The below shows a refurbishment of Classic STi shocks.
If using this as a guide to refurbish Newage knocking shocks please ensure you locate the grease nipples in the correct place in the grease chamber, as they may require slightly different locations compared to a Classic.
I purchased Tim's P1 suspension, primarily for the springs, after his upgrade to Eibach Coilover's, so although no knocks/banging/sticking was reported I thought I would have a go at giving them a refurb as the compression and rebound showed signs that they could do with a re-grease..
First thing you will notice is that someone decided to 1/2 paint them black

The springs have already been sent off and re-powder coated see :
http://www.southeastscoobies.co.uk/v...ad.php?t=17904 (which probably won't be going back on these shocks)
So now it's time to strip down.
1st thing do to is to coat the bottom retaining nut with WD40 and leave for 20 mins or so. Then give the nut and it's protruding thread a good attack with a wire brush.
This ensures that you remove all rust and paint deposits before attempting to remove the nut.
If you do what I did on the rear strut's, like a bull in a china shop and 5 minutes of madness one evening. I tried to remove the nut without this 1st process, the rust bound in the thread and it siezed (the internal retainer is also quite soft and this will round off at which point the whole internal assembly spins

).
At this point you can either throw them in the bin or get the angle grinder out to grind the nut off the thread.
I did the latter hoping your local friendly mechanic can apply weld to the now damaged thread and secure/weld it all back in place.
If the WD40 process is followed the nut should come of fairly easy, as it did with the front struts.
Rear Shock apart, and 5mm hole drilled for tapping & M6 grease nipple fitting :
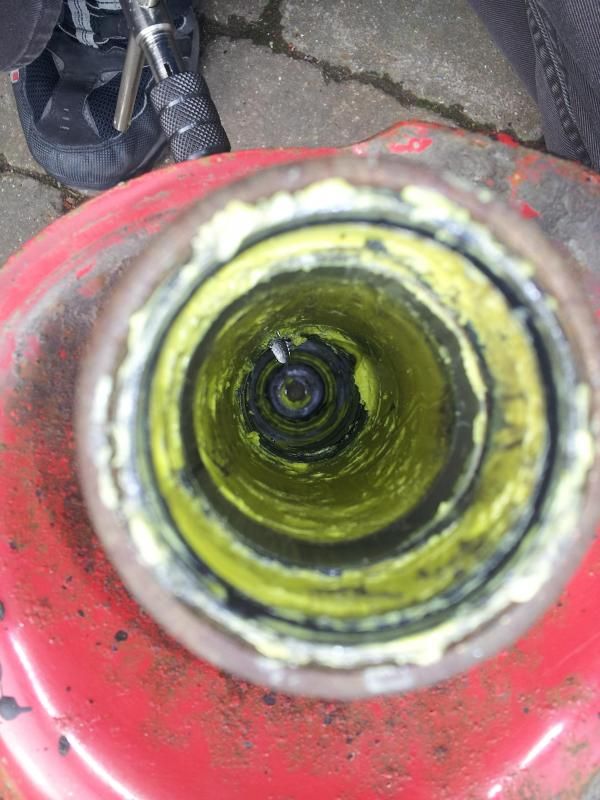
 Start the tapping, leaving all the old yellow grease inside the shock housing, as this will help to catch the swarf and will be removed later:
Note that the condition of the yellow grease (not a smooth surface finish) shows that it hasn't been making much contact with the damper. It is also quite hard and wax like to touch.
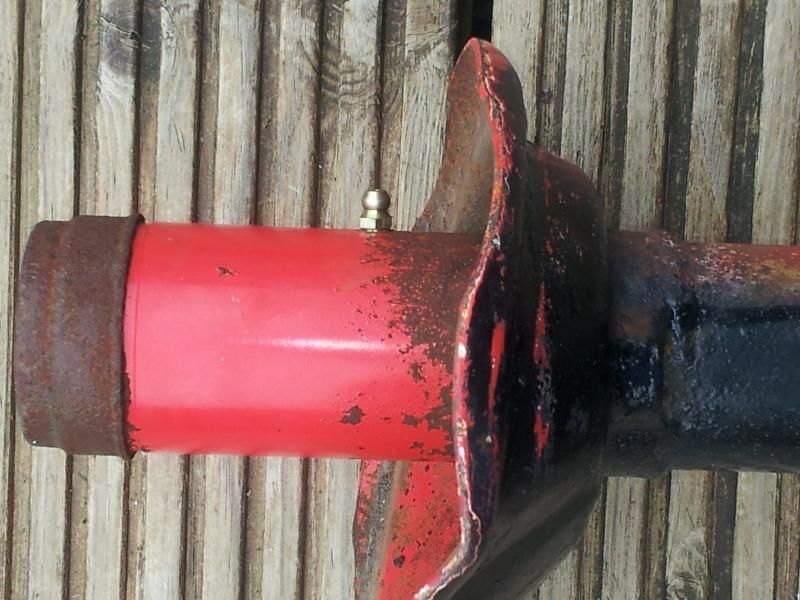
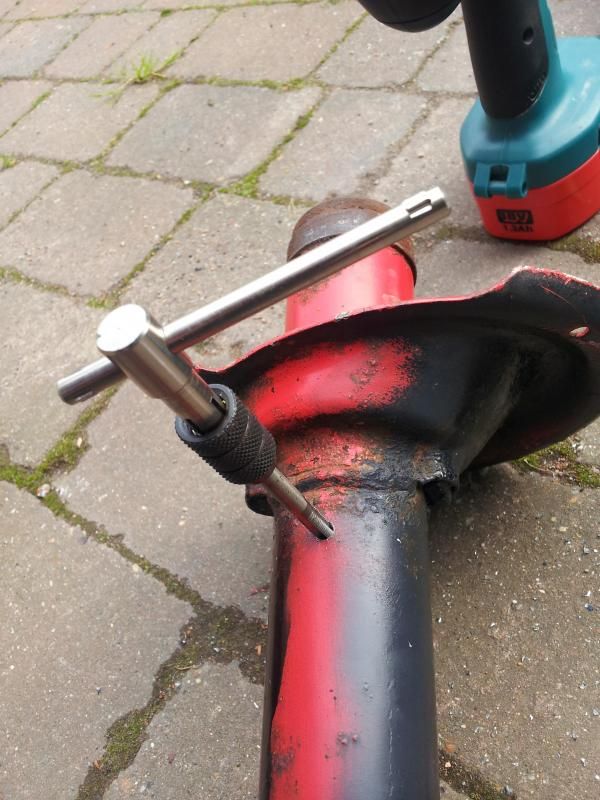 Grease nipple fitted, showing fitting positions for 'REAR' shocks :
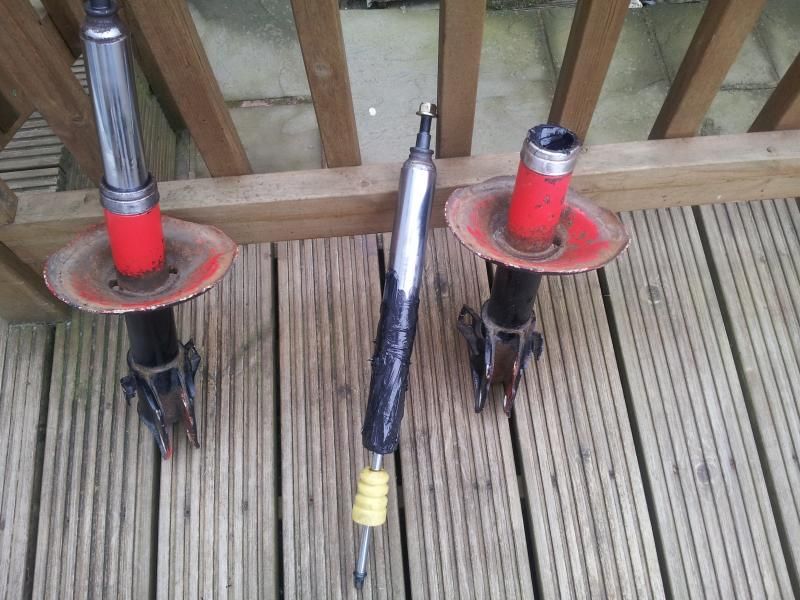
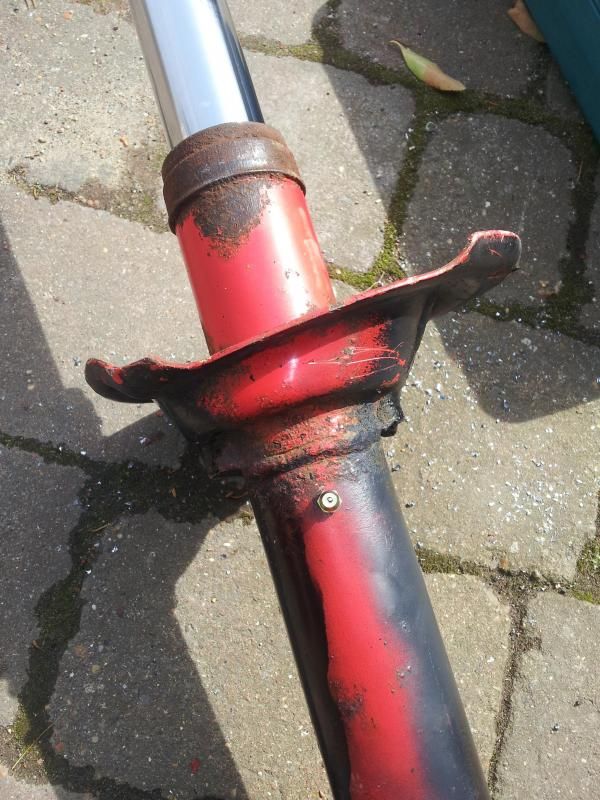 Front Shock stripped down (Note : Damper & Bumpstop cleaned of all grease):
 Method of removing all grease, was a combination of finger, old rag and an adapted wooden spoon :
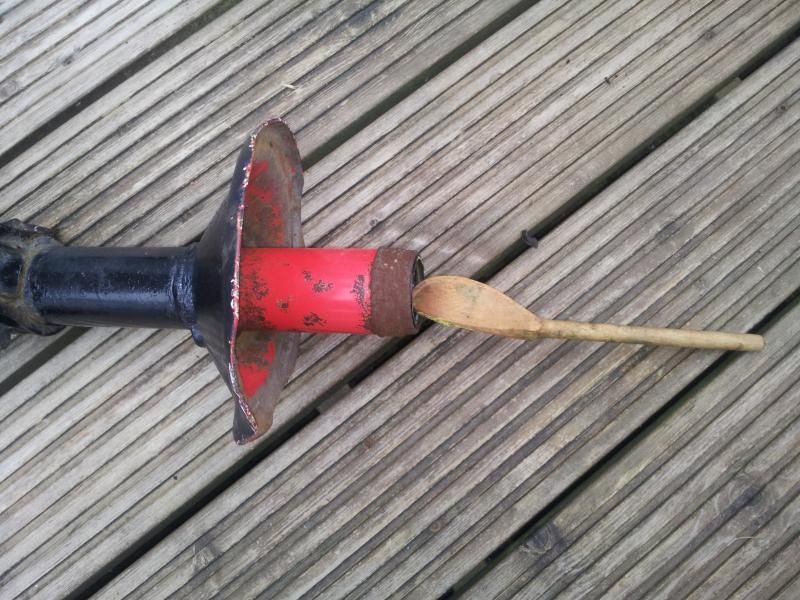 Not sure I will use it to stir the beans again :
 Grease Nipple fitting position for 'FRONT' Shock :
 Before re-assembly clean rust off collar of the shock housing with dremell/sandpaper.
Coat damper with grease, and also fill upper cavity just below the rubber seal on the shock housing collar with grease prior to re-assemble :
A large % of the grease will come out as you re-insert the damper. The main purpose of applying the grease is to ensure smooth re-entry

and that the metal contacting parts get an initial layer of grease. A grease gun will be used at a later stage.
Wipe off Excess Grease, and re-fit/tighten the bottom retaining nut (or get it welded back if the nut is mullered)

To Be Continued............................