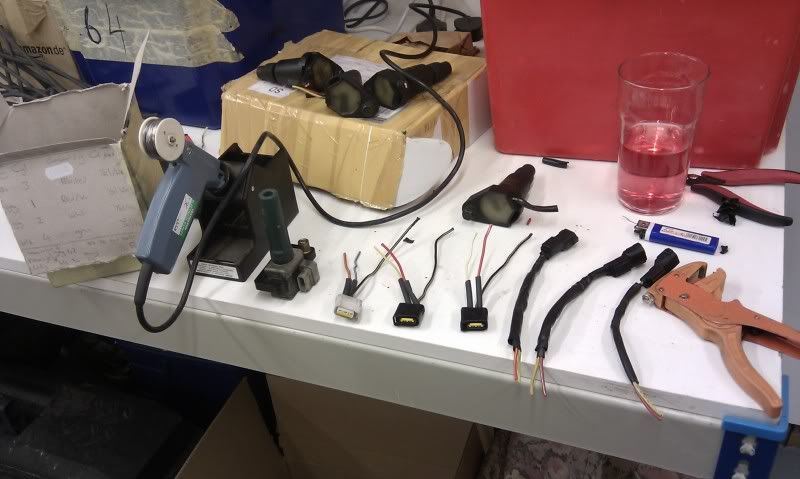
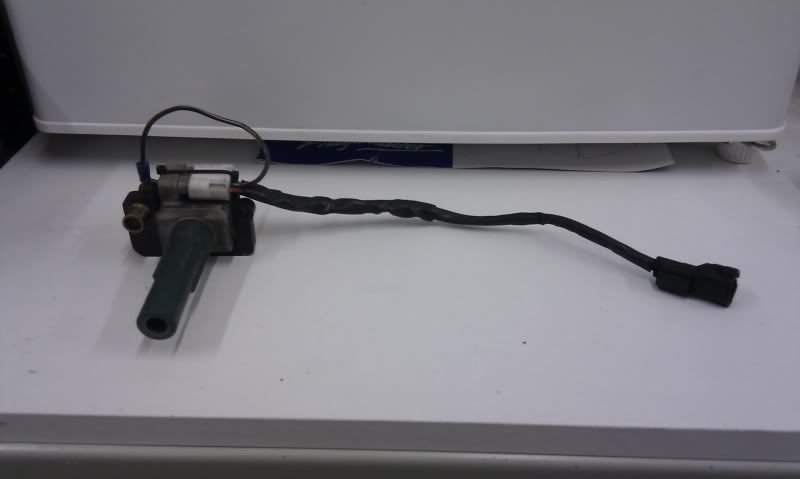
Did this the other day so I thought I'd share
You need to source coilpacks from any year newage car - not sure if the hatch is included here, that needs confirmation. You also need to source the loom - you only need the last 6 inches of loom which also has the connector for the coilpacks.
Then you need to source some old / cracked phase 1 coilpacks so that you can cut the loom for the phase1 connector plugs.
You also need 4xM8 ring eyelet crimp terminals, heat shrink sleeving, soldering iron and insulation tape.
1) Strip down the newage loom. Keep the outer sleeving near each connector, it will be reused. The loom is joined for each head, as in the earth feed and the common 12V feed are joined together - unwind all insulation tape and snip the black and red wires just before the join. You will need the full length of the earth wire so snip as close to the join as you can.
2) measure the length of the tails on the phase 1 coilpacks, then add 50mm to this since you need the newage tails to be a bit longer to cater for the fact that the wires enter the newage pack at the bottom, wheras the ph.1 pack it is at the top.

3) cut the ph.1 loom and the newage connector loom so that the total length of the 2 sets are the total figure you measured earlier. Grab the newage sleeving from earlier and slide that over the ph.1 loom, cut the heatshrink to approx 30mm and slide over the common 12v feed and the signal wires of the newage loom (12v is the red with yellow stripe, signal is the other colour that isn't black!). Then solder the 2 looms together - the ph.1 loom has a red and a yellow wire - red is 12v feed, yellow is signal.
4) Once soldered heatshrink the join, then slide the newage sleeving over the join, finally use iinslation tape to join the sleeving to the ph.1 loom.

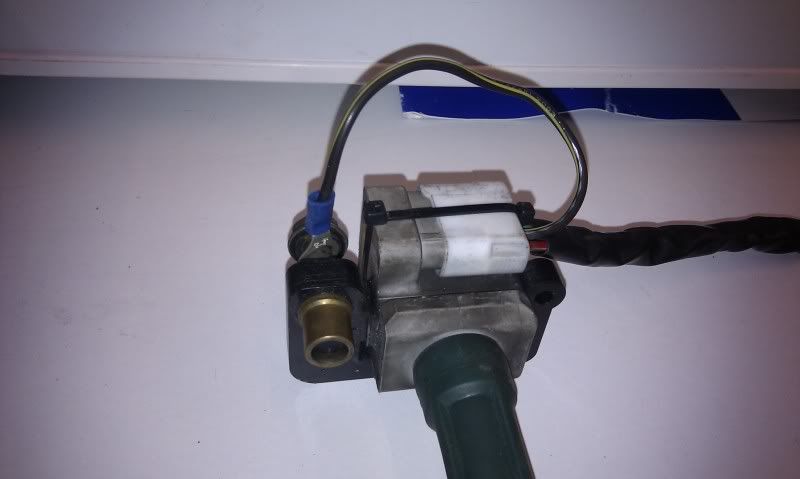
5) Earth tag. The newage coilpack need to be earthed, my solution is to crimp an M8 eyelet ring terminal to the black wire, then unscrew the pack mounting bolt and attach the eyelet to the bolt, then rescrew the bolt back in

Job done!
But before fitting these you also have to bypass the ignitor module, located under the bracket near the BCS on the OSF strut. When I get that done I'll post pics and add to this guide.