South East Scoobies  

Go Back   South East Scoobies > The Garage > Wheels,Tyres & Brakes

Reply
 
Thread Tools
  #1  
Old 11-08-2012, 05:39 PM
SpecB's Avatar
SpecB SpecB is offline
Moderator (formerly known as Bluebugeye!)
 
Join Date: Mar 2009
Location: Littlehampton
Posts: 4,345
Default DIY Wheel Refurb.

Since we've lost Rich and Scotts write ups I thought I'd add my attempt! Plan is to refurbish Ginola's old wrx wheels for fitting to the Forester.

Before shot

Wheel on the Right is a finished version.
The kit

Plus assorted Wet and Dry Sand Paper, Clean cloths, Sanding Block, Filler (Chemical Metal) and normal sand paper.
Stage 1
I used a sanding block and P80 paper to smooth off the majority of the damage, there was some corrosion around the centre cap and some kerb damage.

Stage 2
Not all the damage could be smoothed out so I gave the deeper marks a good key with the P80.

Then smoothed over some filler making sure to leave it slightly proud of the surface.

This was then sanded back with P400 Wet & Dry (used wet) on a sanding block

Stage 3
The wheel was then keyed using the coarsest of the Scotchpads I had and some areas worked over with P400 Wet & Dry. The wheel was then washed and dried.

Stage 4
The wheel was given a final clean with surface cleaner and a clean cloth before 2 coats of Acid Etch primer was applied.

Stage 5
Wheel will be rubbed back with P400 and then P1000 Wet & Dry (used wet) before spraying with Primer
Stage 6
Rub back again with P1000 then spray with colour coat (U-POL steel Wheels)
Stage 7
Laquer
__________________
2005 Spec B 6MT - KiDO tuned (~270Bhp)
Custom exhaust - Cosworth filter - Samco Intake - Tints - Bilstein B8/B6 & STI springs - SuperPro ALK - Whiteline positive shift kit, rack mounts, rear adjustable camber bushes, front ARB mounts & strut brace, 20mm rear ARB with AVO mounts, - Hardrace Gearbox and pitch mounts - Prodrive PFF7's - Front Brembos - Kenwood CarPlay - 1/2 carbon grille - STI front splitter
Reply With Quote
  #2  
Old 11-08-2012, 07:18 PM
Hongkongfooi's Avatar
Hongkongfooi Hongkongfooi is offline
Platinum Member
 
Join Date: Dec 2008
Location: East Sussex
Posts: 5,783
Default

Nice one nick
Reply With Quote
  #3  
Old 21-08-2012, 05:28 PM
Ginola's Avatar
Ginola Ginola is offline
Moderator
 
Join Date: Mar 2011
Location: Steyning
Posts: 4,231
Default

looking forward to seeing how these turn out
__________________
Somewhere drinking Coffee

Mapped and maintained by FBTuning 07595 493581.
Reply With Quote
  #4  
Old 21-08-2012, 06:17 PM
majorscooby majorscooby is offline
Platinum Member
 
Join Date: Dec 2008
Location: gravesend, kent
Posts: 3,298
Default

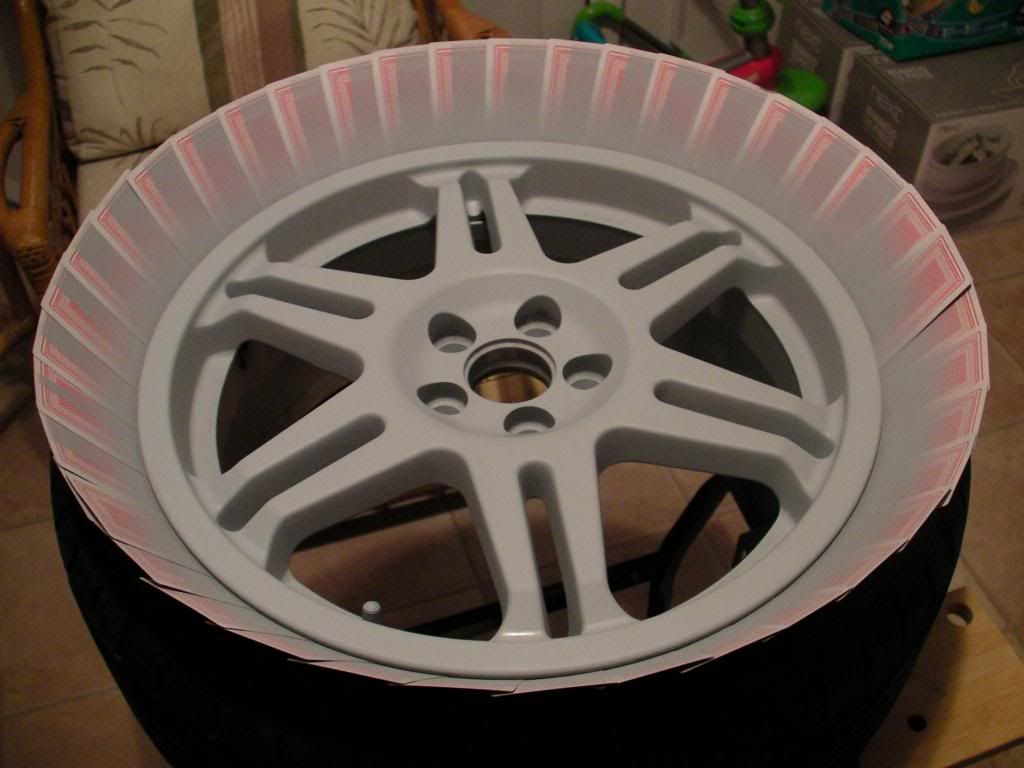
Nice job nick , I think the wheels look sooo crisp in the acid etch primer.

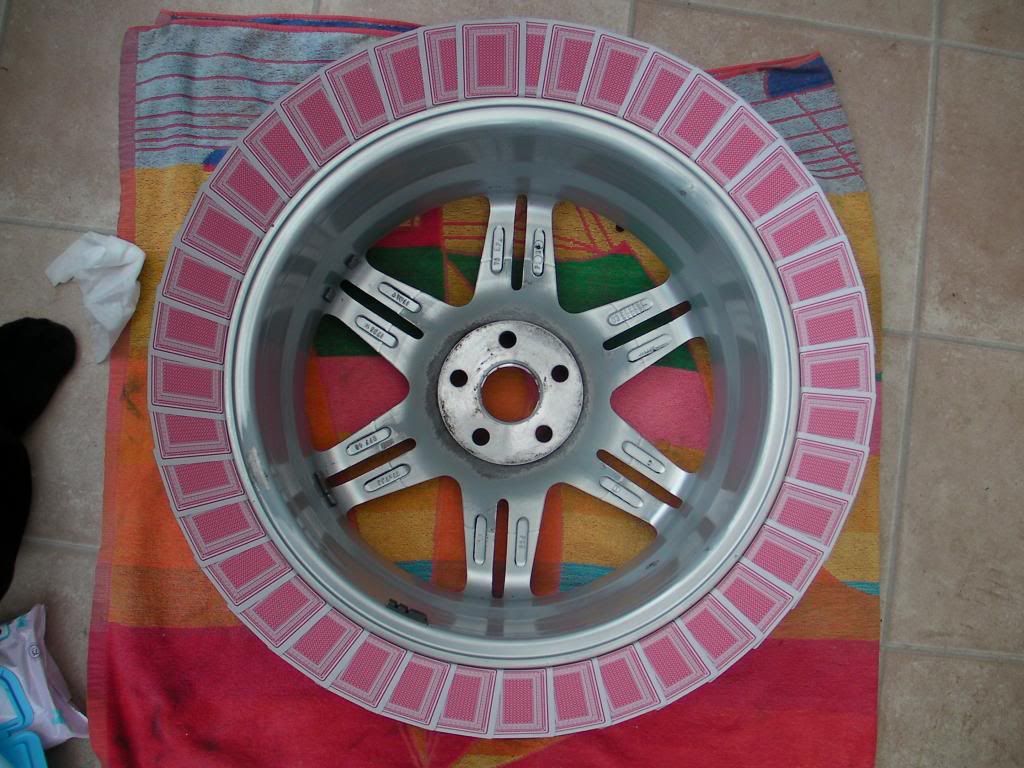
Shame you never had the tyres on though to do the little playing card trick.


Looking forward to seeing them on the car!
__________________
Cooper man!!!!!
Reply With Quote
  #5  
Old 20-04-2013, 09:13 AM
ajelliott ajelliott is offline
Bronze Member (formerly Red Devil)
 
Join Date: Jan 2013
Location: Brighton
Posts: 466
Default

Quote:
Originally Posted by majorscooby View Post
Nice job nick , I think the wheels look sooo crisp in the acid etch primer.

Shame you never had the tyres on though to do the little playing card trick.


Looking forward to seeing them on the car!
What's the "playing card trick" ?

Im looking ar doing my wheels and could do with all the help I can get
__________________
Turbo chatter is awesome
Reply With Quote
  #6  
Old 20-04-2013, 09:38 AM
majorscooby majorscooby is offline
Platinum Member
 
Join Date: Dec 2008
Location: gravesend, kent
Posts: 3,298
Default

Quote:
Originally Posted by green dream View Post
What's the "playing card trick" ?

Im looking ar doing my wheels and could do with all the help I can get
Basically take your wheel off and place playing cards down the side of the rim where it meets your tyre and make sure you overlap the cards. Go all the way around and make a complete wall so that when you spray no paint goes on the tyre wall.
I have a pic on my laptop, ill try and post it up later when I get home.
__________________
Cooper man!!!!!
Reply With Quote
  #7  
Old 20-04-2013, 10:15 PM
ajelliott ajelliott is offline
Bronze Member (formerly Red Devil)
 
Join Date: Jan 2013
Location: Brighton
Posts: 466
Default

Quote:
Originally Posted by majorscooby View Post
Basically take your wheel off and place playing cards down the side of the rim where it meets your tyre and make sure you overlap the cards. Go all the way around and make a complete wall so that when you spray no paint goes on the tyre wall.
I have a pic on my laptop, ill try and post it up later when I get home.
any luck with those photos yet?
__________________
Turbo chatter is awesome
Reply With Quote
  #8  
Old 20-04-2013, 10:39 PM
bonner's Avatar
bonner bonner is offline
Silver Member
 
Join Date: Nov 2012
Location: East sussex
Posts: 1,288
Default

Quote:
Originally Posted by green dream View Post
any luck with those photos yet?
Have a butchers at silver surfers profile hes got some on there pukka job too!
__________________
Reply With Quote
  #9  
Old 21-04-2013, 08:19 AM
majorscooby majorscooby is offline
Platinum Member
 
Join Date: Dec 2008
Location: gravesend, kent
Posts: 3,298
Default

Using the playing card trick for quick masking up and removal.
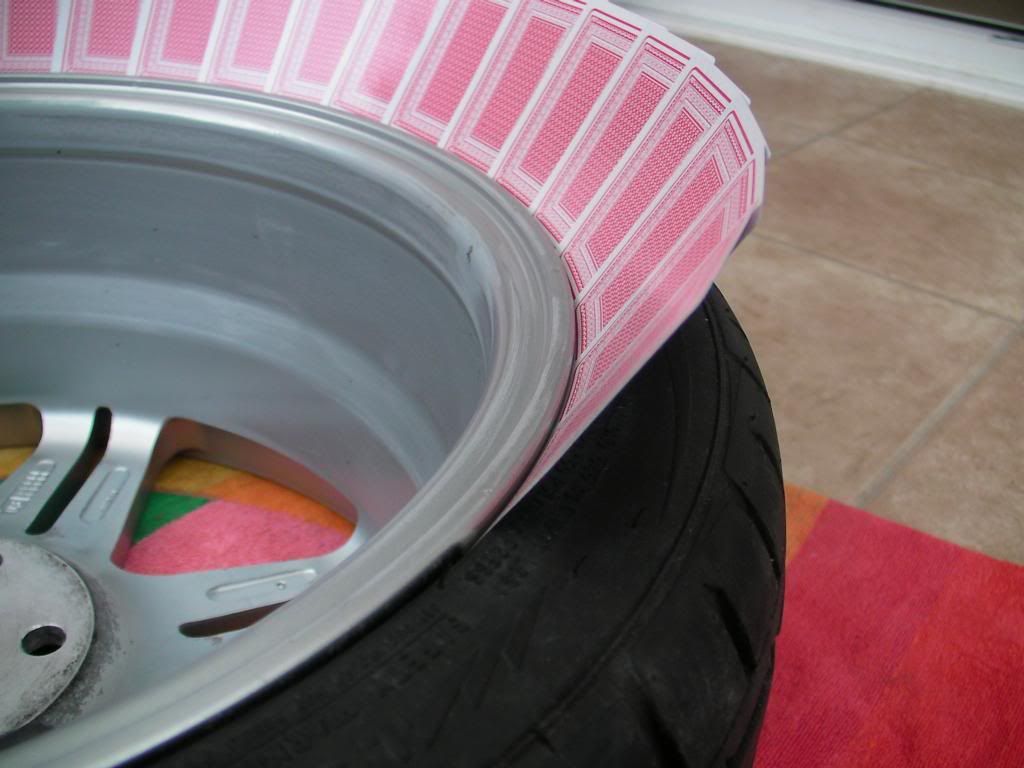


If your going to spray your wheels yourself remember to do the backs FIRST as the overspray will come though onto the front. do the front last and you'll get a better finish.
__________________
Cooper man!!!!!
Reply With Quote
  #10  
Old 21-04-2013, 08:53 AM
ajelliott ajelliott is offline
Bronze Member (formerly Red Devil)
 
Join Date: Jan 2013
Location: Brighton
Posts: 466
Default

Thankyou..... Im definitely going to try that when I come to do mine
__________________
Turbo chatter is awesome
Reply With Quote
  #11  
Old 21-04-2013, 09:12 AM
Scott.T's Avatar
Scott.T Scott.T is offline
Admin, Meets/Events Organiser.... formerly known as SilverSurfer
 
Join Date: Sep 2008
Location: Hastings, East Sussex
Posts: 9,483
Default

It's defo a good trick. I've sprayed many wheels over the years and masking was always a hassle.
You end up not fully covering/painting the rim edge where it meets the tyre.
This method ensures you get the very best coverage without having to remove the tyre.
It's also quick to move the mask over to they next wheel and crack on.......
Reply With Quote
Reply


Currently Active Users Viewing This Thread: 1 (0 members and 1 guests)


All times are GMT +1. The time now is 02:41 PM.


Powered by vBulletin® Version 3.8.11
Copyright ©2000 - 2024, vBulletin Solutions Inc.

Opinions expressed are not necessarily the opinions of SouthEastScoobies or any individuals directly or indirectly involved in this website. No responsibility is taken or assumed for any comments or statements made on this or any associated website. Visitors who use this website and rely on, or act on any information do so at their own judgement, discretion and or risk. SouthEastScoobies or its content providers shall not be liable for any loss or damage arising from or otherwise in connection with your use of SouthEastScoobies forums. It is not possible for the Administrators of these forums, or the Moderators participating, to fully and effectively monitor Messages that are submitted for infringement of third party rights. If you believe that any information within the forums infringes your legal rights, or gives cause for concern you should notify an Administrator or a Moderator immediately giving such information to enable the recipient to amend, delete or remove in its entirety the message, at their earliest convenience.