
 |
|
#151
|
|||
|
|||
|
Let me get some better for you and you can see if you want these one, but yeah I should sell them really as I don't have a use for them...
|
|
#152
|
|||
|
|||
|
Quote:
|
|
#153
|
|||
|
|||
|
Minor alteration today as its still friggin' raining.....
I wanted to change the pipe from the compressor to the intercooler. I had no particular issues with it under the inlet manifold but with the stock power steering pump being used going under the there with the PS pipe work makes more sense and there isn't room for both. Another aesthetic reason for changing the IC pipe is that it now runs along the same angles as the air box and also the Air filter pipe once I've made it... and we all like a little symmetry ever now and then I chopped the old pipe to save a bit of time and effort then cut come more Ti for the new section, 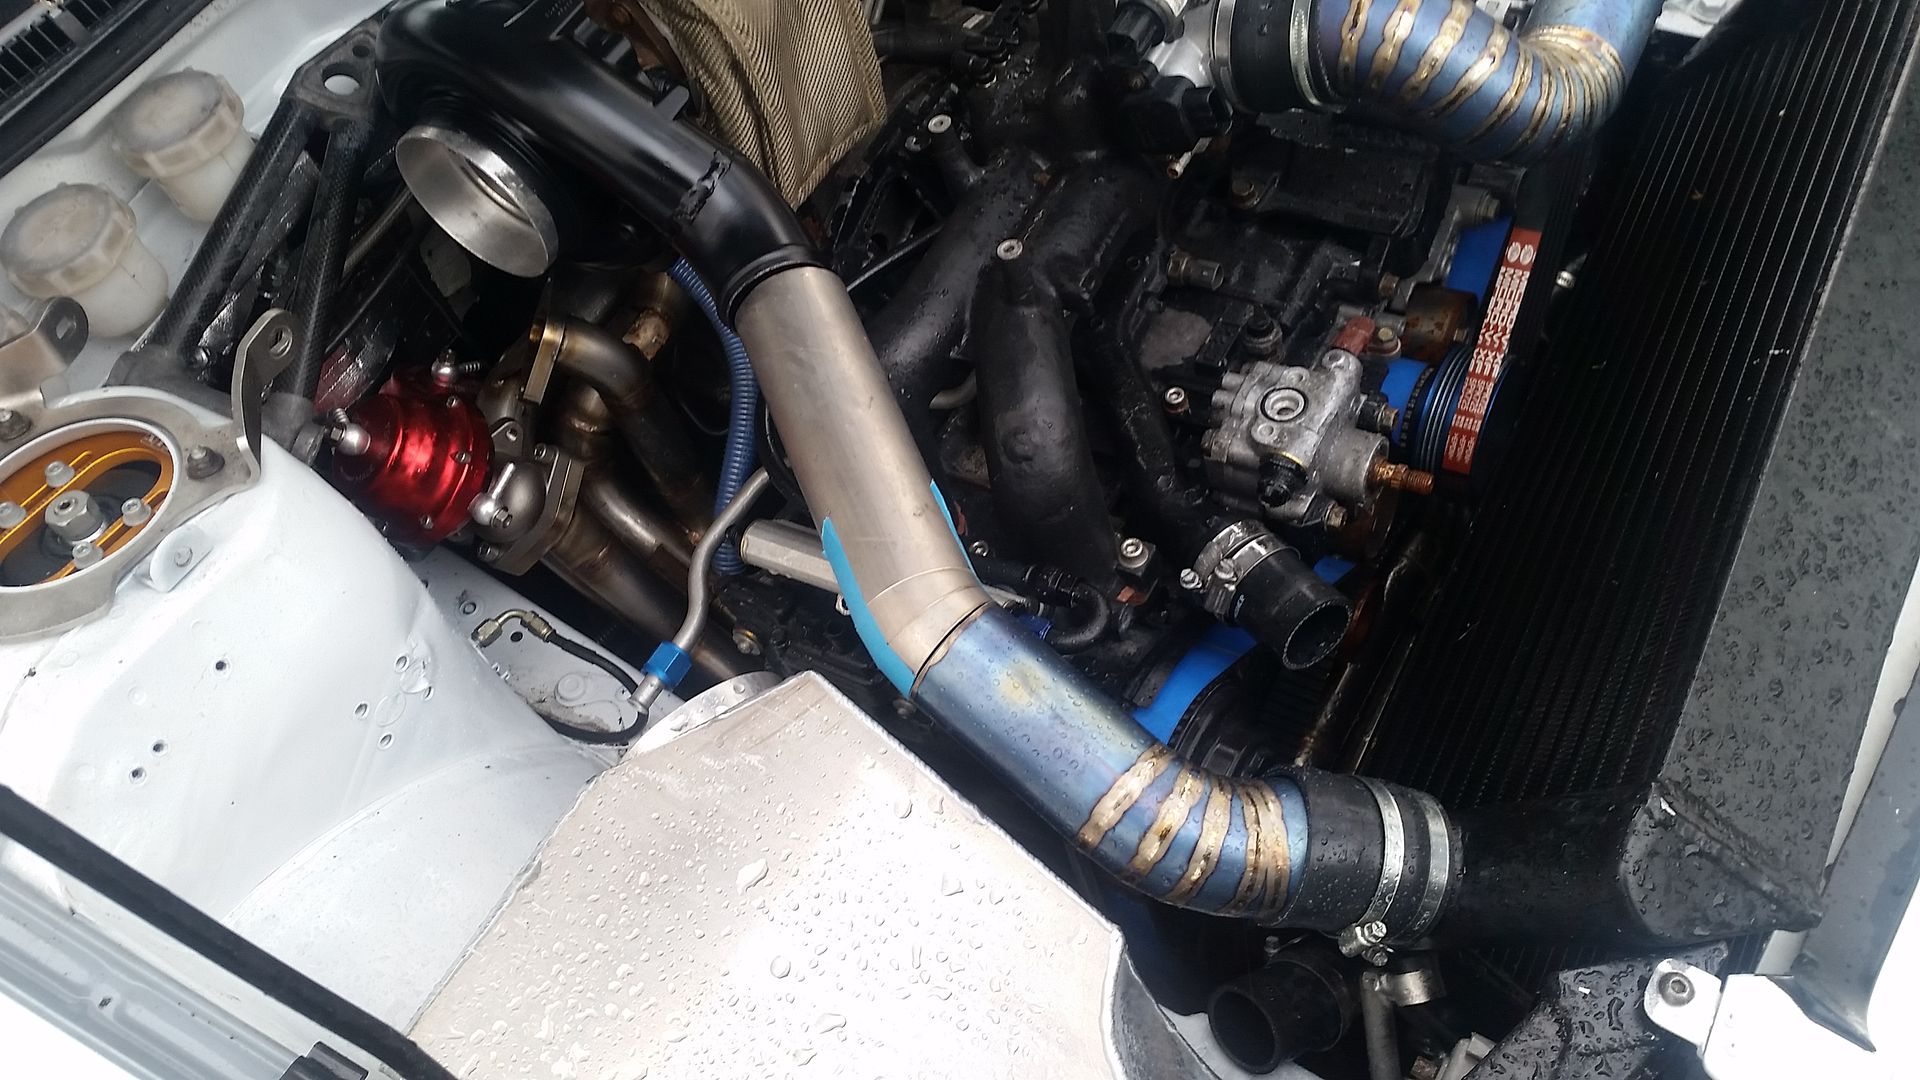 once correct it go the heat applied to it so it matches the other pipe work, 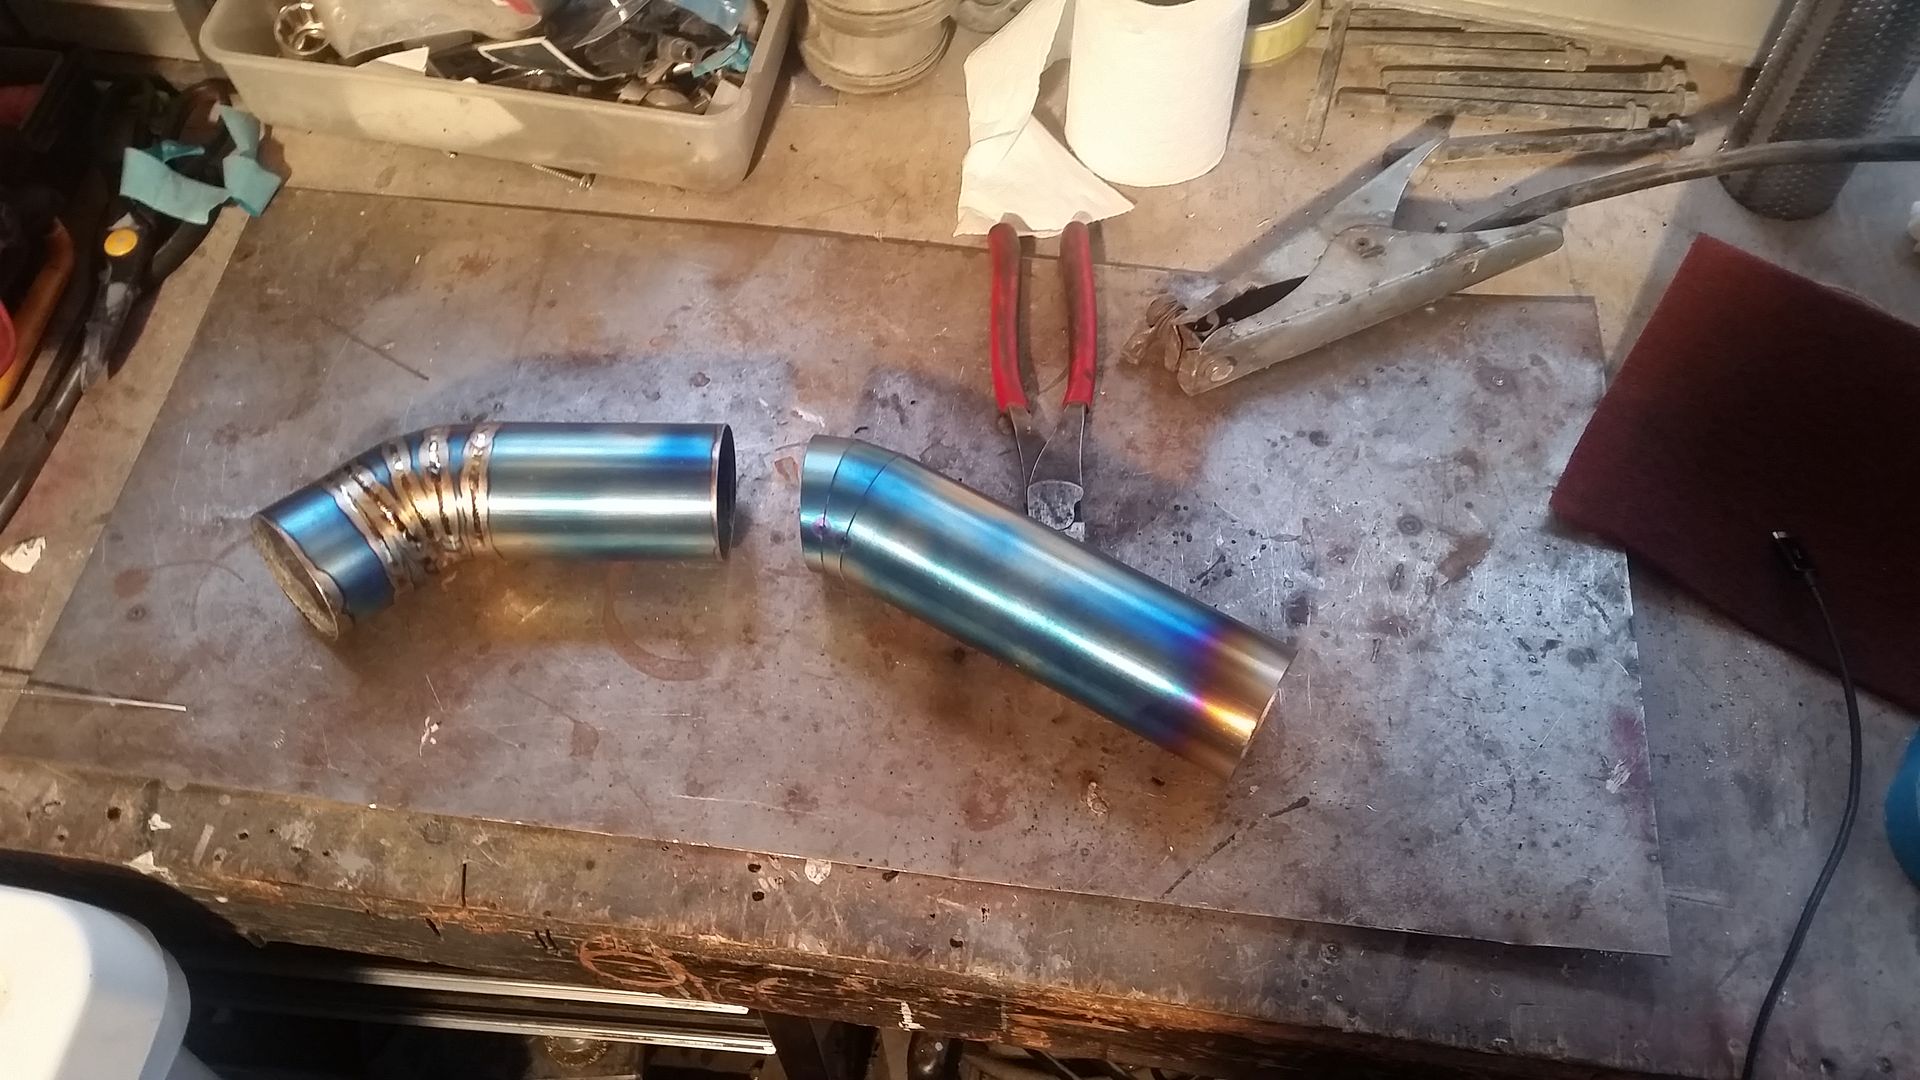 Welded up, 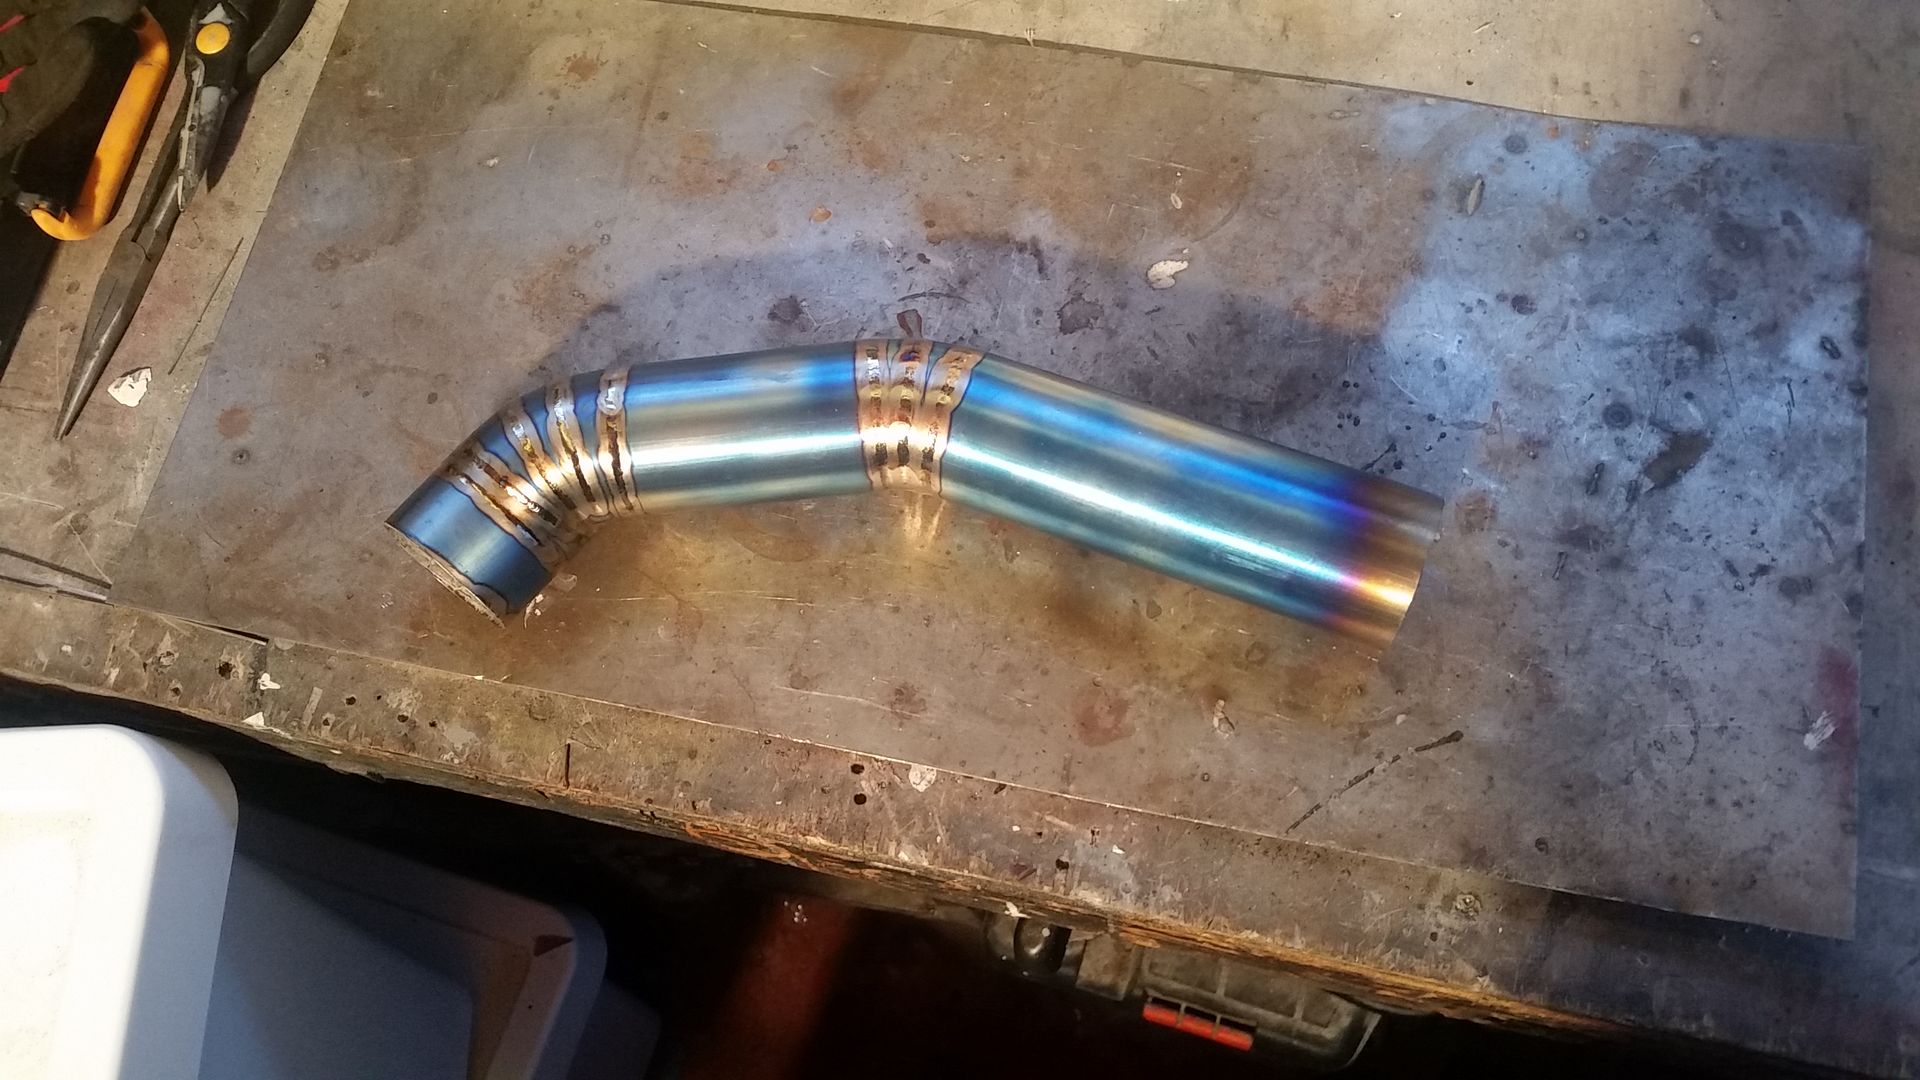 and fitted up 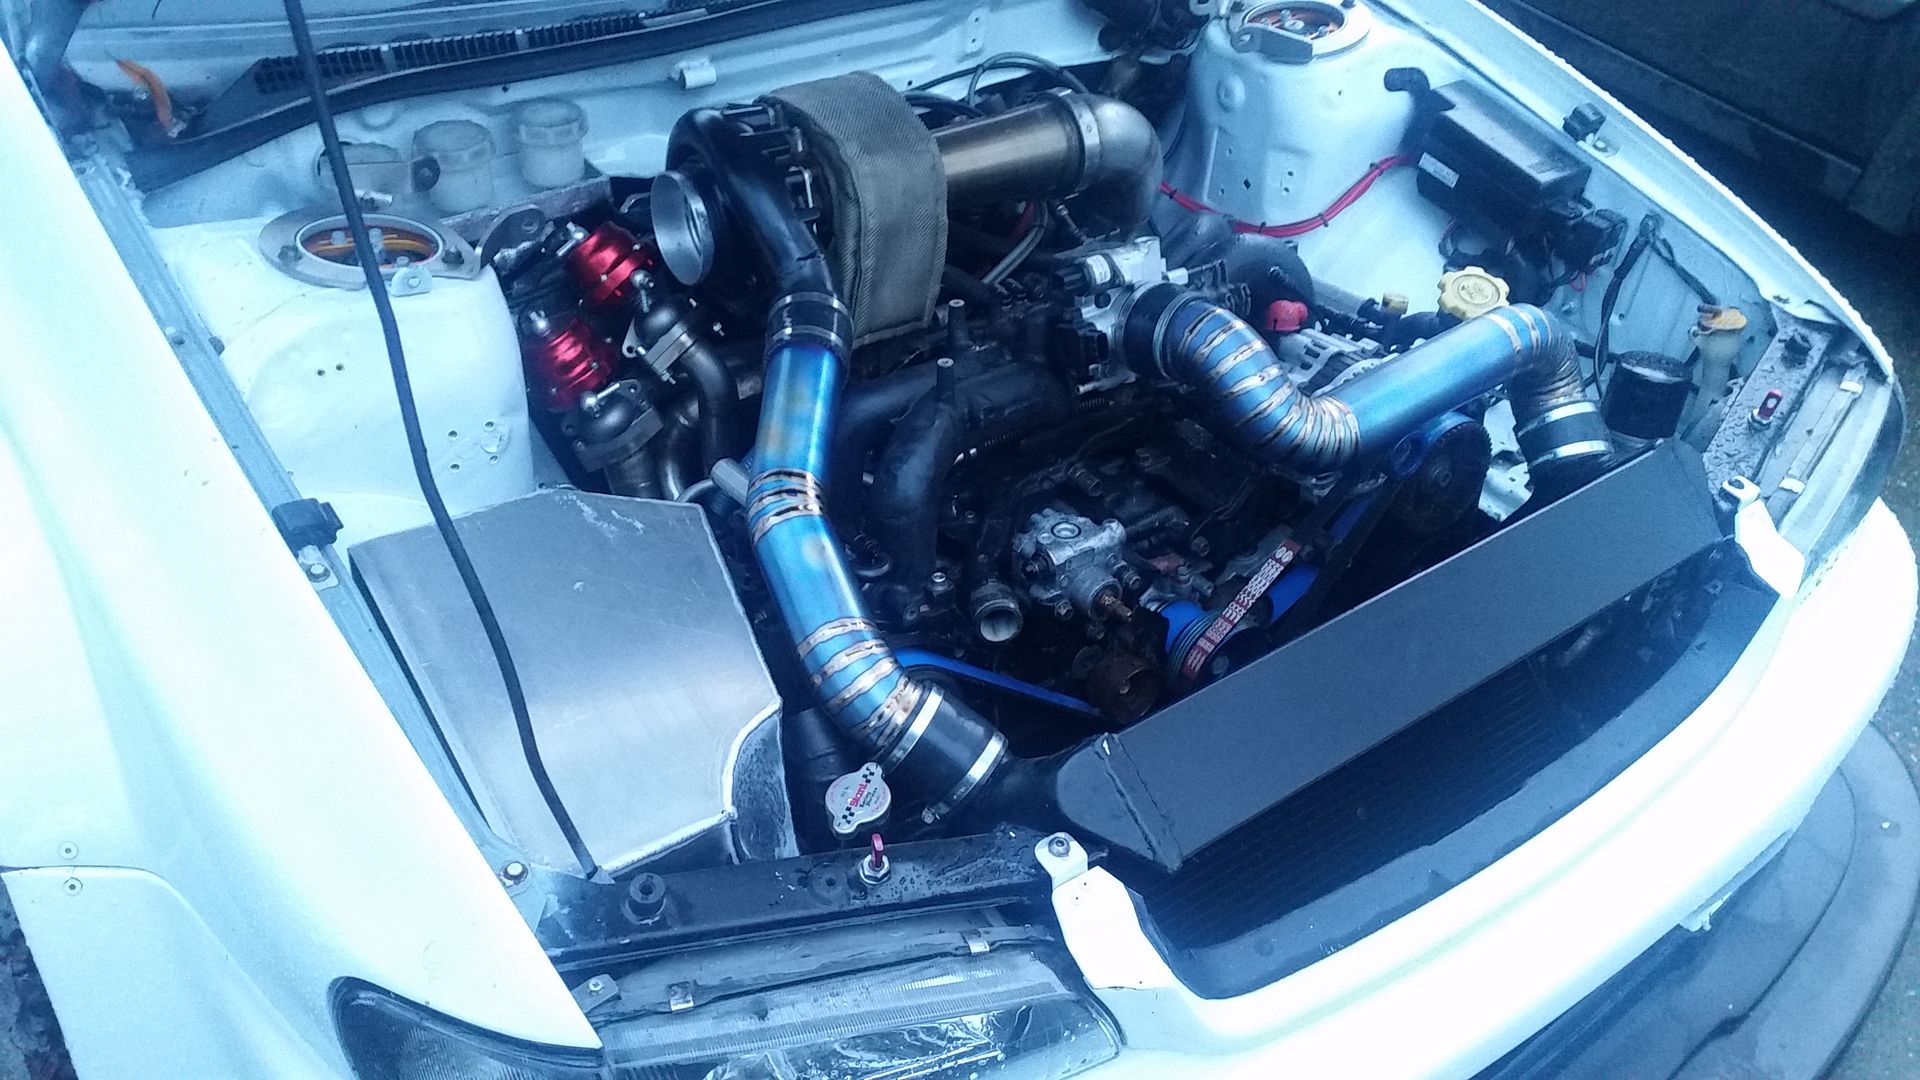
Last edited by seventune; 16-01-2017 at 05:27 PM. |
|
#154
|
||||
|
||||
|
Love The heated look on the pipes
Sent from my iPhone using Tapatalk
__________________
Somewhere drinking Coffee Mapped and maintained by FBTuning 07595 493581. |
|
#155
|
||||
|
||||
|
pipes look ace!
|
|
#156
|
||||
|
||||
|
truly is an epic build...

__________________
Subaru Impreza WRX STi Prodrive Type UK 2002:  "Tinkered With!" Maintained and Modified by Super Jules  & RM Performance http://www.rmperformance.co.uk |
|
#157
|
|||
|
|||
|
Last edited by seventune; 21-06-2018 at 12:40 PM. |
|
#158
|
||||
|
||||
|
Sent from my iPhone using Tapatalk
__________________
Somewhere drinking Coffee Mapped and maintained by FBTuning 07595 493581. |
|
#159
|
|||
|
|||
|
Not been able to do much on this since I've had my first operation... two more to go!!! Anyway I've been looking at the best way to finish off this little monster in a more efficient way which has led to lots of lists.... and who doesn't love a list
In the mean time I've have been tinkering trying to finish the front end.... which led to the making of an undertray and sorting those vile chrome wheels out... For the undertray I have resorted to plywood becuase we all know that carbon fiber is ugly, heavy and gross Template and pics below... ive ordered the rose joints and ally bar to support and adjust angle.... 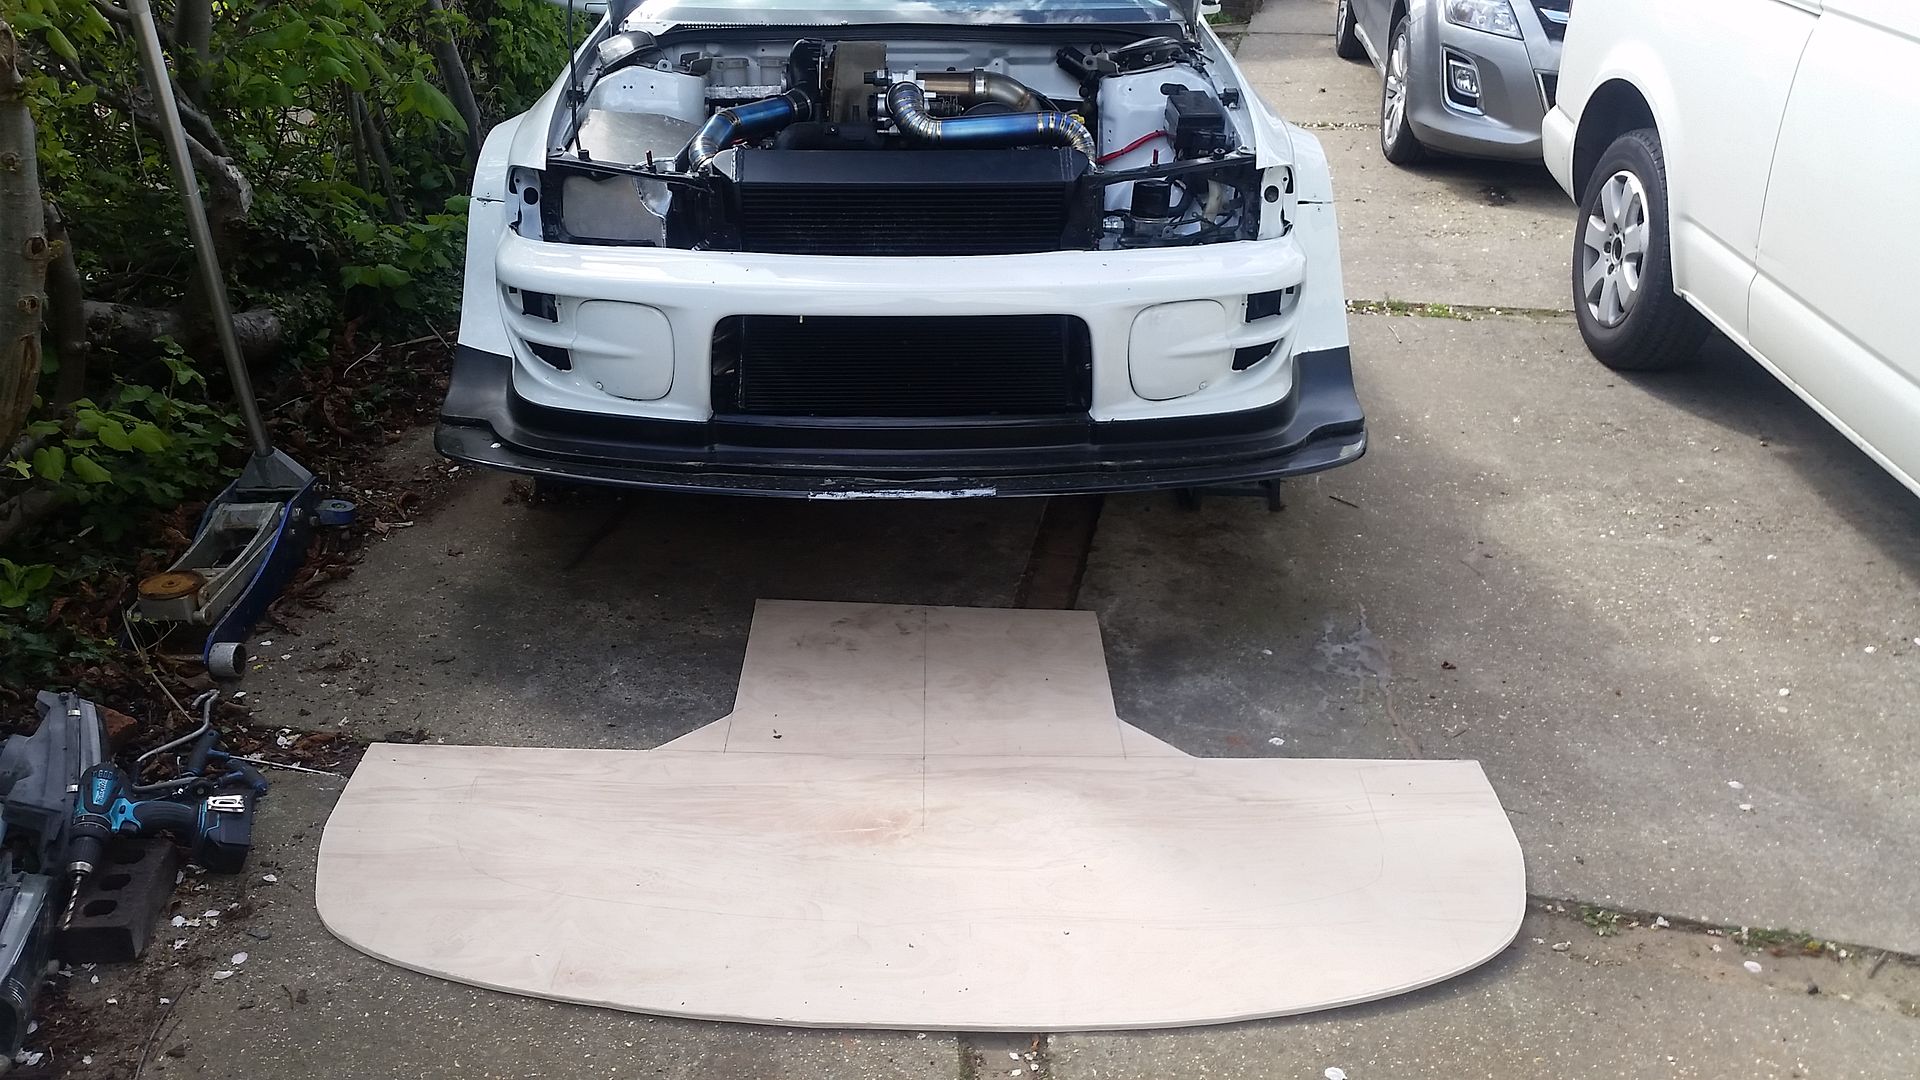 Frame work welded up; 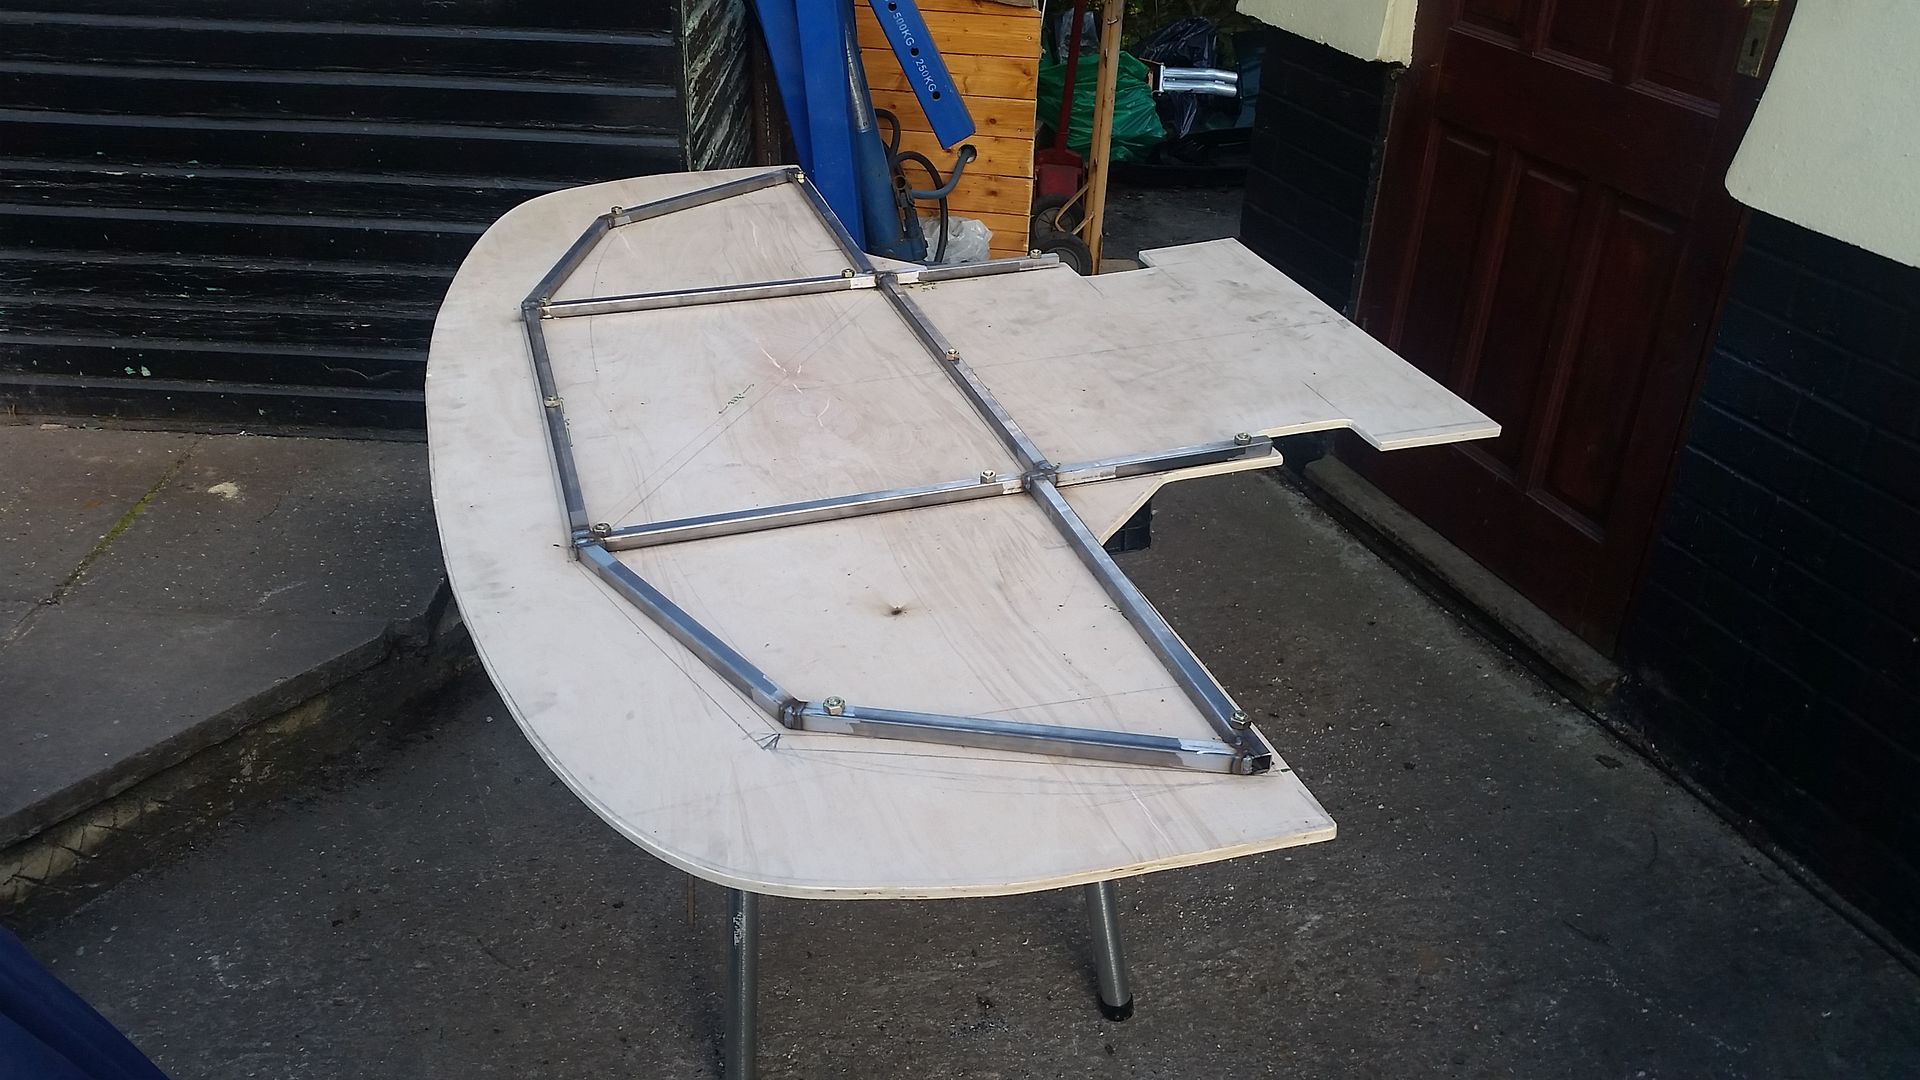 Fitted up just on little strips of metal for now until the fixing bits arrive.... 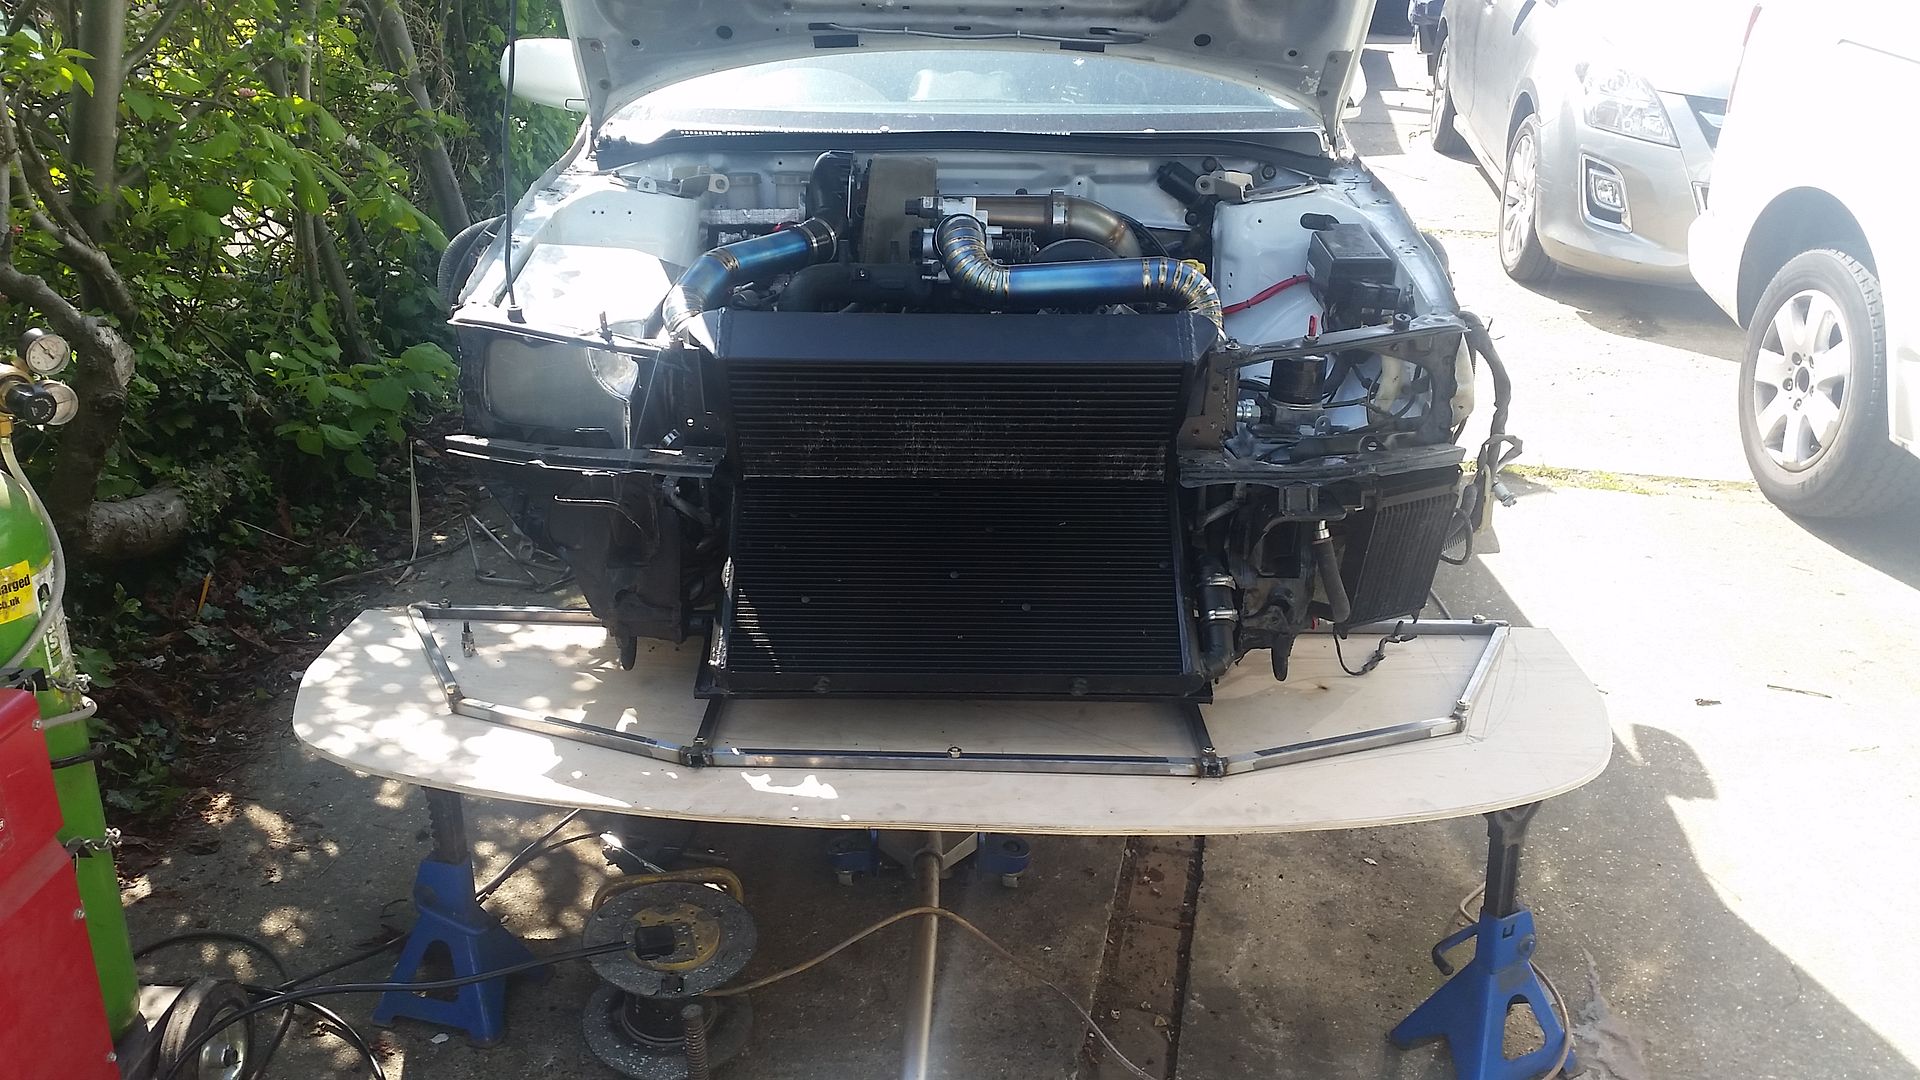 Then we have the wheels.... pretty self explanatory.... silver base, purple and clearcoat... 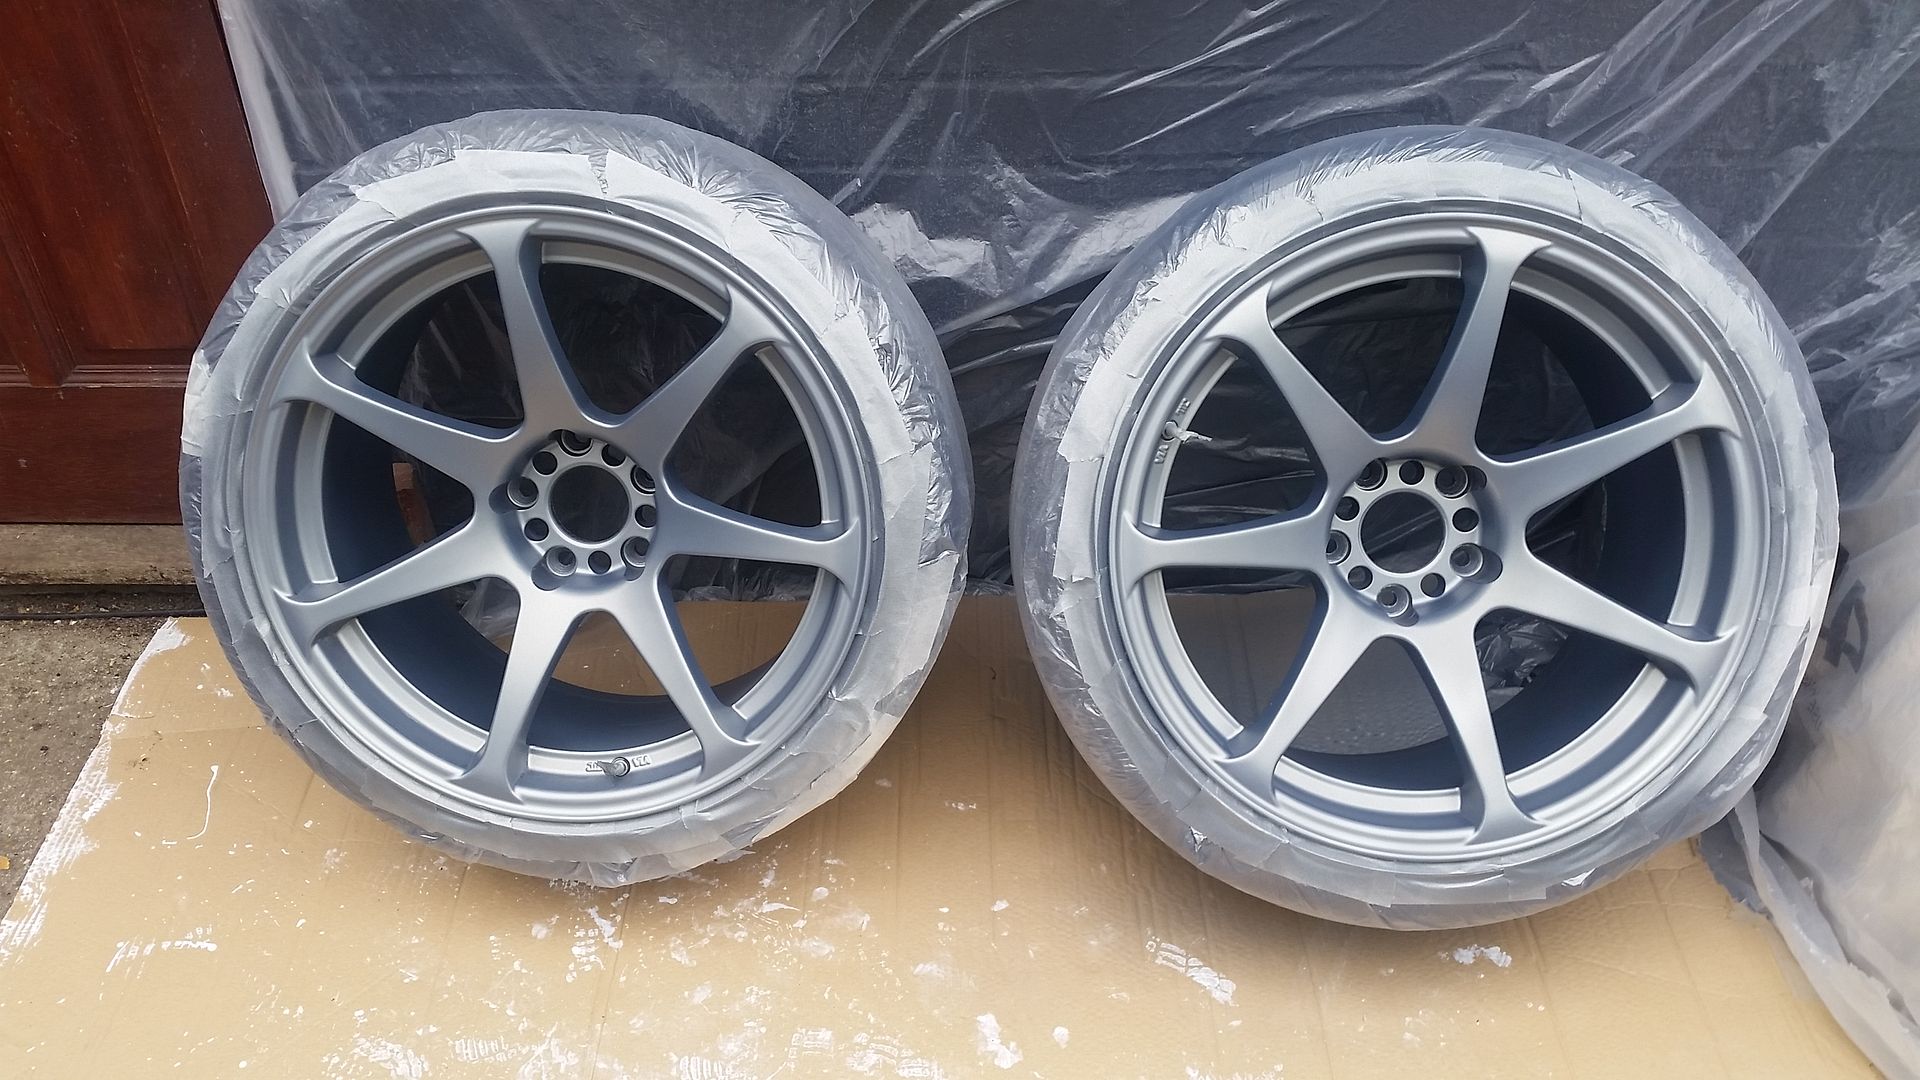 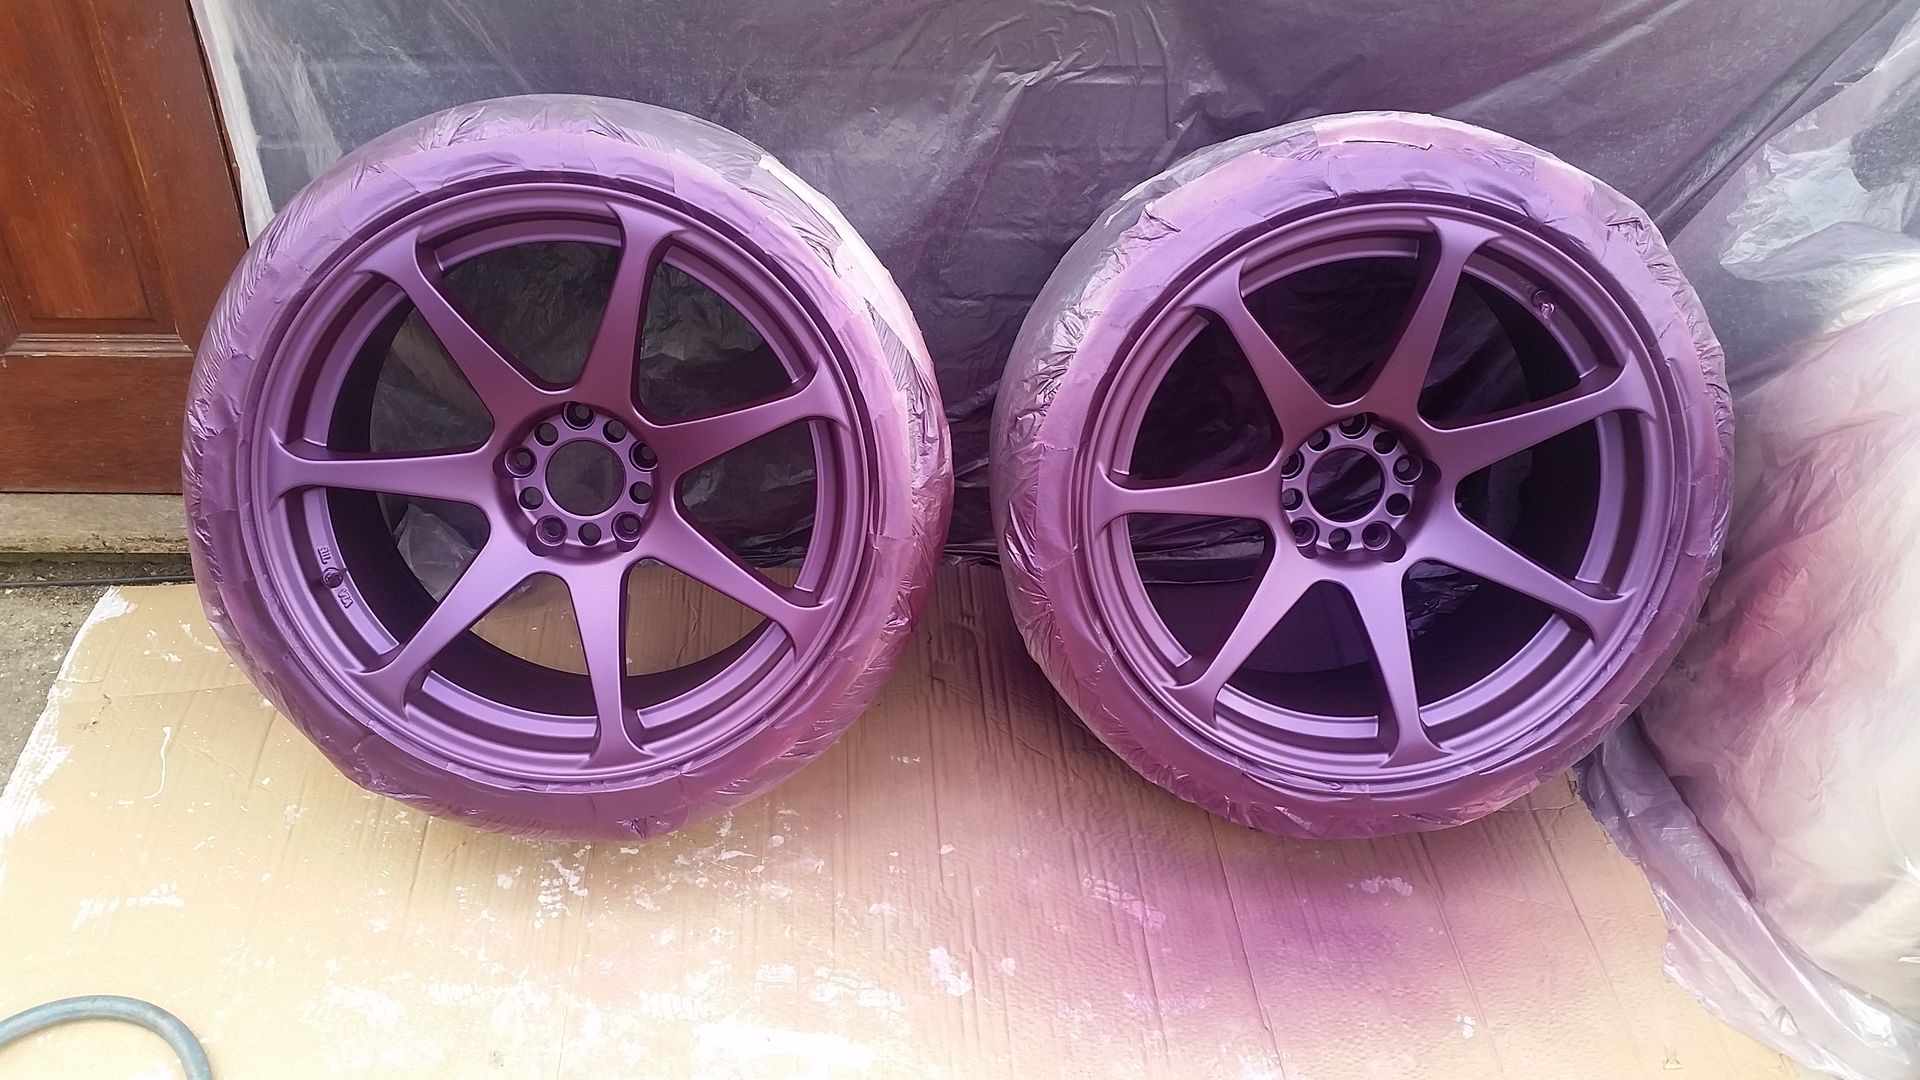 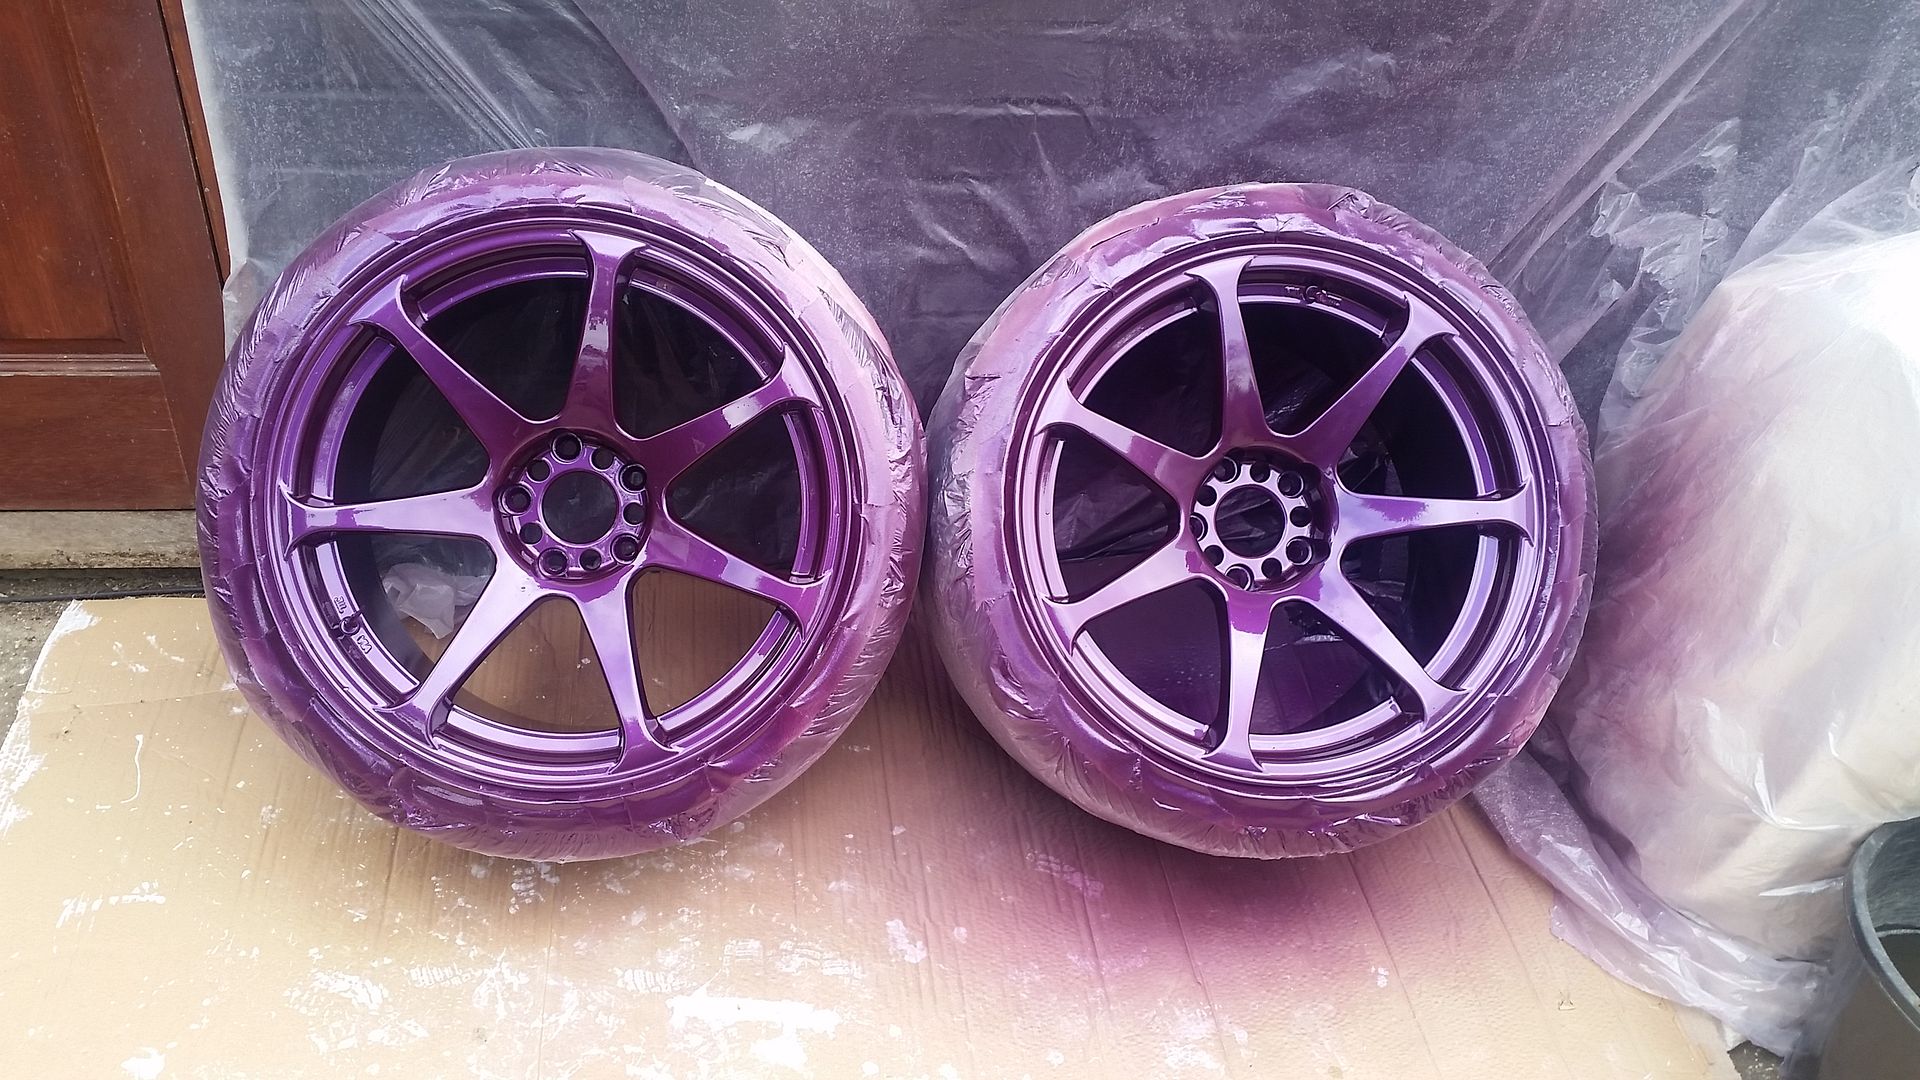 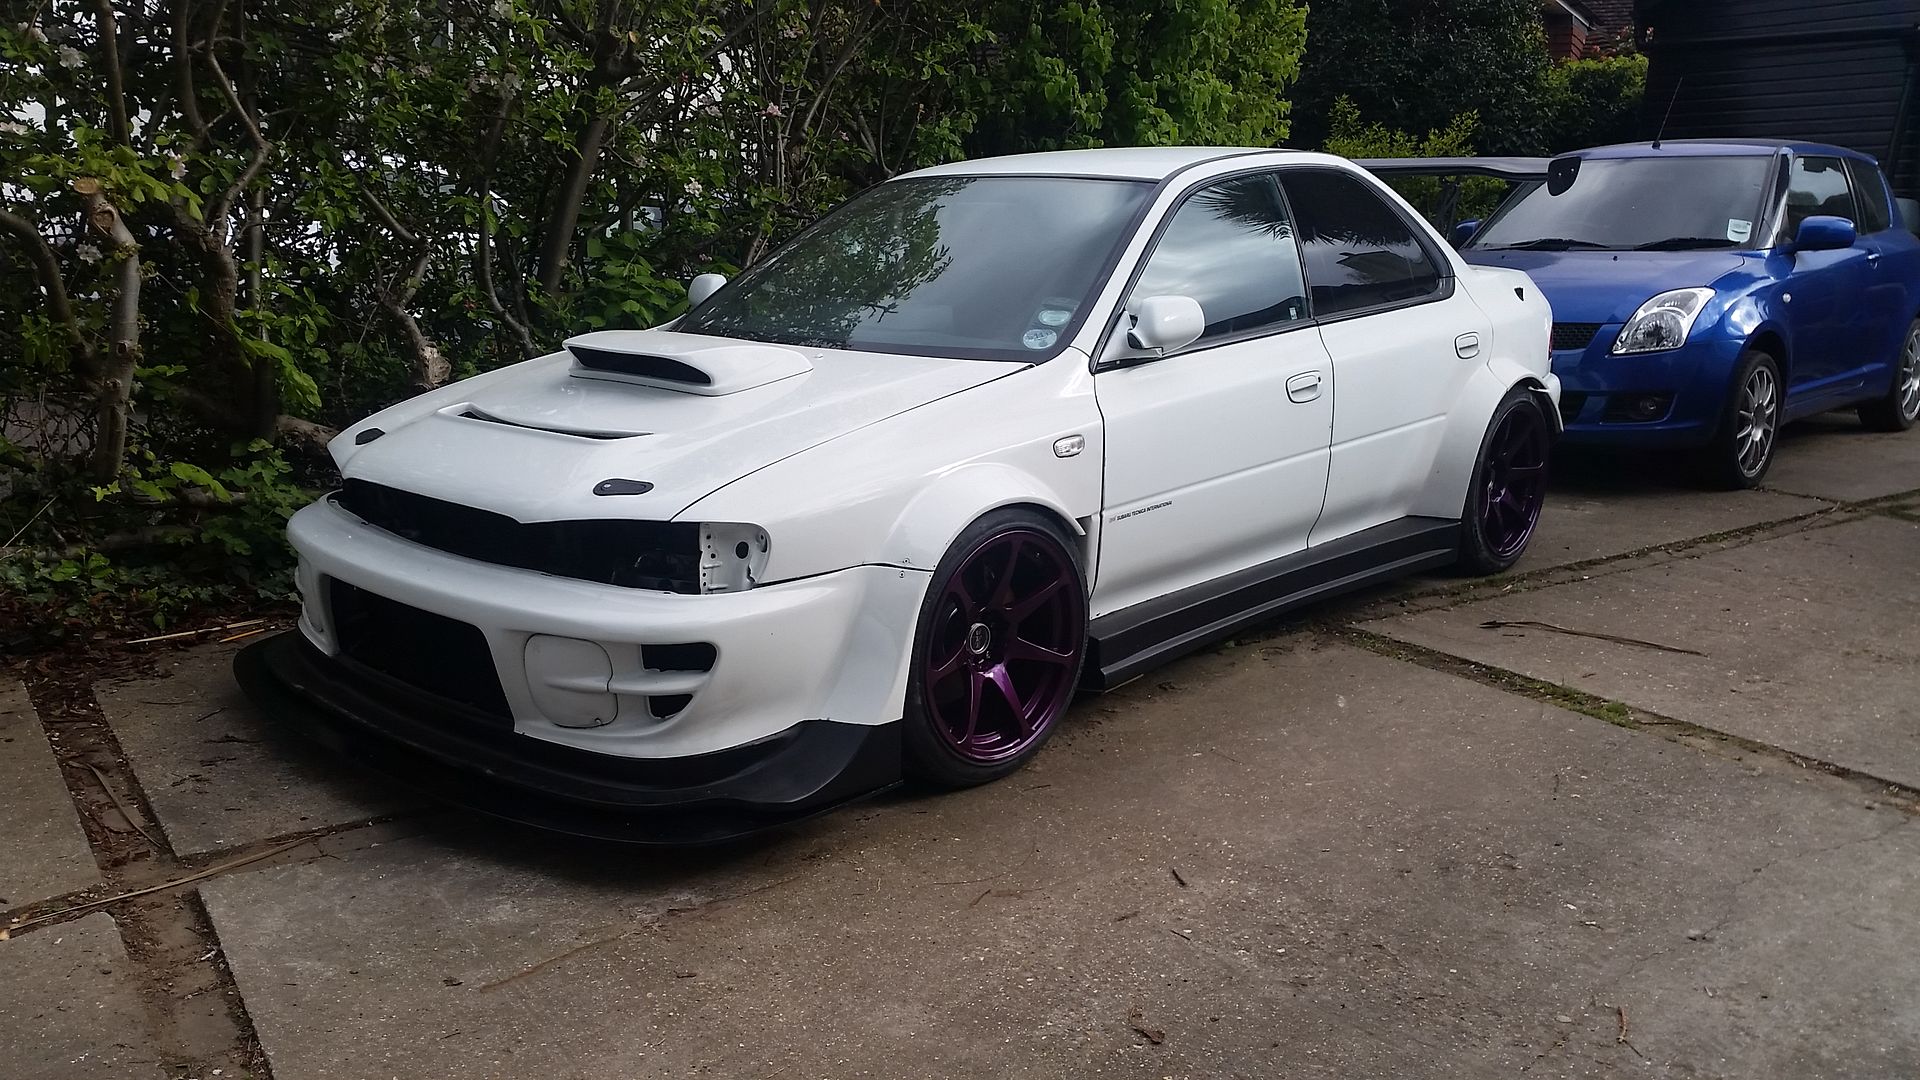
Last edited by seventune; 21-06-2018 at 12:41 PM. |
|
#160
|
||||
|
||||
|
That is looking truely astonishing

__________________
Subaru Impreza WRX STi Prodrive Type UK 2002:  "Tinkered With!" Maintained and Modified by Super Jules  & RM Performance http://www.rmperformance.co.uk |
|
#161
|
||||
|
||||
|
That colour of purple suits the car and front end is coming along nicely .
__________________
Maintained by Hypertech and Mapped by Andy Forrest 1998 UK Turbo , 1998 Terzo , 1997 JDM Type R the money pit , 2004 black WRX STI Type UK , 2004 blue FSTI |
|
#162
|
||||
|
||||
|
great project
|
|
#163
|
||||
|
||||
|
like! I've been toying with proper front splitter/undertray even flat flooring for mine but not got round to doing it., looking forward to seeing the finished result
__________________
Somewhere drinking Coffee Mapped and maintained by FBTuning 07595 493581. |
|
#164
|
|||
|
|||
|
Cheers guys.... These things are not always going to be to everyone's tastes but positive comments are always handy...
With regards to the undertray.... heavy... again this stage it's more of an exercise to see how best to do it.... The sure tube I had laying around so I used it... to loose some weight you could use ally..... or even a thinner ply with ply spines and boxing then cover it in a few layers of carbon... that would work well.... Once the rose joints etc turn up I will pop it on the scales for you... |
|
#165
|
|||
|
|||
|
Playing around with aero ideas.... canards mainly... wanted something that might actually do some good but not look too daft.... With nothing about on the self to suit mine i set about it with the old fiber glass....
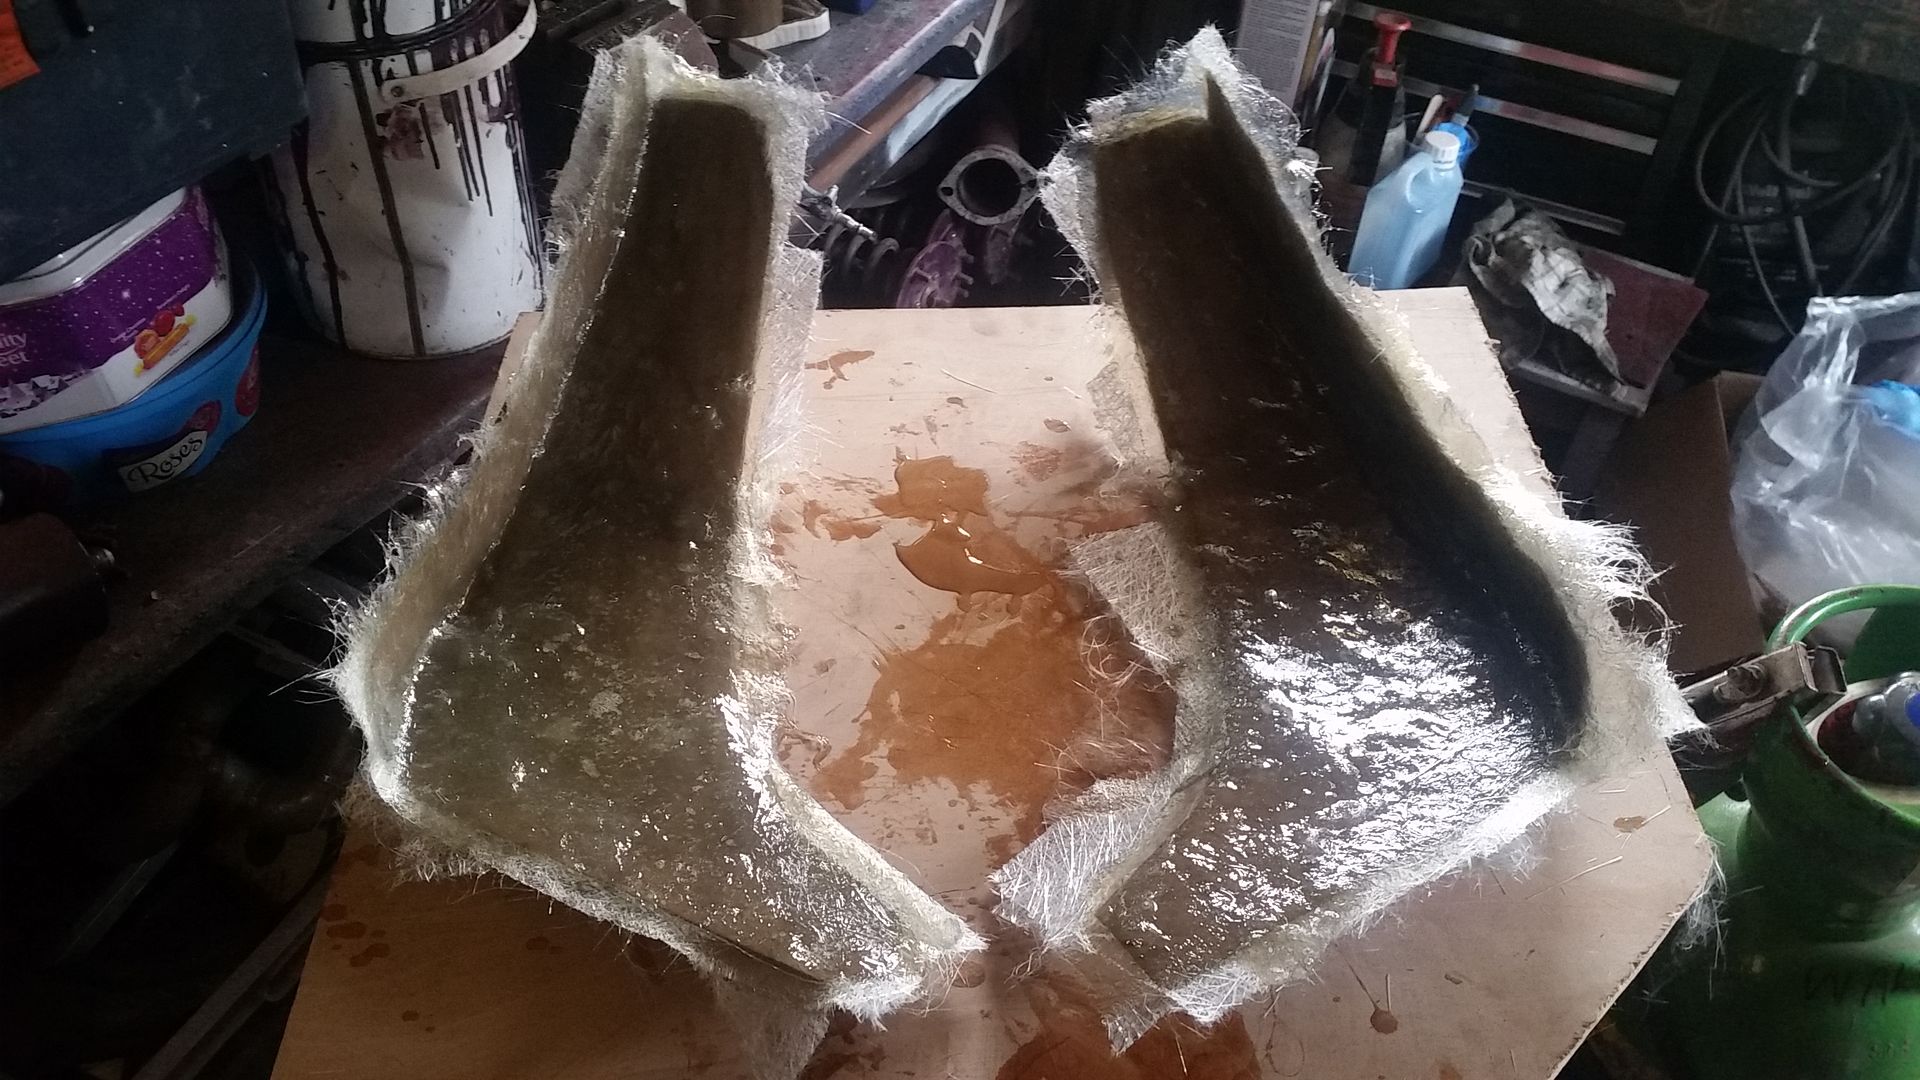 Test fit.... meds a bit of trimming etc... 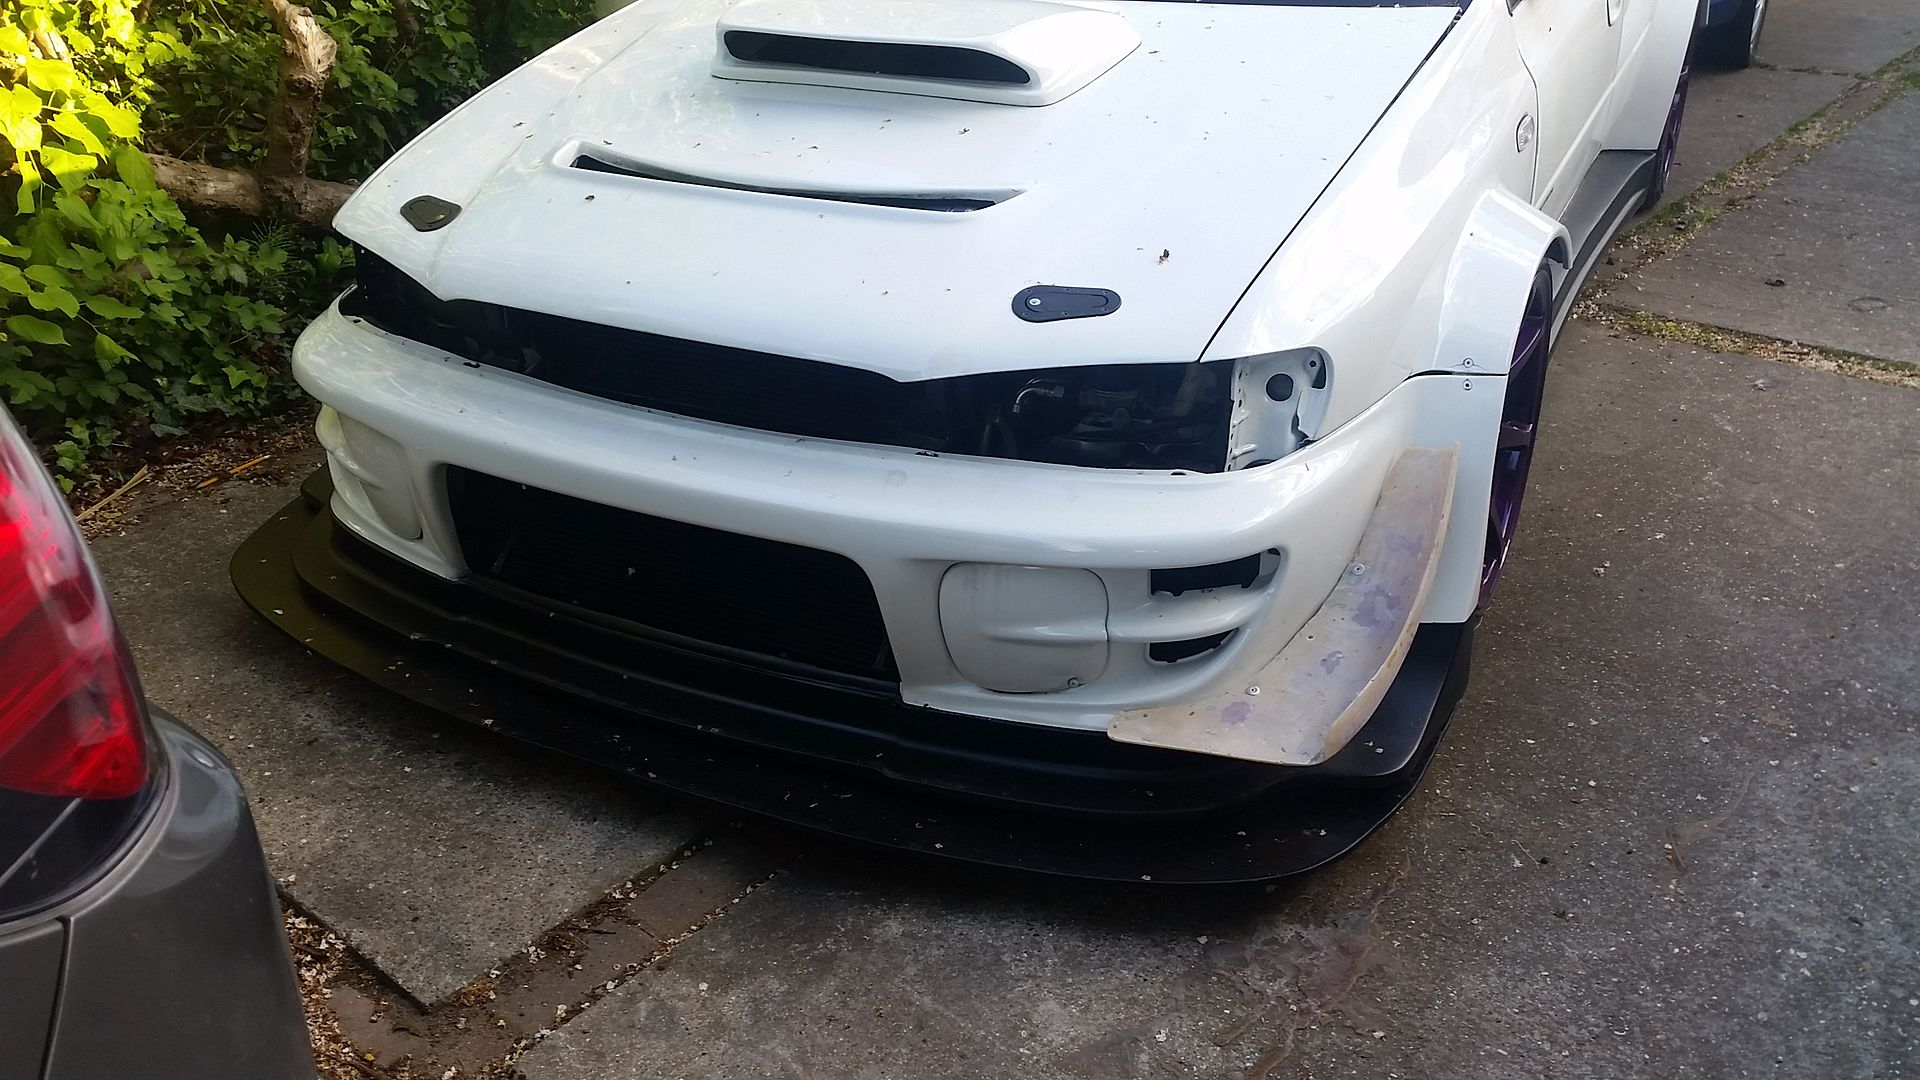 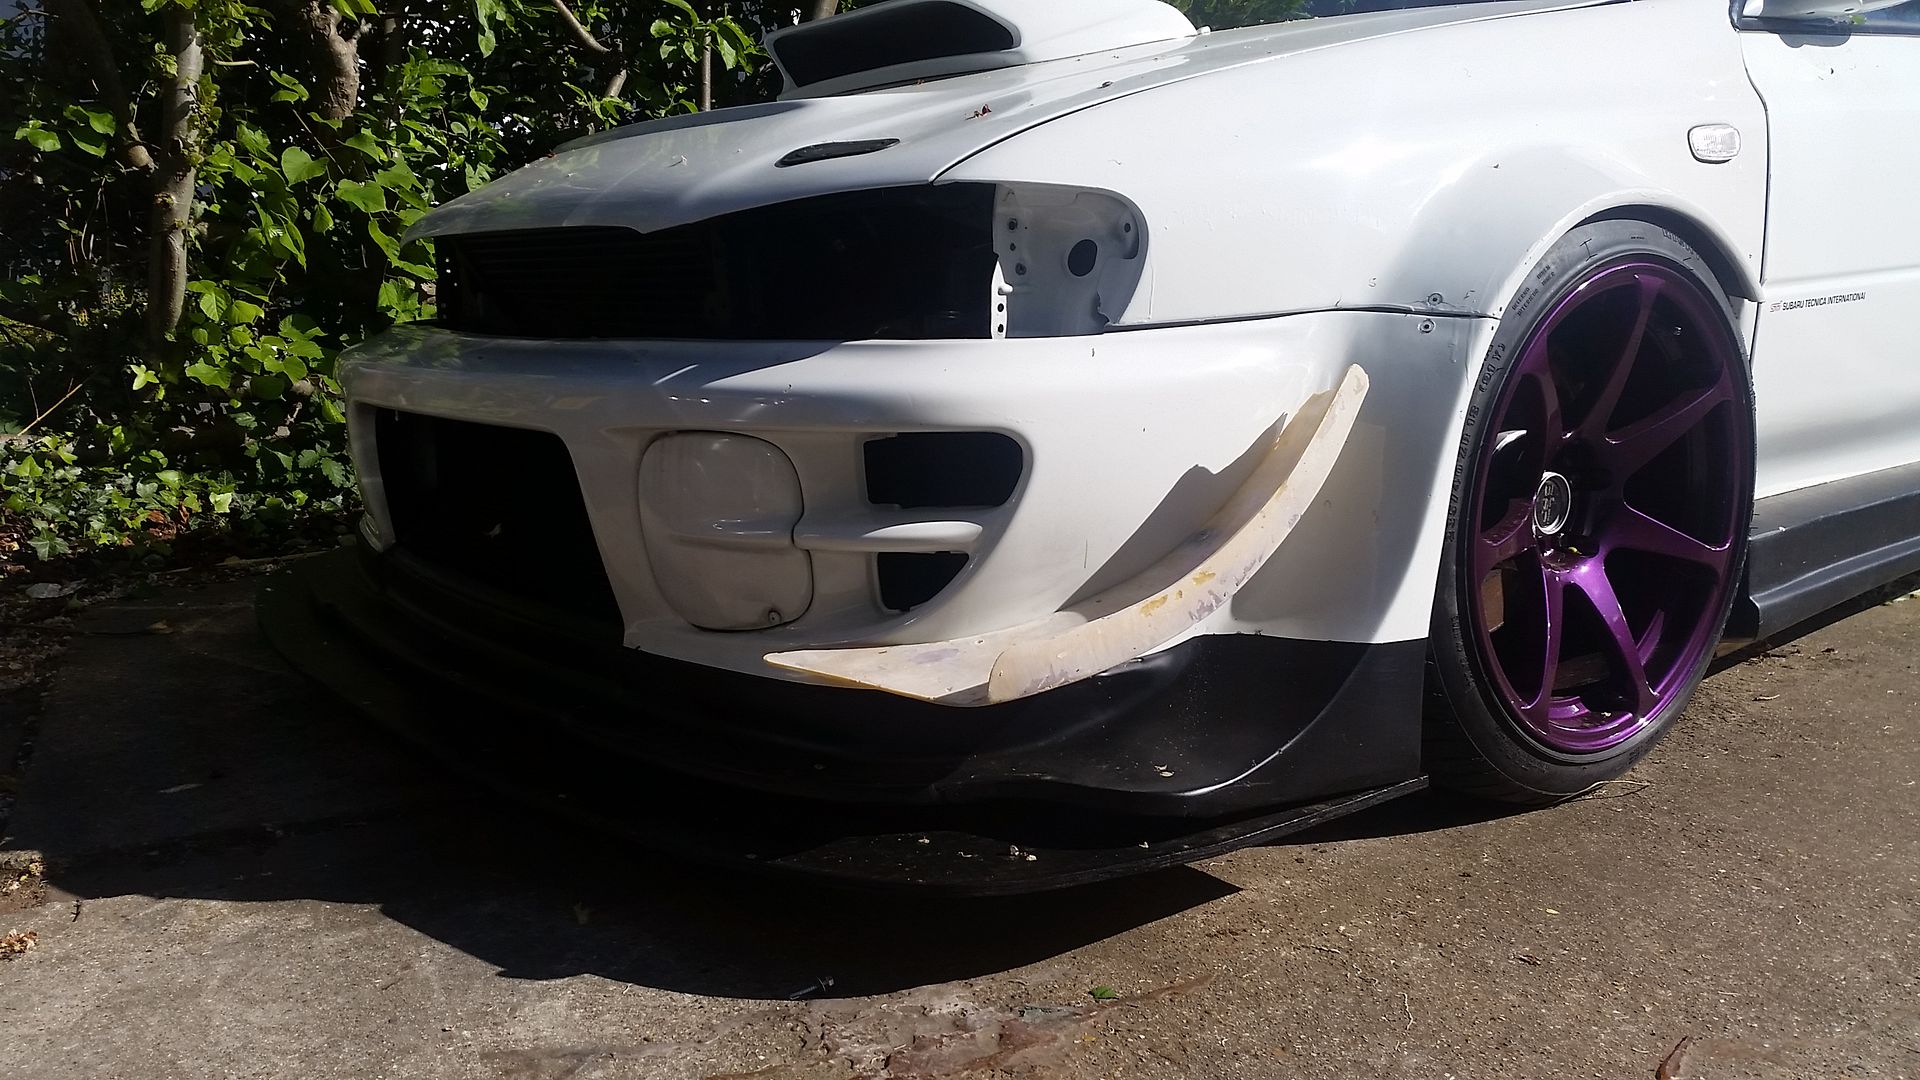 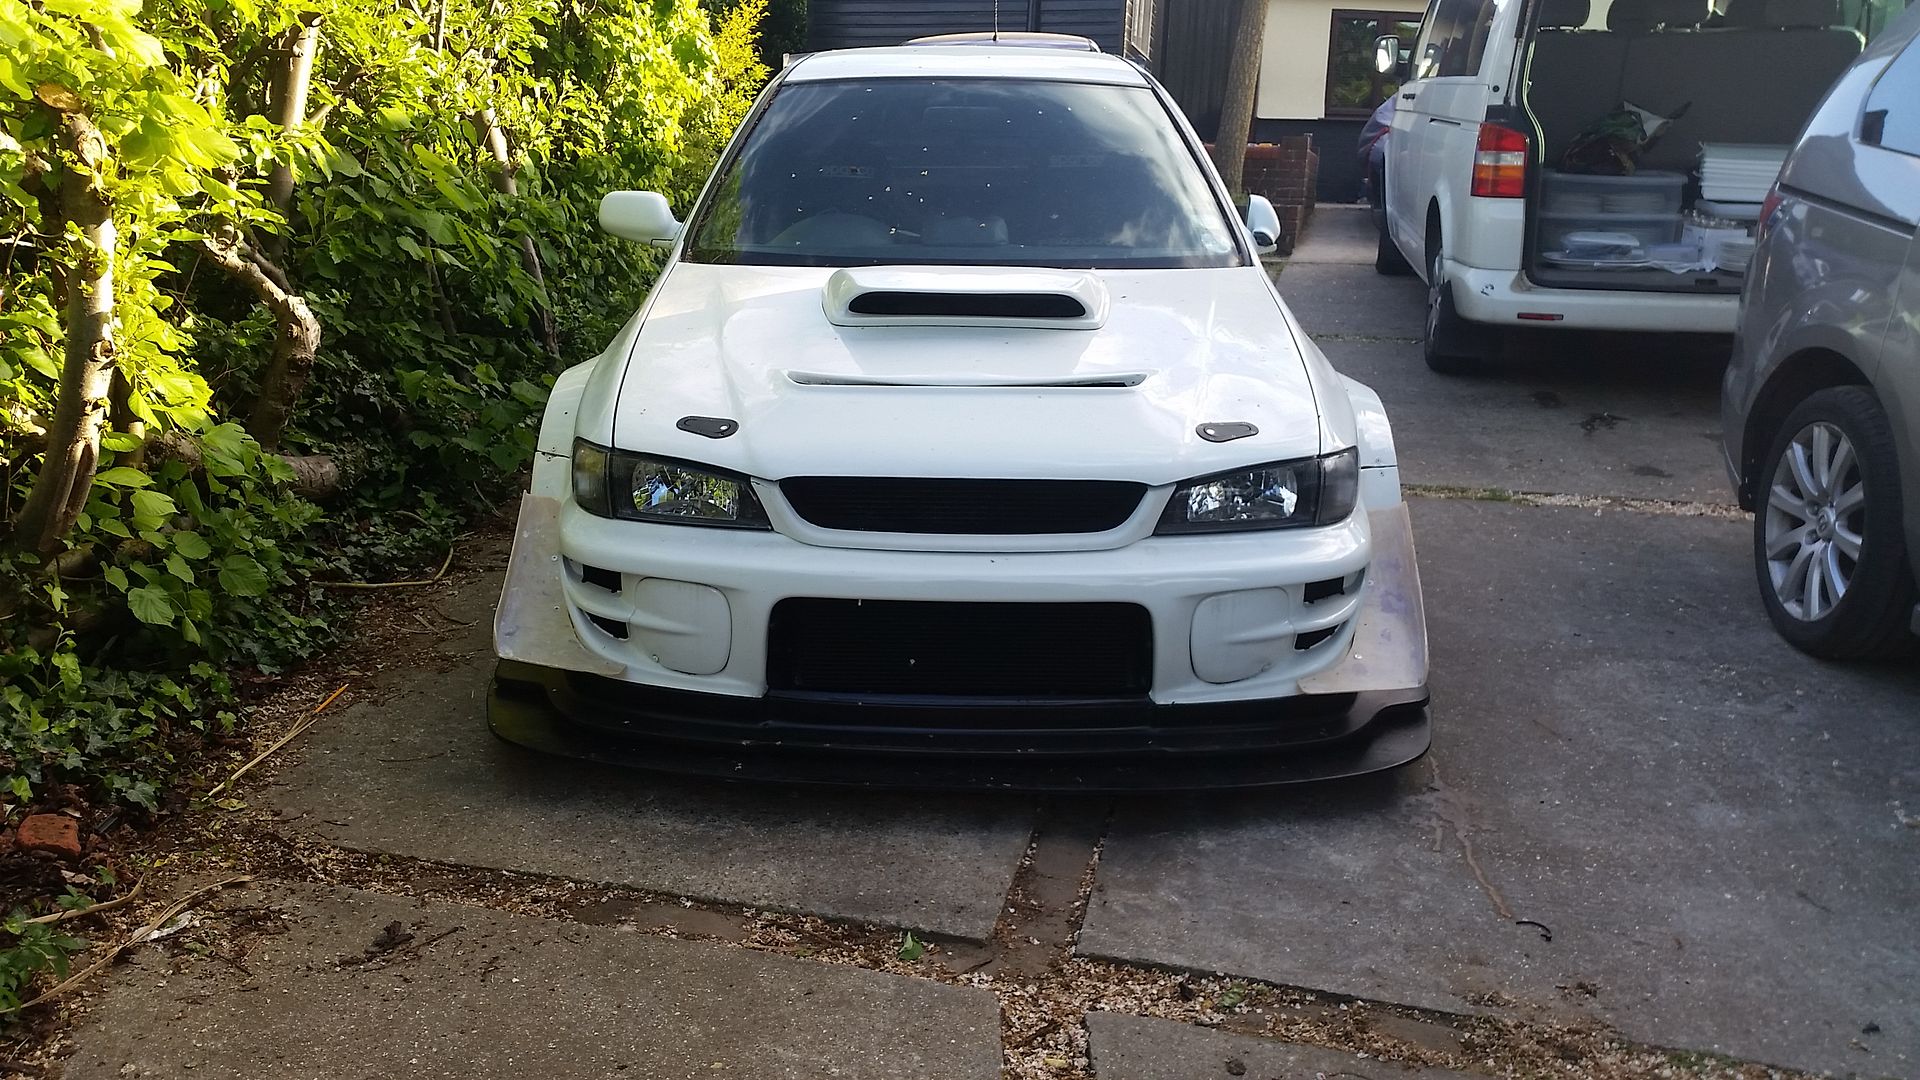
Last edited by seventune; 21-06-2018 at 12:42 PM. |
|
#166
|
||||
|
||||
|
Hats off to you for your creativity mate
 Looks the part and only enhances the wide look - this is going to be one very mean, quick scoob 
__________________
Subaru Impreza WRX STi Prodrive Type UK 2002:  "Tinkered With!" Maintained and Modified by Super Jules  & RM Performance http://www.rmperformance.co.uk |
|
#167
|
|||
|
|||
|
The pesky interior.... lots to do here. The S6 I have isn't a plug and play. I didn't want too use the stock loom as it has issue so a full new engine loom is required and I shall do that bit soon. The aim here again along with the seat swap is too loose weight and make it all simple....
A vast strip back of the stock loom saved a huge 13kgs.... these is leaving the lights, wiper systems, front electric windows, steering rack controls and indicators. pretty much everything else has gone.... including the bulky air con unit and heater unit.... The heater is being replaced with a smaller much lighter unit.... so that's those gone: 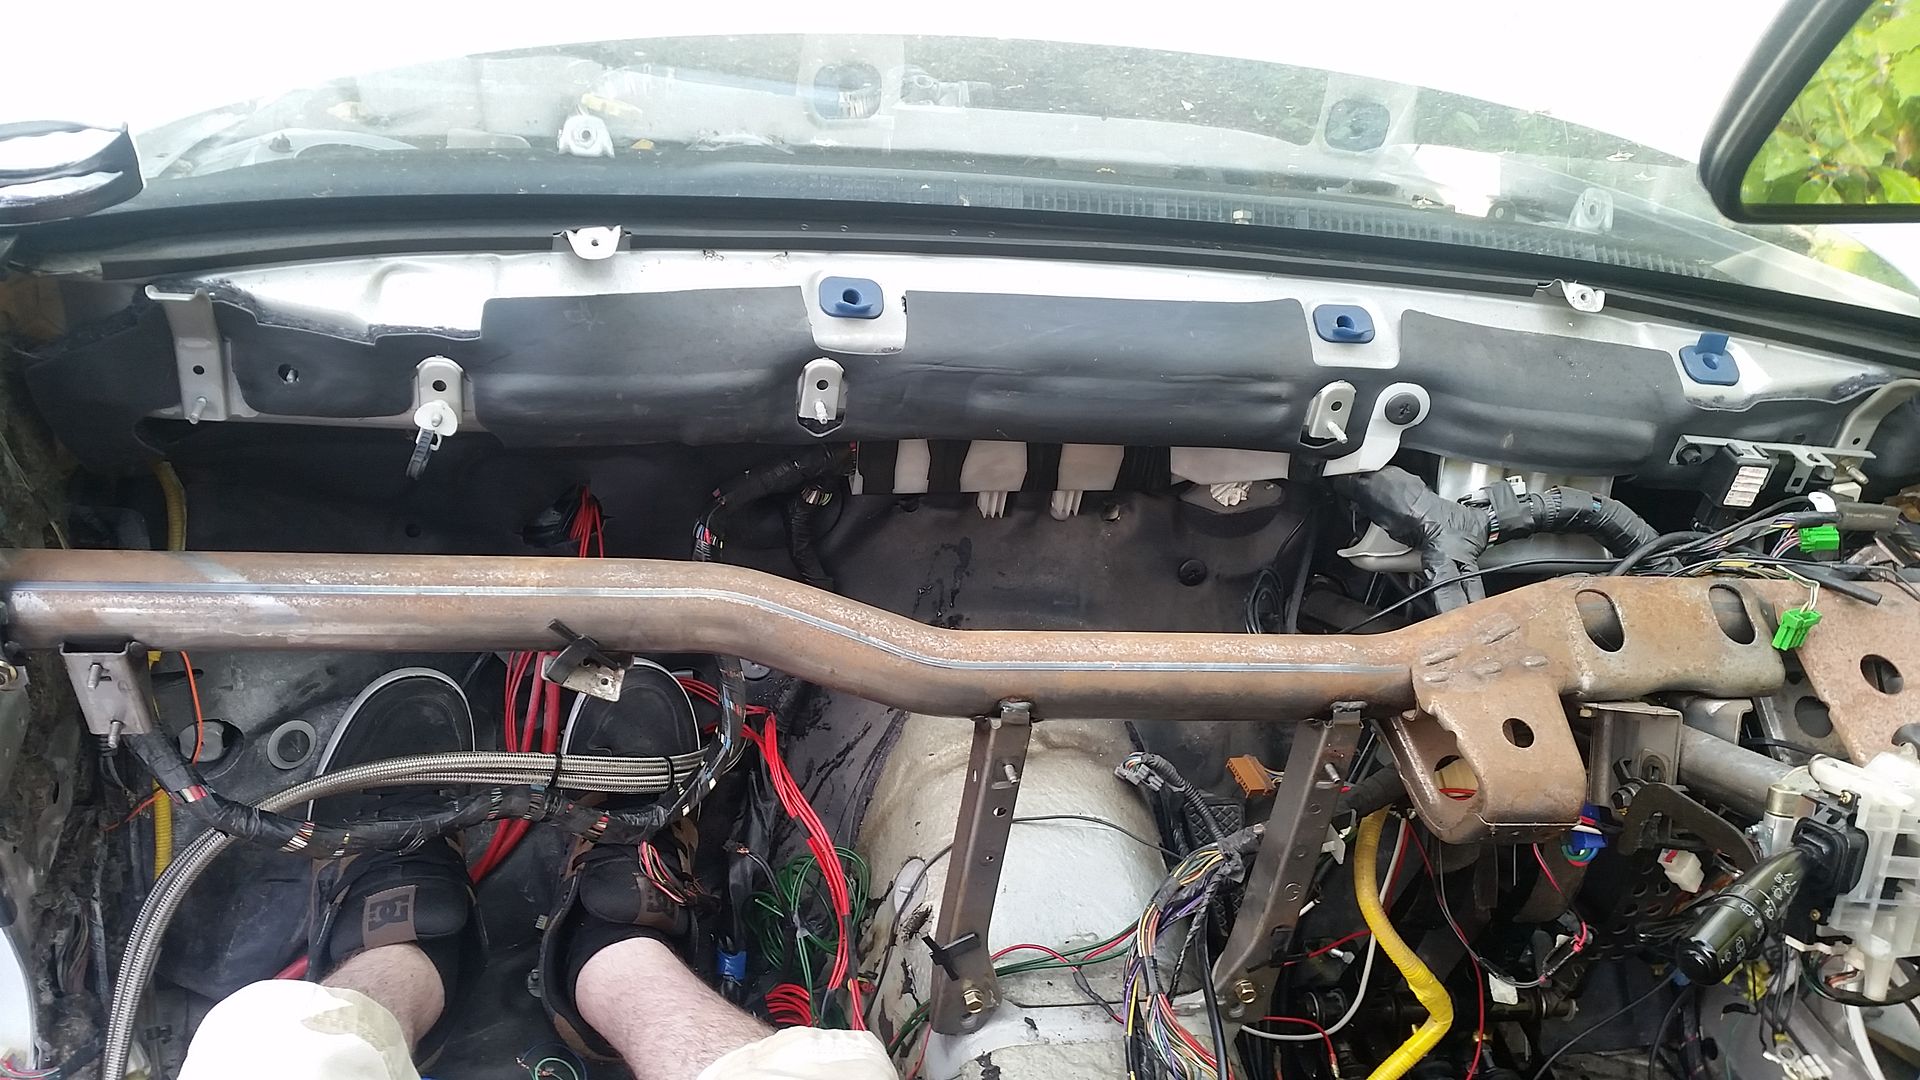 all this seemed very unnecessary: 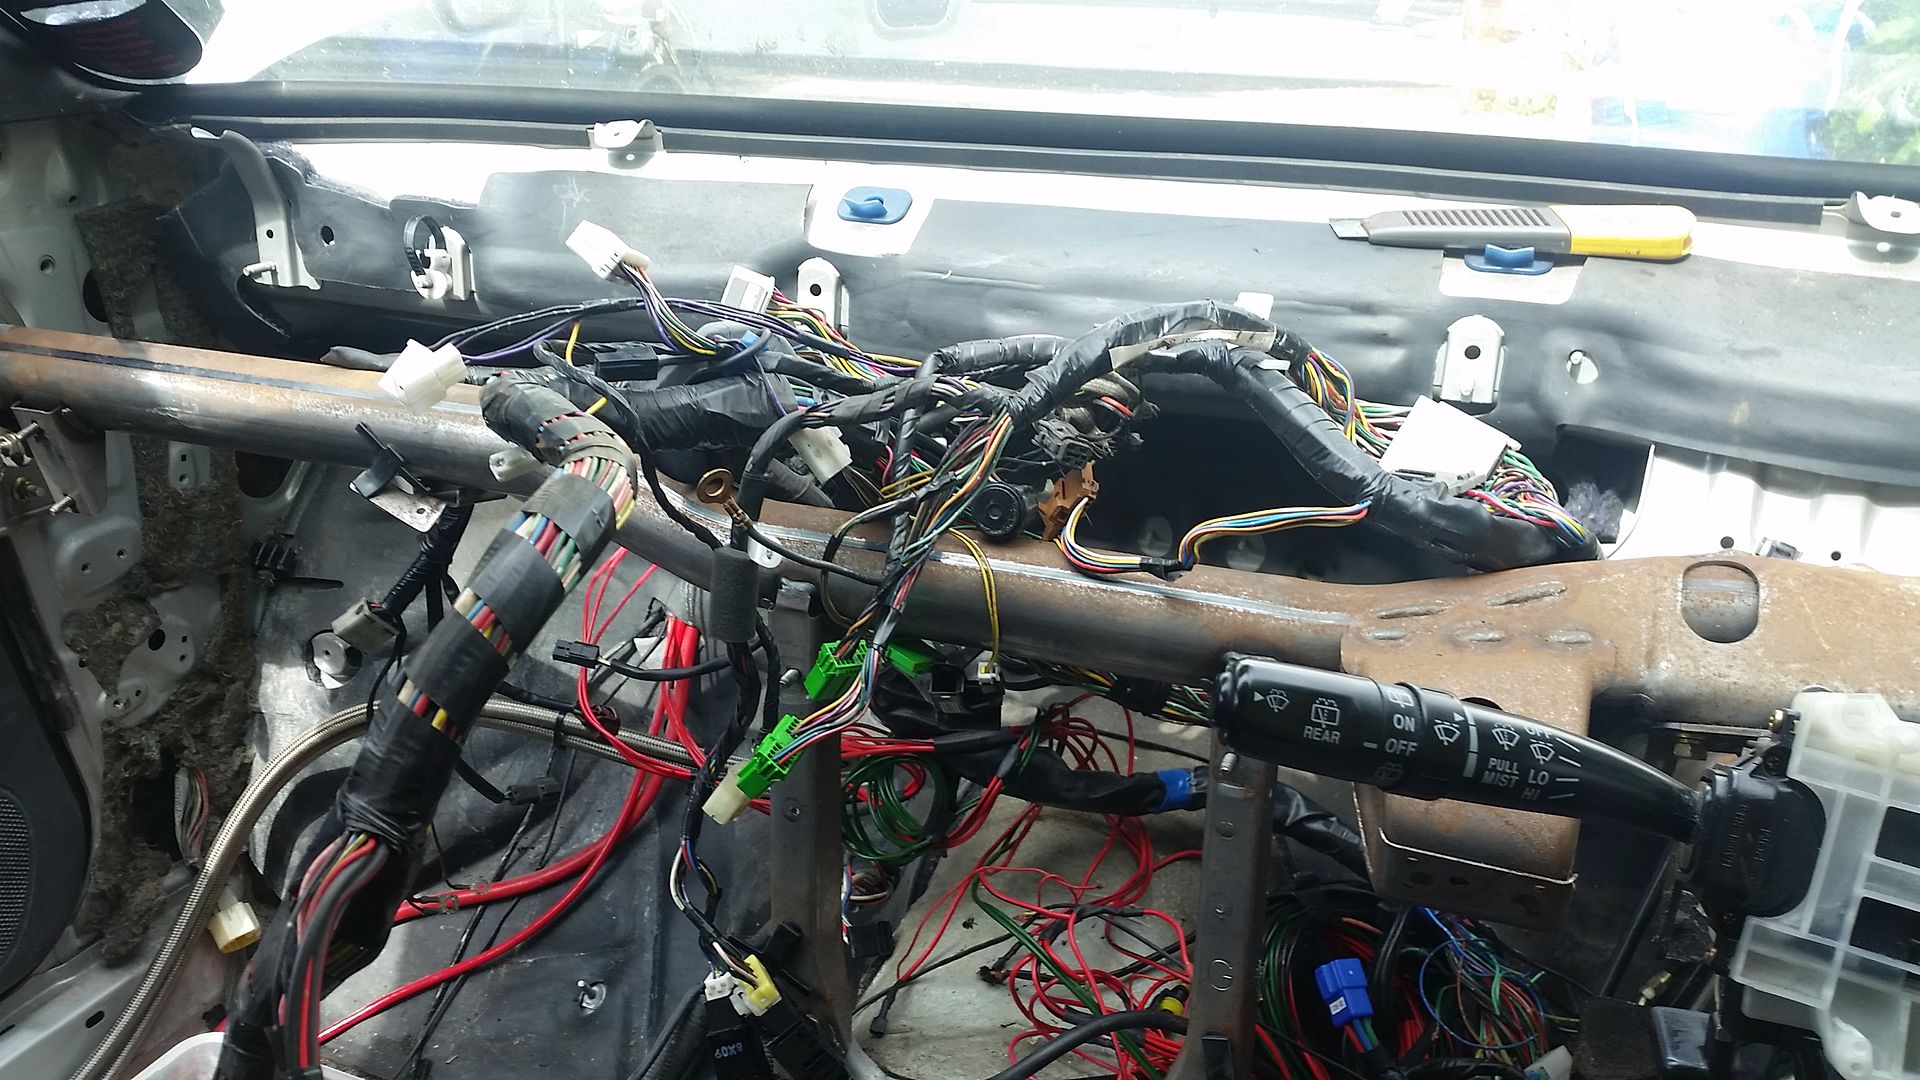 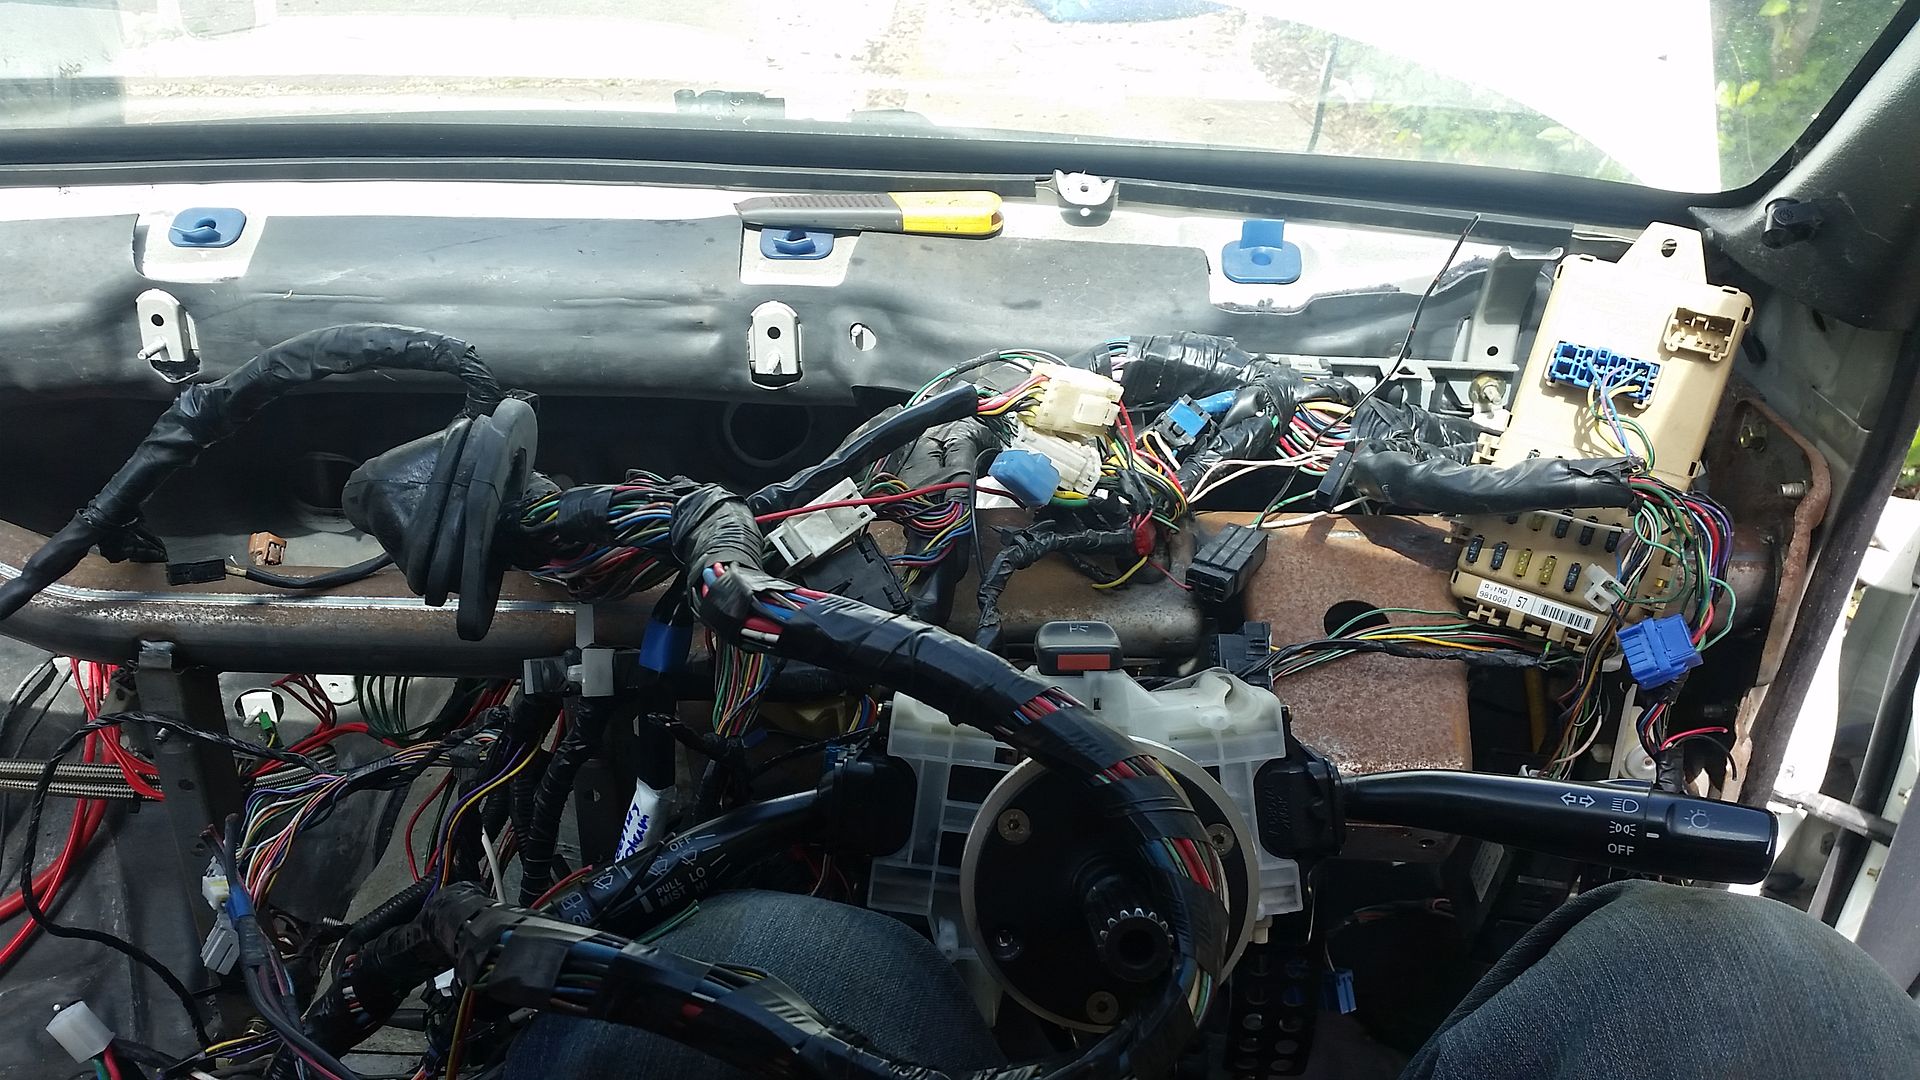 And this is what is left: with the heater unit /air con unit/wiring an over all saving of just under 21 kgs.... that'll do for now.... 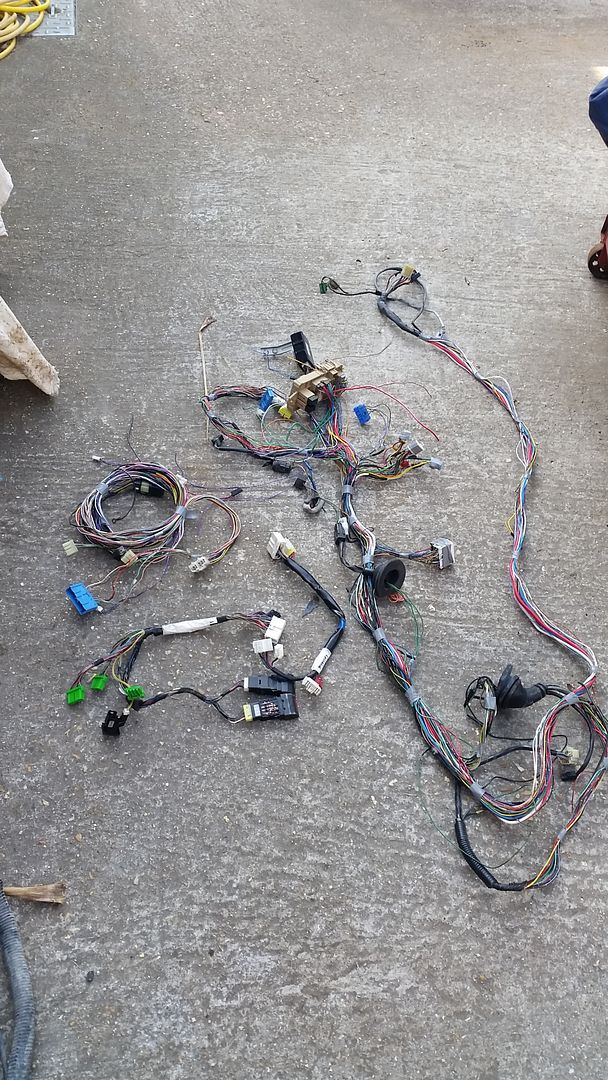
Last edited by seventune; 21-06-2018 at 12:44 PM. |
|
#168
|
||||
|
||||
|
Looks very impressive especially as my level of expertise is changing a bulb!!!
|
|
#169
|
||||
|
||||
|
Dedication doesnt even come close to where your going with this monster
 Amazing your attention to details and craftsmanship. Are you attempting the new loom yourself? As Frenchie says, I can barely do a wiper blade pmsl !
__________________
Subaru Impreza WRX STi Prodrive Type UK 2002:  "Tinkered With!" Maintained and Modified by Super Jules  & RM Performance http://www.rmperformance.co.uk |
|
#170
|
|||
|
|||
|
Thanks guys, just trying to do what I can with what's avail be and parts I kind of happen upon of you like.... she's no where near as sorted or a plush as some of these impreza builds kicking about!!!
The loom I will be modifying further and also yes the loom for the Syvecs I will be building myself.... that way I know what colour is what and where if there is an issue with it.... and I can hide it all in an attempt to keep the bay clean.... |
|
#171
|
||||
|
||||
|
Quote:

__________________
Subaru Impreza WRX STi Prodrive Type UK 2002:  "Tinkered With!" Maintained and Modified by Super Jules  & RM Performance http://www.rmperformance.co.uk |
|
#172
|
|||
|
|||
|
|
|
#173
|
||||
|
||||
|
Wow!!!!!!!
What a thing of beauty!
__________________
Subaru Impreza WRX STi Prodrive Type UK 2002:  "Tinkered With!" Maintained and Modified by Super Jules  & RM Performance http://www.rmperformance.co.uk |
|
#174
|
||||
|
||||
|
Quote:
__________________
Eat, Sleep, Race , Repeat |
|
#175
|
|||
|
|||
|
I know what you mean about the labeling the plugs... made that mistake the first time I did a Microtech in the RX7.... but yes I've done a few over the years now... much easier starting from scratch instead of hacking and splicing looms together....
|
|
#176
|
||||
|
||||
|
Quote:
 A question if I may?! What are the benefits of having the turbo positioned there please? I'm sure Brent has his there and he did tell me once but it was a while ago and I've forgotten!
__________________
Smiles Per Gallon >>>>>>>> Miles Per Gallon |
|
#177
|
|||
|
|||
|
X2. Do you not get loads of heat in this position.
|
|
#178
|
|||
|
|||
|
Only reason i ask is surely if your gains where that great with having a turbo in that position the likes of rcm,lateral, and other good tuners would of done this or maybe not.
|
|
#179
|
|||
|
|||
|
A valid question indeed and a few reasons for why. The turbo in this position will offer no extra horsepower gains over a conventional twisted kit. The reason RCM etc would not offer this as a kit is there are too many extra modifications needed to fit the tutbo in the position..... reverse inlet, you have to move all the stock fuel lines, etc etc which makes them un viable as an off the shelf kit.... begs the question why on earth did I do it....
So the GT4094 is twin scroll. Arguably oversized for what I need... as chance would have it I happen to have one so I didn't have to pay out for a new turbo after I realised the old one was a touch deaded... becuase of this I wanted to run direct and short pipes with and few twists and turns as possible... that's where the V mount comes in and primarily the turbo position. I also wanted to run longer secondaries on the manifold to help more mid range power and this was a suitable location to allow me to do so. Also of you look at the down pipe coming out the rear turbine housing it is unimpeded as it's absolutely straight out the back of the turbo then drops down the passenger side. The GT40s do have problems with choking up when it comes to exhaust temps/gas flow so an attempt aid to help that.... If you twist the through 180 degrees but in the same position you can run an air box directly under the scoop (I'd you go back through the build you can see that was my original intent) but the trade off is a super tight down pipe and the GT40 would have suffered as a result... However a GT30 or 35 would not suffer as much from being placed there..... In terms of heat no not at all. If you think about a typical twisted kit the turbine housing is sitting in a small space surrounded by the suspension turret, mater and clucth cylinders, aswell as the down pipe all bunched up in a corner with very little air movement around it.... at least the turbo big up there is in more 'empty' space.... I will likely at some stage change the scoop for a vent.... And the final reason.... pretty much just because it looks cool and I can... So in short - long secondaries on the manifold - very short intercooler pipes - very straight outlet on the exhaust - looks cool But ad I say you couldn't sell this as kit from a tuner perspective as it could never be a bolt up solution like the twisted kits are.... |
|
#180
|
||||
|
||||
|
That's great, thank you very much for the informative, detailed reply
__________________
Smiles Per Gallon >>>>>>>> Miles Per Gallon |
|
#181
|
||||
|
||||
|
You had me at looks cool
 But what a great answer - I too have often wondered the above - thanks for sharing  Sent from my iPhone using Tapatalk
__________________
Subaru Impreza WRX STi Prodrive Type UK 2002:  "Tinkered With!" Maintained and Modified by Super Jules  & RM Performance http://www.rmperformance.co.uk |
|
#182
|
|||
|
|||
|
��be great to see results once finished on this ...heat temps,power,etc
Last edited by j2000; 13-05-2017 at 09:59 AM. |
|
#183
|
|||
|
|||
|
Not a problem.... to be honest if this wasn't the kind of thing I did for a living it would be a very different car...
A curious black box turned up this morning....  What's inside??? 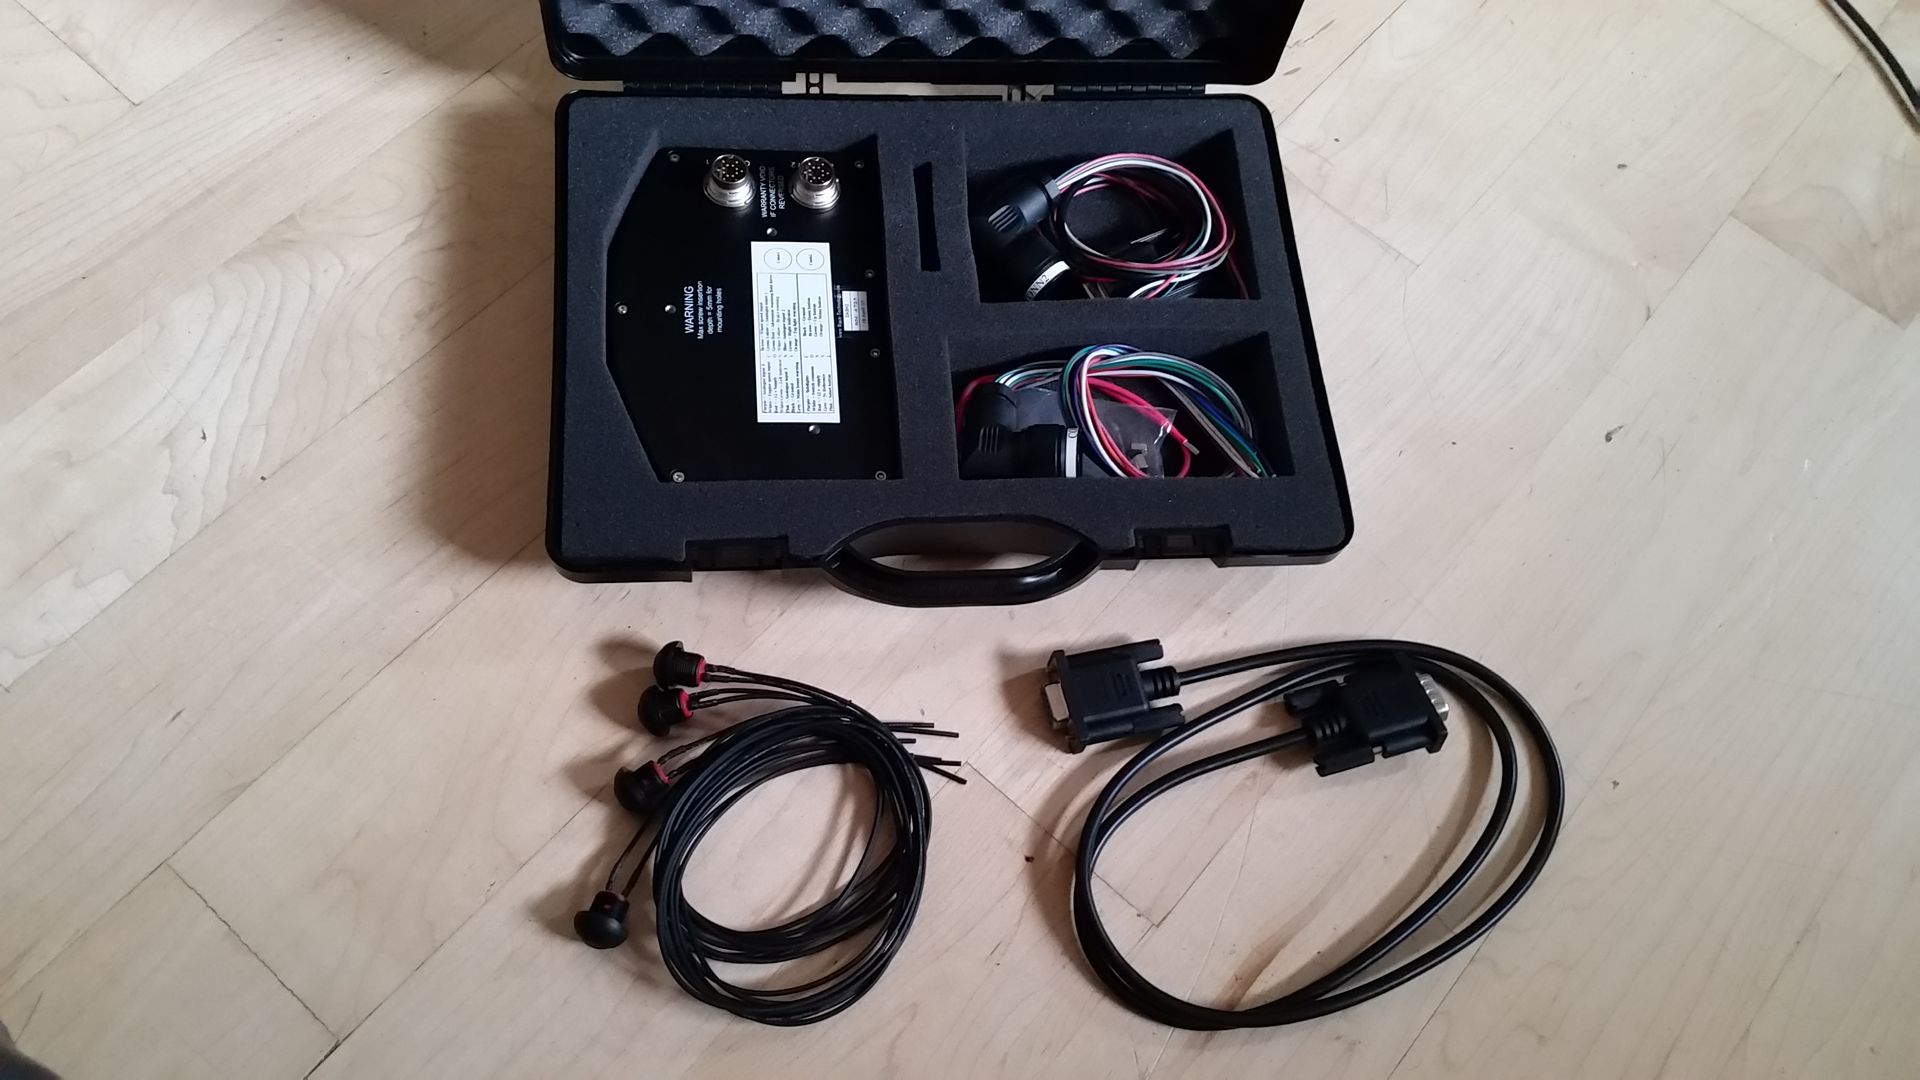 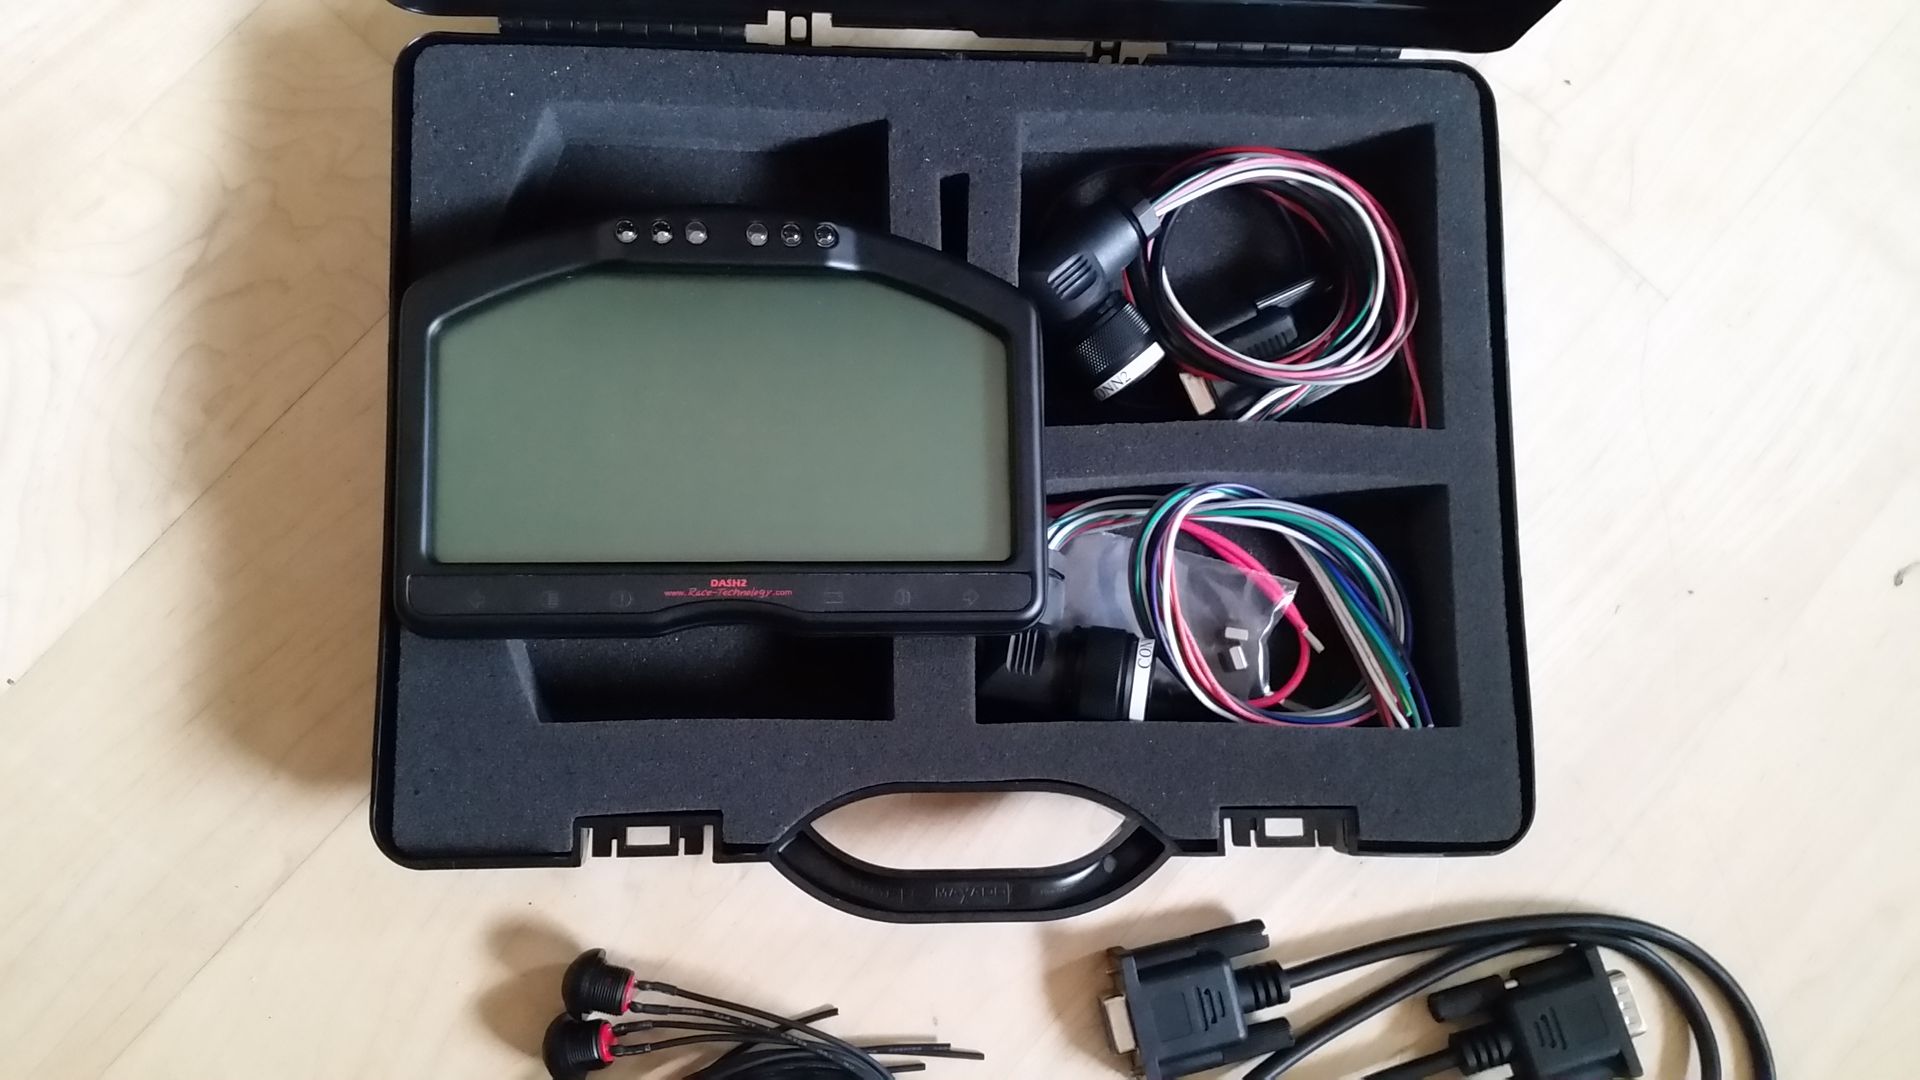 The comes the question... near or far.... have to say I think it's close for me.... means the dash moves with the height adjustment on the steering colum..... 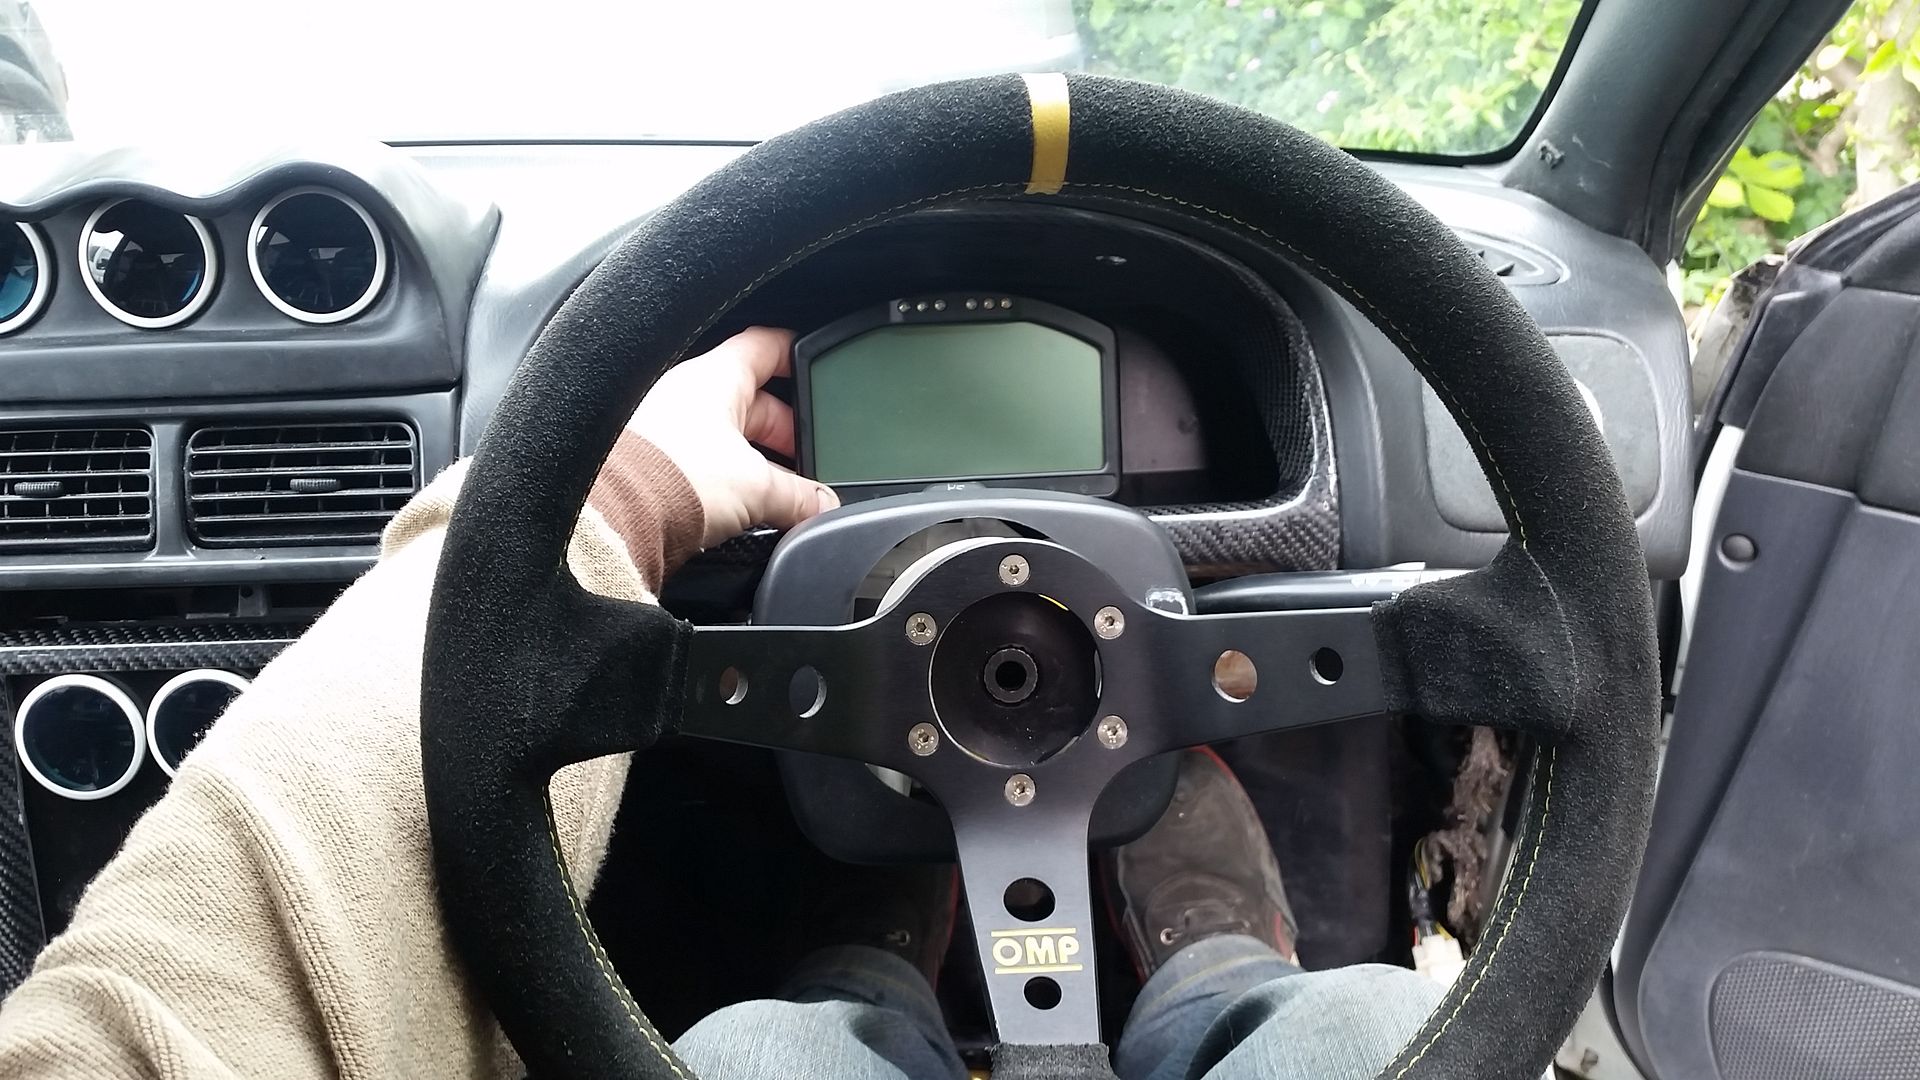 Near: 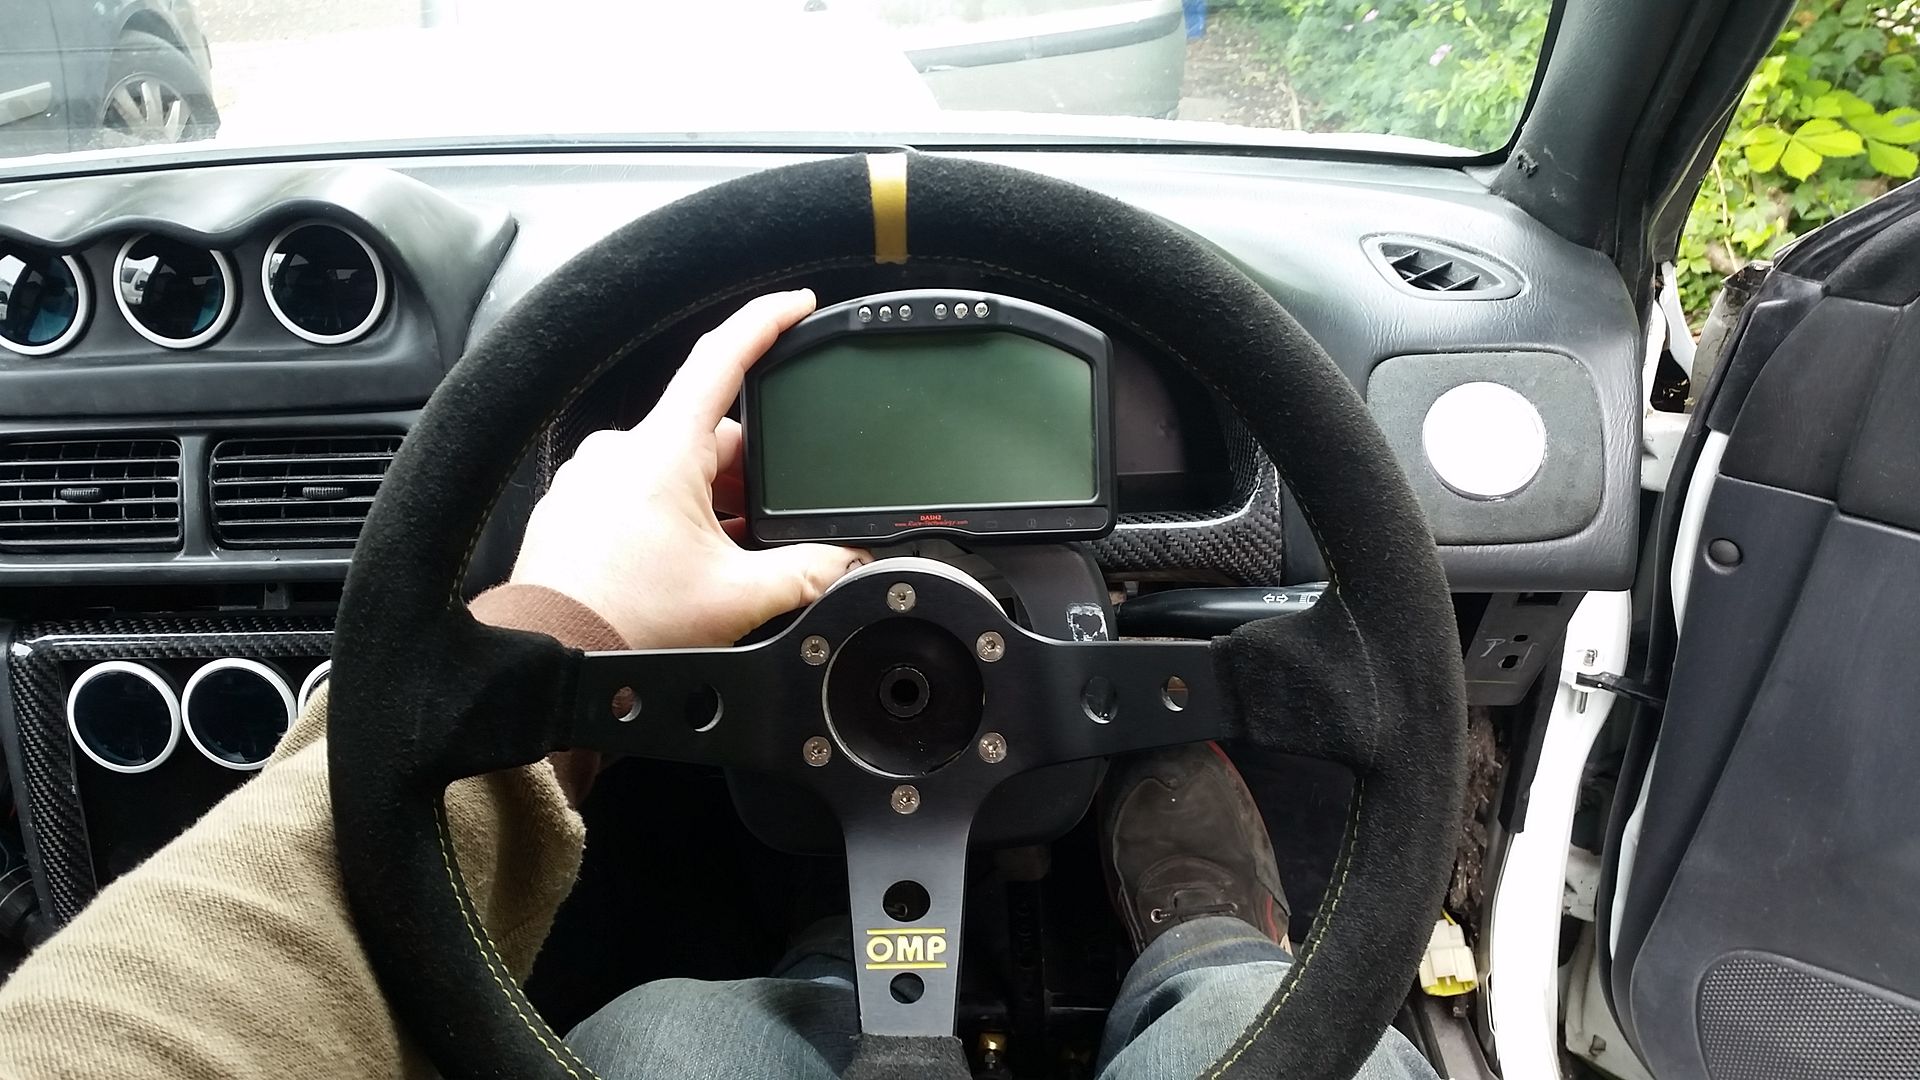
Last edited by seventune; 21-06-2018 at 12:46 PM. |
|
#184
|
|||
|
|||
|
Love the dash display mate.
|
|
#185
|
|||
|
|||
|
Yeah I quite like it....
Just doing the mounting bracket... first design was a bit plan son the second is a bit more holey!... a friend of mine has a 3d printer so I've just sent the model over to him for him to print for me..... 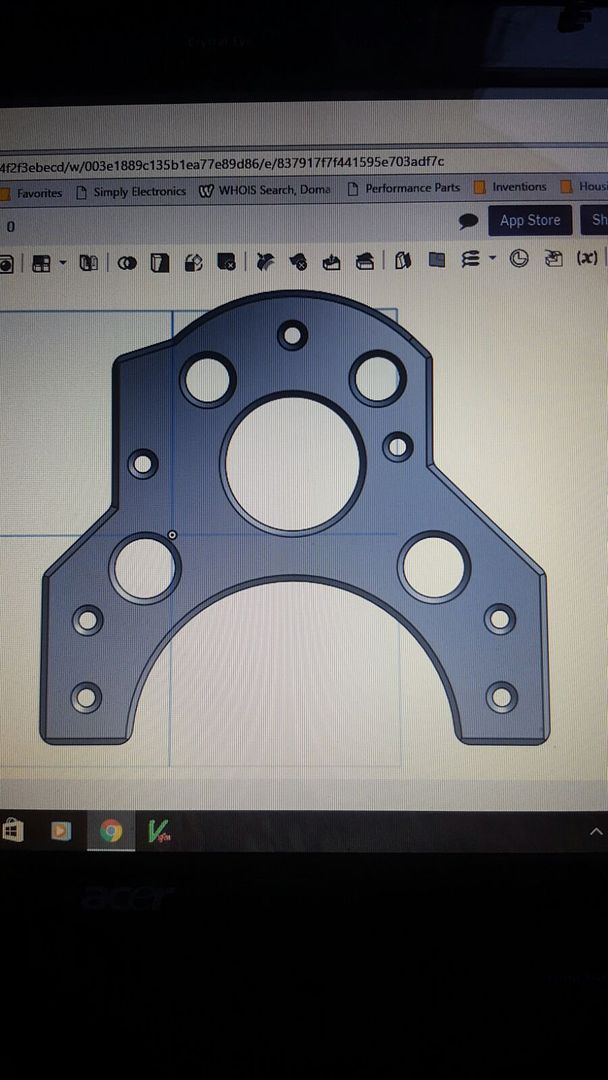
Last edited by seventune; 21-06-2018 at 12:47 PM. |
|
#186
|
|||
|
|||
|
Last edited by seventune; 21-06-2018 at 12:48 PM. |
|
#187
|
||||
|
||||
|
looking very smart
|
|
#188
|
|||
|
|||
|
Hoping to get back on the old girl soon! I've been super ill since the last instalment and finally feeling a little more with it!!!
She really isn't far off now. P/S lines and pump fuel cell finish the exhaust and plumb the wastegates in wire the thing up And some paint wouldn't go a miss either to be fair! I'm sure there are some other niggling bits but they are the big jobs... Last edited by seventune; 12-02-2018 at 07:16 PM. |
|
#189
|
||||
|
||||
|
Wondered where this had got to, glad to hear you're on the mend.
|
|
#190
|
||||
|
||||
|
Glad you're back, was only thinking the other day that you hadn't been on here for a while .

|
|
#191
|
|||
|
|||
|
So the only thing thus far that i haven't added is the mods to the rear floor which is where the two silencers will be for the side exits.... you genuinely can't get any big silencers in there with the fuel tank so that is going in the boot, and even then the space isn't great. So i have also removed the big T bar that supports the diff which will be placed with a small lighter fabricated option and polly bushed and the actual rear floor has been partly removed to get more height for bigger mufflers.... So a couple of pics of the floor... diff mounts to follow....
As we all know and love it.... 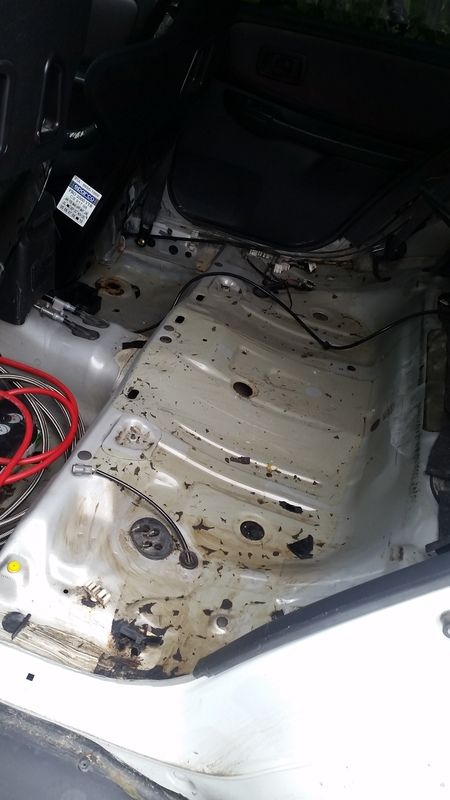 New section: 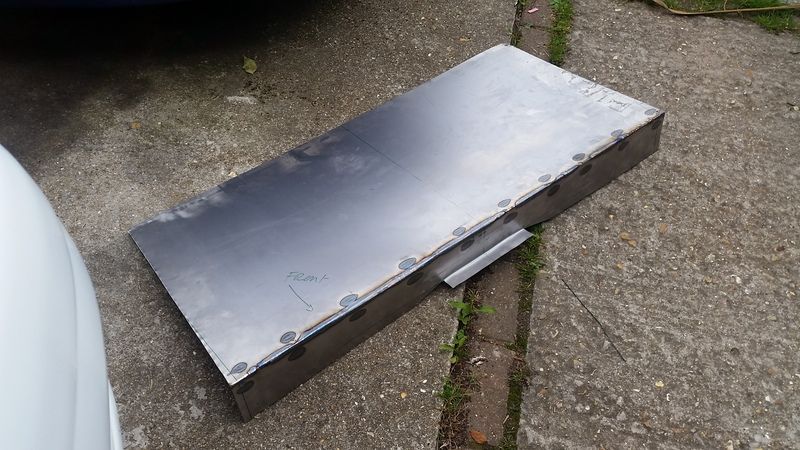 Sitting in place.... now the side still need to be filled in but i'm waiting for some metal to do that... but you get the idea... I will start work on the oval side exits soon but it will be this kind of thing which i mad for a mate a while back.... but this car has the stock fuel tank.... 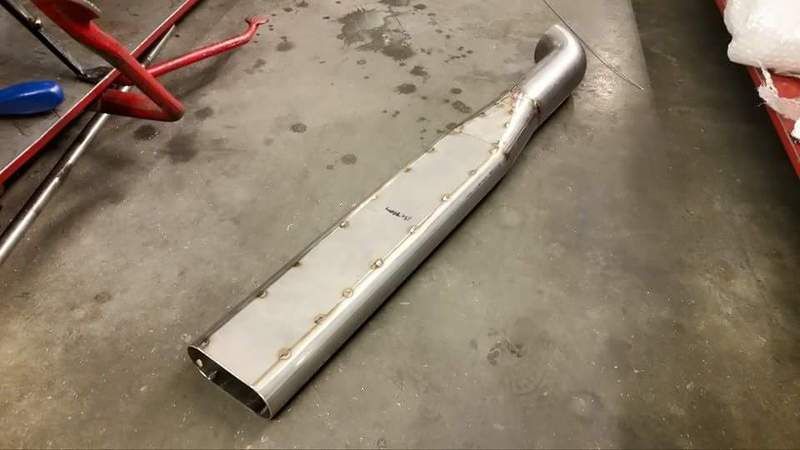 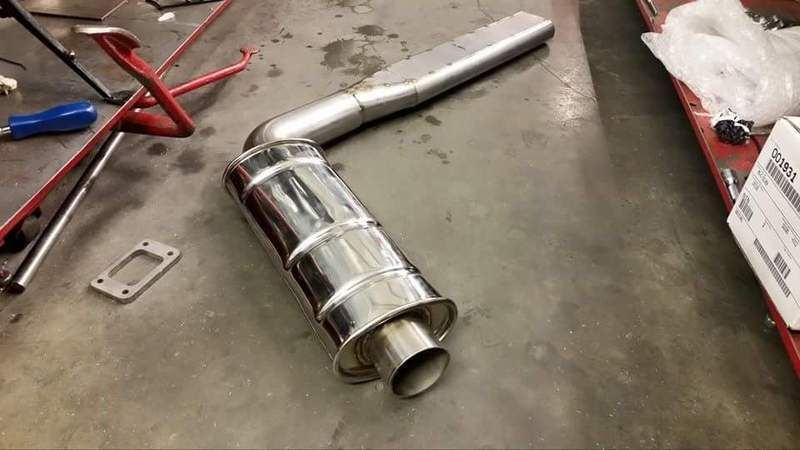 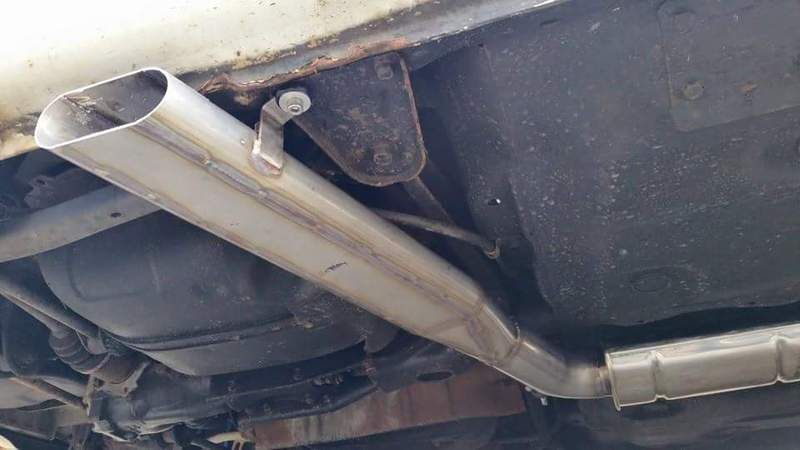 and yes this was loud..... Last edited by seventune; 21-06-2018 at 12:50 PM. |
|
#192
|
||||
|
||||
|
This has been an incredible read! Can't wait to see the final product. What an animal of a car!

__________________
2006 WRX Wagon Build Thread Modified and Serviced by Brent @ Southern Motor Developments in Newhaven, East Sussex. |
|
#193
|
|||
|
|||
|
Quote:
Had a little play today with exhaust ideas, will defiantly go with twin side exits, one either side, the exits have been made into flat oval using a length of pipe and some sheet metal.... so made those today and trimmed the skirts to get an idea to style and placement.... I will have to get the diff mounted underneath before i can build the exhaust properly but definitely happy with the look.... the tips: 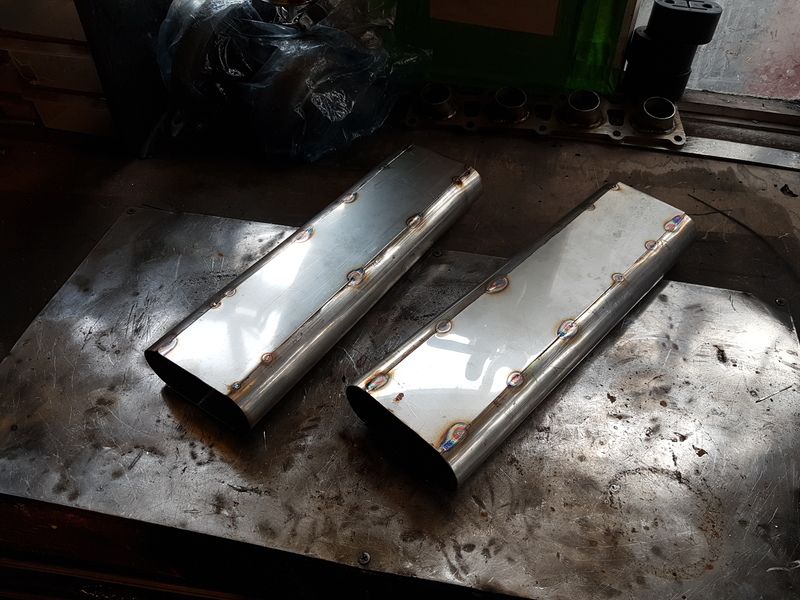 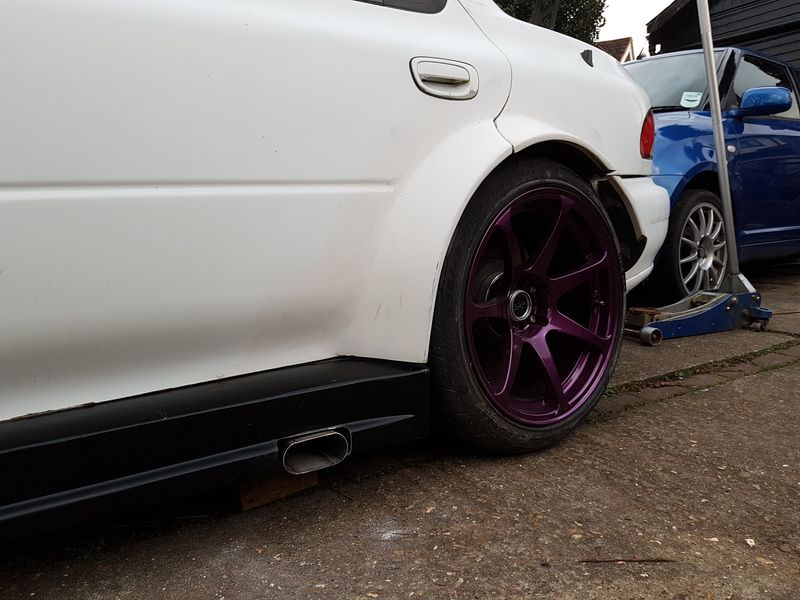 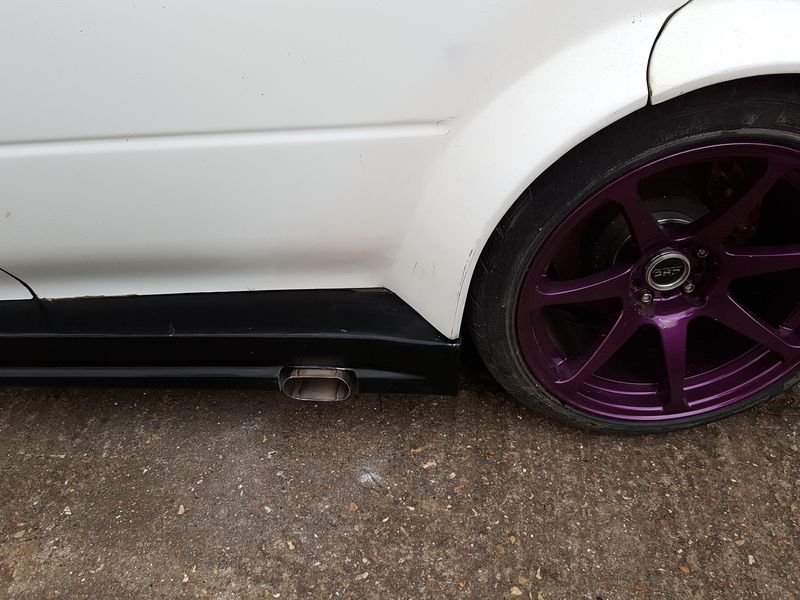
Last edited by seventune; 21-06-2018 at 12:53 PM. |
|
#194
|
||||
|
||||
|
Quote:
BZ dude, some amazing mind blowing work going into this.  
__________________
2006 WRX Wagon Build Thread Modified and Serviced by Brent @ Southern Motor Developments in Newhaven, East Sussex. |
|
#195
|
||||
|
||||
|
Stunning dude

__________________
Subaru Impreza WRX STi Prodrive Type UK 2002:  "Tinkered With!" Maintained and Modified by Super Jules  & RM Performance http://www.rmperformance.co.uk |
|
#196
|
|||
|
|||
|
I've had no time to play the old girl for ages!!! Just been silly busy with? Well I'm sure what other than work!!!
Anyway managed to get a few more bits done.... Diff mount is almost finished. There are a few more braces to weld in just to aid with the twisting motion from the drivechain but you get the idea. The brace that holds the diff is also tied into the floor support and exhaust mount points that are part of the rear floor section. I have also spent a while re working the rear arches a little and modding the rear bumper with cuts aways. These will have addition sections added in which I'm hoping i might get done tomorrow. There is some fiber glass work to do on the bumper too which i will have to do before paint.... some pics: The almost finished diff brace: 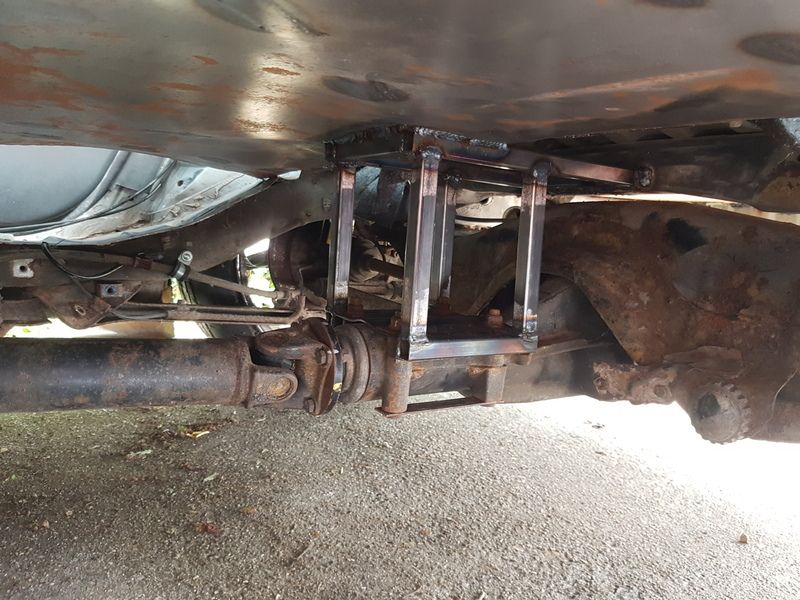 The new rear floor section which has been mad to house the two side exit silencers: 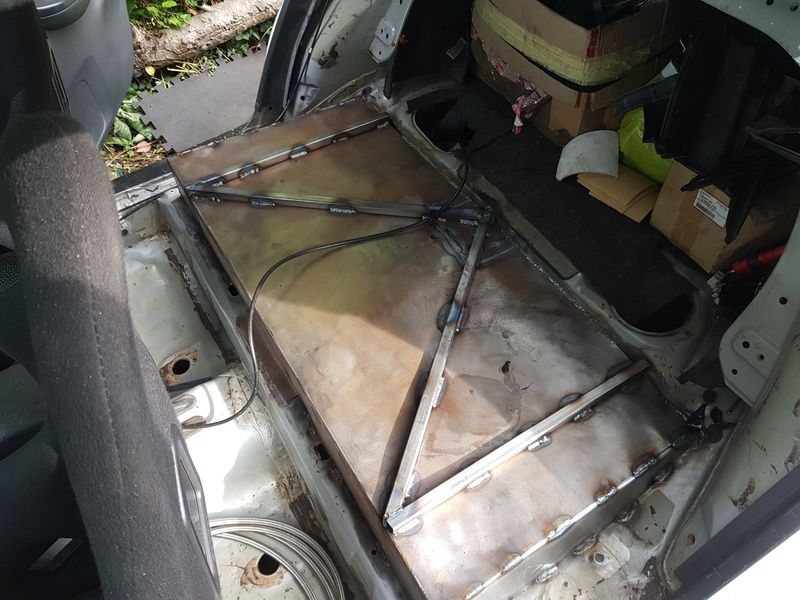 As for the arches, you can't really tell from a pic the changes as they look pretty similar but evidence to show the working 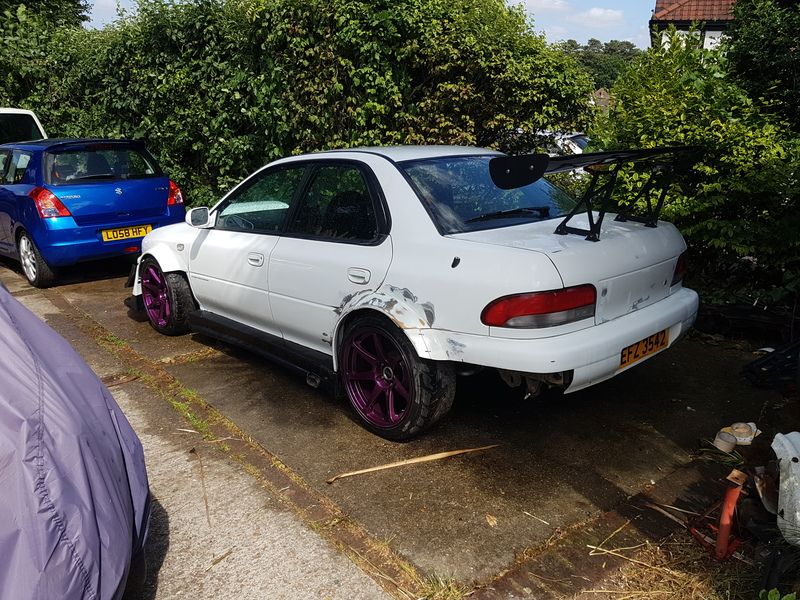 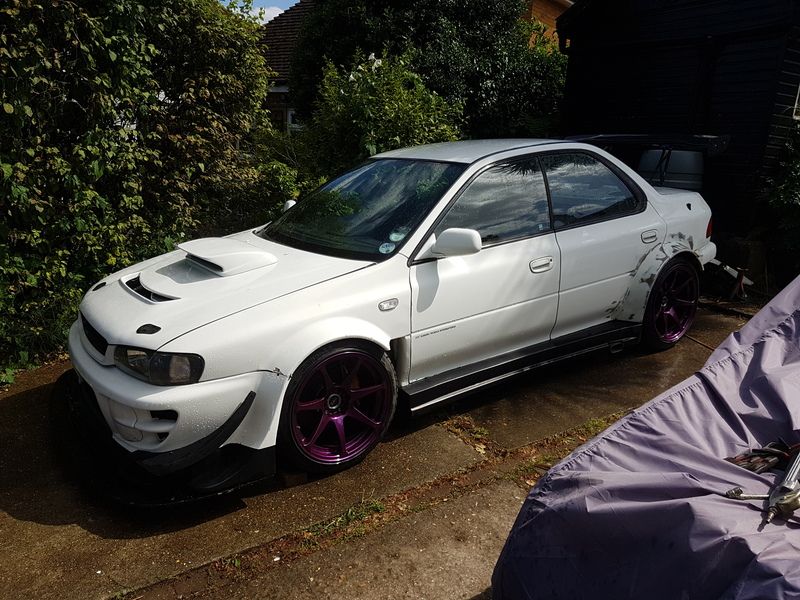 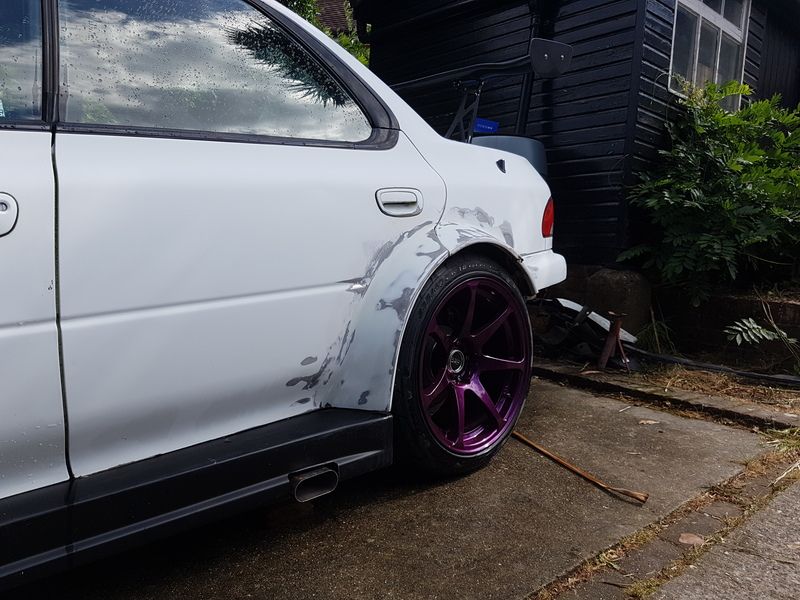 Doesn't look like much has been done but there is a "few" hours in there the last couple of days!!! Once these bits are done i will be making the battery tray, mounting the ECU and Injector driver. Then onto the the PS reservoir, header tank and air intake tube.... my tube roller is busted so for now I will use 4" ally tube for that and will build the Ti one at the later date once i have rolled the tube.... The onto the Exhaust and wiring!!! Oh yeah and the fuel system!... I forgot about the fuel system!!! Quite important that bit! but anyway there isn't a huge amount left to do which has given me a 2nd wind Last edited by seventune; 22-06-2018 at 12:09 AM. |
|
#197
|
||||
|
||||
|
Amazing looking machine and some great fabrication in this build. Very different and very exciting!
Can not wait to see and hear this beast once itís finished! Superb job mate! Modifying to the extreme! 
__________________
Subaru Impreza WRX STi Prodrive Type UK 2002:  "Tinkered With!" Maintained and Modified by Super Jules  & RM Performance http://www.rmperformance.co.uk |
|
#198
|
|||
|
|||
|
Annoyingly after getting the bug again to get cracking with this strange contraption health has managed to get in the way again. After a ten day stage in hospital after surgery I'm back to a six to eight week recovery again.... which is frustrating to say the least....
However just before that I did manage to get a few niggly bits done in the engine. Water system/ header tank and lines are all in and buttoned up, power steering cooler and lines are all in along with all the vacuum system, 4 port boost solenoid and MAP sensor.... I have to take some pics of most of those bits still but here is a couple of the wee header tank. You can also see where the MAP sensor will be mounted although it isn't in the picture.... 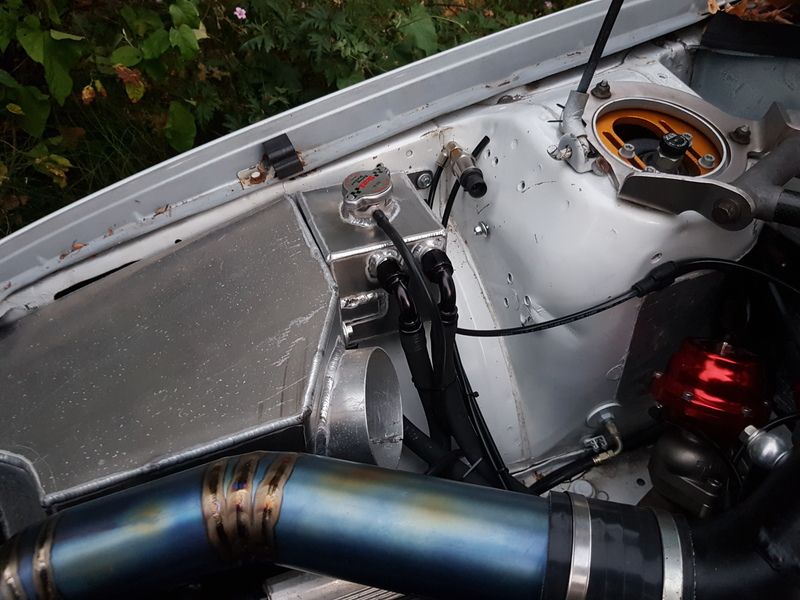 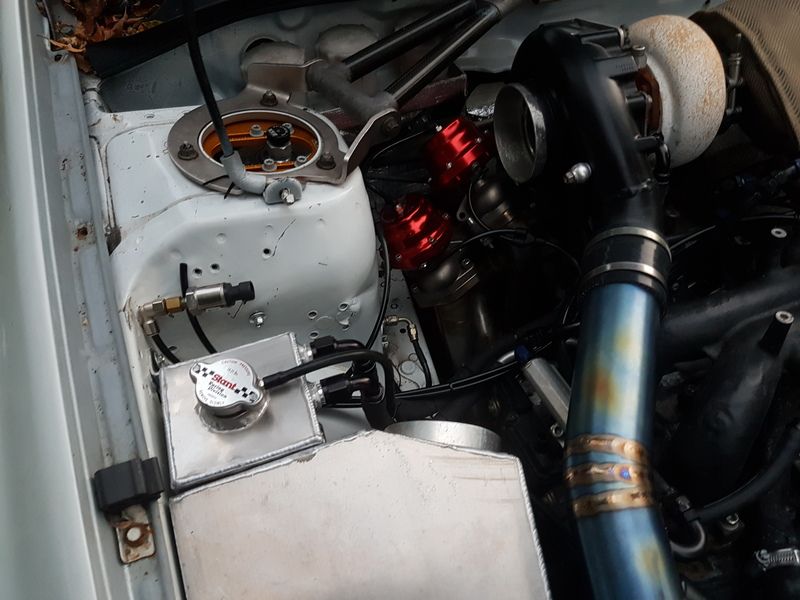
|
|
#199
|
|||
|
|||
|
So while I'm not able to do anything physical for a bit I've turned my attention to the wiring.... as you know I have pulled all looms and wires out the car so none remain. I did chop the interior loom right down but I have decided to remake that as well as the engine harness.... which means there is a lot to consider.... after going through the eve pin outs, assigning in and outputs etc I decided a good idea would be to draw out all the individual circuits before bringing them together.... this has resulted in and engine look and a lighting and interior loom.... So here is what I came up with as a guide to location, volume of wire required and just a visual reference so I can get my head around it.... the example uses here is the lighting loom....
So first off the lighting circuit.... no do bare in mind these are more for visual reference.... 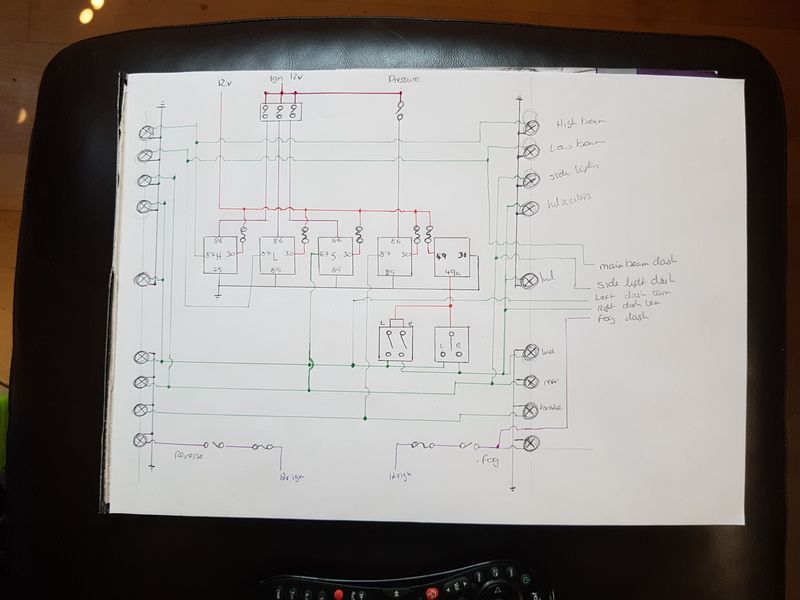 Then I decided to scribble a quick top view of the car.... this then allows me to place another sheet of paper over the top to draw in the circuit.... 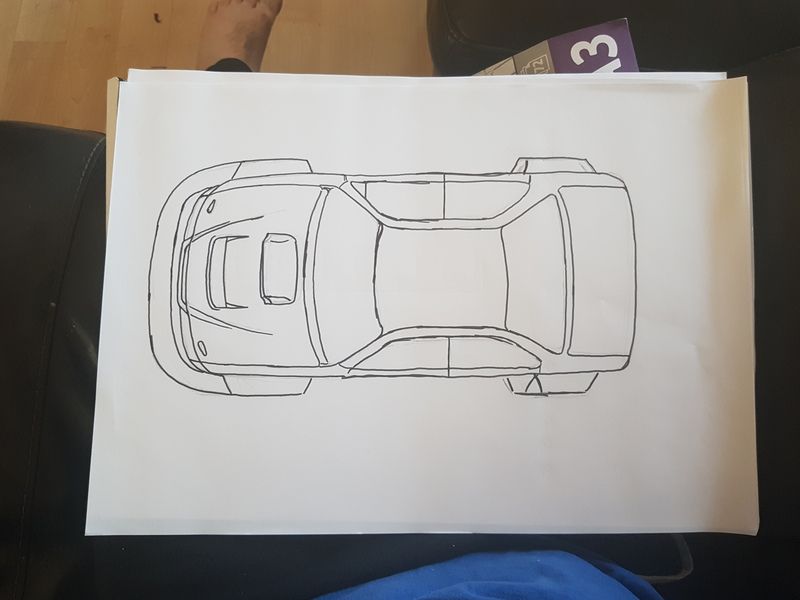 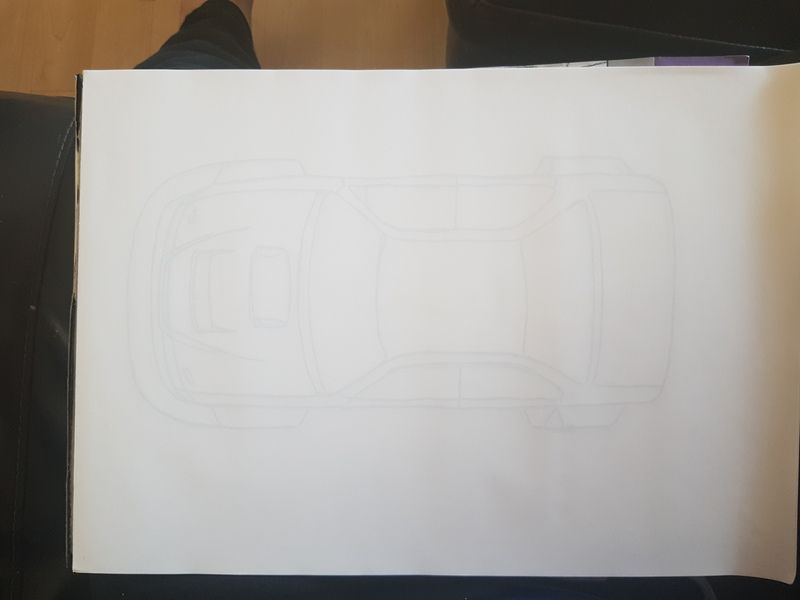 Then on this sheet I can draw in approximate locations of busbars, relays and get a rough idea of the length of wires needed to each circuit..... in this pic is the lighting, power windows and rear screen heater.... 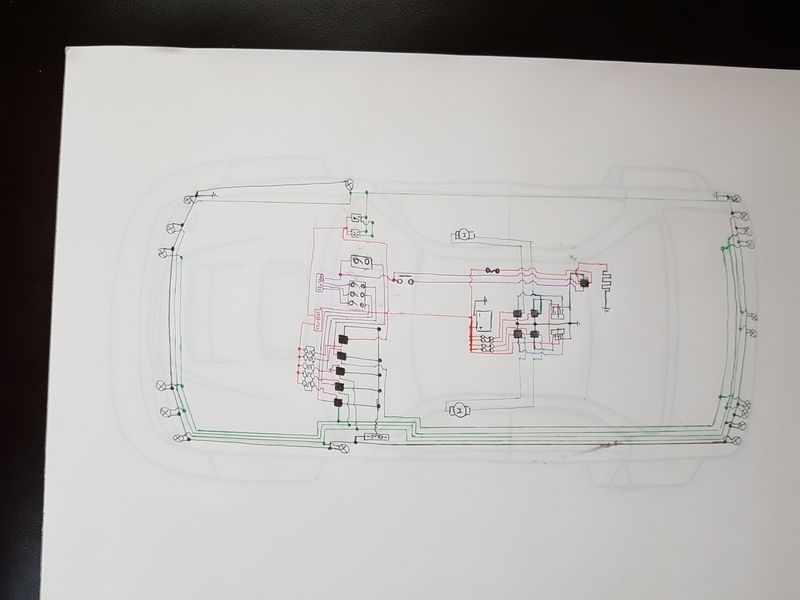 This may seem a little long winded but it does provide me with a less confusing veiw of it all.... I then did the same with the ecu engine harness for the syvecs.... |
|
#200
|
||||
|
||||
|
Quote:
Sent from my G8441 using Tapatalk |
 |
| Currently Active Users Viewing This Thread: 3 (0 members and 3 guests) | |
|
|