
|
|
|||||||
| Projects Tell us about your cars mods, past, present and future! |
 |
|
|
Thread Tools |
|
#1
 07-12-2011, 05:58 PM
|
||||
|
||||
|
Here we go:
SEPTEMBER 2010:  I decided after 3 years of owning her and building the car completely from an unmodified car to this. I decided after 3 years of owning her and building the car completely from an unmodified car to this.  NOVEMBER 2010: After looking at a few different cars and always having a soft spot for P1's I decided that I was going to start looking for P1's and suddenly the perfect one popped up. It was a really well looked after P1 WR with loads of goodies ranging with the following.  Prodrive Recaro's Alcon Calipers Godspeed 2 Piece Brakes Prodrive Mats Prodrive 18inch OZ Wheels RCM Induction Kit RCM Turbo Back exhaust RCM Remap Walbro 255lph Fuel pump RCM Cooling Panel Samco auxillary hoses Samco Coolant hoses Samco boost hoses Defi Oil pressure gauge Defi Oil temp gauge Defi Boost Gauge Defi Controller Carbon Interior Inserts Crystal Light pack Tinted windows Trackstar tracker She had 60k on the clock and was immaculate on the outside and drove lovely, I snapped it up there and then and then went about driving her home and giving it some more TLC. First things first was some cleaning products  After a quick clean up:         Secondly was some RCM bits and bobs and a service kit which included Silkolene Coolant Pro Cool Silkolene Oil 10/50 Pro S STI Oil filter 3 Bond sealent (for when I fit the baffle plate) RCM Battery Clamp bracket RCM 1.5 bar Rad cap RCM Oil filler cap    Piccy of RCM bits fitted while I was replacing a defi sender  December 2010: Having joined up on here and reading through I decided to have a chat with Keith from scooby projects and discuss some bits I fancied which Included. Cosworth Baffle Plate RCM Tubular Un-equal headers RCM Up-pipe Keith was uber helpful and a week or so later it all arrived alomg with some Stainless steel engine bay bolts from J-steel and my new private plate. I also had decided by then that I was going to completely drop everything from the rear end and give her a clean up, so purchased some Superpro rear ennd bushes ( every single bush infact for the rear.) Roger Clarke Stainless Headers Ceramically Coated   Roger Clarke Up-pipe Ceramically Coated  Private Plate  Superpro Bushes courtesy of Sumo Dan from Sumo power a good friend of mine. (every single bush for the rear end of the Scoob)   engine bay bolts, cheers J 

|
|
#2
07-12-2011, 05:59 PM
|
||||
|
||||
|
JANUARY 2011:
STRIPPED REAR END AIM: Strip rear end Zinc plate every nut and bolt Powder coated everything Poly bush Underseal Braided brake lines Firstly was to get the car on stands and start stripping everything from the rear and ....... what a nightmare the underneath was grimey and horrible, some pics guys.        as you can see its disgusting now for the actual underneath which before painting had to be prepped over 2 kilos of mud and dirt was actaully removed in the end.      I firstly started on the heat shelids, drive shafts, hubs and shoch absorbers and the rest is off to the powdercoaters Friday 4th Feb along with the bolts to the platers. Anyways here's some piccys of the bits I have cleaned and painted Diff (just needs bolts and one side painting and sealing up)  Heat Shields   Brakes and Holders   Shock absorber  Undersealed 1 Coat one to go.    Hubs with one coat   Once everythings back from the Powder Coaters and Zinc coaters I'll get some pics up One last thing Drop links woop woop and Do-luck braided lines  
|
|
#3
07-12-2011, 06:01 PM
|
||||
|
||||
|
BIG UPDATE 12th Feb 2011
 . .SO BACK FROM POWDER COATERS and ....... Im over the bloody moon so here's some piccys of the bits I have had done and the crazy colour choice. Everything was shot blasted, acid dipped , zinc primered then had 2 coats of powdercoat and some bits 3 coats. There are a few other bits that are not pictures like the rear bumper bar, Anti-roll bar and a few little brackets. Also back from the Zinc platers are the bolts which again im really pleased with...  Without futher ado I'll upload the piccy's.... ENJOY!!!!         And here are the pic's of what I have mounted today, the rest hopefully will be finished tomorrow.  Sprayed shocks with Red hammerite , treated rubbers and then had Springs done black powder coat.       I also managed to get most of the bushes pushed in too which was a bonus.    
|
|
#4
07-12-2011, 06:02 PM
|
||||
|
||||
|
14th Feb.....
So today I just pottered around taking my timwe as I'm waiting for the rear beam bushes as super pro didn't list them and I forgot to order them. But anyway I started by fitting the rear bumper and all the associated bars, bolts and bits and bobs. The rear bumper bar and brackets were in a state when they were removed so I had them powdercoated and cant beleive how well it all came out. Then fitted the bushes into the hubs and started bolting the undeneath back together again. Let me not bore you any more and fire some pics up again. Enjoy.                    Hope your enjoying following this 
|
|
#5
07-12-2011, 06:03 PM
|
||||
|
||||
|
16th Feb.
Inbetween nights at the moment so just plodding along, but still managed to get the diff and rear beam mounted today as my Powerflex rear beam bushes showed uo this morning. Anyways she's nearly done probably another full days work to ensure it's all correct and torqued up correctly, then the rear brakes, lines and shoe assembly needs bolting back onto. Piccy's from today         
|
|
#6
07-12-2011, 06:04 PM
|
||||
|
||||
|
20th Feb 2011
Right guys the rears pretty much done all I need is the following. Rear discs and Pads ( turning up Tuesday ) Brake Fluid and Diff fluid ( again ordered from Opie and turning up Tuesday ) Anyways without furthur ado the finished article. I have an M.O.T Sat and then the fronts coming apart for the same treatment as the rear so stay put everyone.  Managed to get the front braided lines on today too as it's pointless bleeding the system and then doing the fronts.         
|
|
#7
07-12-2011, 06:05 PM
|
||||
|
||||
|
BIG UPDATE 28-02-2011
Right guys as the rear was near completion and only needs a day really to fully complete, I have decided sod it and lets have a bash at giving the front and the engine bay the same treatment. While I was on the Interweb I ordered some new rear brakes and pads, HDI GT2 FMIC, Full Super pro front poly bush kit, Diff Oil and Brake fluid. The aim for the front is basically exactly the same as the rear, remove eberything underneath both subframes . Hub assemblies, suspension everything bascially even the radiator and coolant system are being given a spruce up. While I'm there I'll be fitting the RCM ceramically coated headers and up-pipe and also the cosworth baffle plate. The weather has hampered play but here are some piccys over the last few days of the front being demolished... I mean stripped down ready for the Powder coating and Zinc plating of all the nuts and bolts and a few brackets that are to near a heat source to be powder coated. Enjoy guys.             I'll get some more pictures of how stripped the front actually is but basically the main subframes and powersteering is also out and the engine now balancing on railway sleepers and jacks, the turbo is also removed. I'll be documenting the whole undersealing process and cleaning of everything too
|
|
#9
07-12-2011, 06:07 PM
|
||||
|
||||
|
March 5th 2011:
Not much has been happening over the last week or so, I need the subframe and powdercoated bits back so I can then re-seat the engine and box and also get cracking putting everything back together. Then I can touch up any underseal I have missed and also tidy up underneath and start fitting the FMIC and engne bay bits again...... HOWEVER here is what I have been doing in the mean.  Few coats of paint on the hubs   Touched up P/S pump   Bushes  Shocks after a coat of paint         Baffle plate   
|
|
#11
07-12-2011, 06:09 PM
|
||||
|
||||
|
Right everyone spent the whole weekend rebuilding the scoob and had some up's and down's and some just plain old fiddly bits. Another 2 days and she should be fired up and ready for an MOT.
So without further ado let me show you the pics.       Gearbox cradle and super pro bushes below     Cradle with Hardrace engine mount   CDF Pitching stopper   Subframe all mounted sorry about it looking dirty the powder from the latex gloves was coming off everywhere.  Lower arms and CDF Droplinks (only loose in place as they need to put the correct way round.    Just mocking up FMIC pipes again only loose in the bay until everything is back in place  Carbon cannister bracket I'll have some more interesting piccy's on tuesday and some really good ones as all the bushes are pressed in now and everything is pretty much on the car accept a few bits..... But it was getting dark and the camera died so sorry guys.Cheers Kris
|
|
#12
07-12-2011, 06:09 PM
|
||||
|
||||
|
Some more piccys from Today most of the car is back together now everything underneath is tight I just have too fettle around with the ARB. Also I need to mount the FMIC and then fill her up with all the right fluids.
         
|
|
#13
07-12-2011, 06:10 PM
|
||||
|
||||
|
Well basically been busy over the last few weeks and didn't want to bore you with too many more pictures so thought i'd put the best ones up. Here they are everyone... enjoy
       Finished pic's I'll get some high def one's once the rear wheel bearing turn up.           
|
|
#14
07-12-2011, 06:11 PM
|
||||
|
||||
|
April 2011:
The Big trip to BR developments...... Over the last few months I have been toying with Idea of finishing off the P1 with a Simtek accompanied by features such as L/C and A/L, which I felt would go nicely with the rest of the engine modifications the car has .I wanted something within a reasonable budget and something that would be future proof. So Thursday evening I left for Swindon and booked into a travel lodge with a friend whom also was having his ECU tweaked by Bob who fitted it in Feb. (MR2 Rev 3 with a Link G4 ECU) Friday came a quite frankly I was bricking it as I have spent the last 4 months slogging away in the ****ing hard rain and cold weather getting the car ready. We met Bob at around half 10 and he quickly started getting on with the Subaru. His professionalsism and knowledge is vast and he is a really friendly bloke too. The old ECU was taken out replaced with the Simtek and the switches for Hi/Lo boost and A/L were installed, after another 40minutes or so of checks and mechanical checks we were ready to go and map............................... By this point I am really worried all I can think about is how long a walk it is back to Kent from Swindon if the car goes POP . Bob gave clear and concise Instructions of what he wanted from me and how the mapping session will pan out.We started at low boost and gradually worked our way up.... with no hick-ups all was 100% as the boost was increased so were my nerves as eventually we were hitting 1.4bar of boost and the car feels like a rocket. The only small glitch was the fact that the turbo was wanting to spool really hard due to I believe some sort of uprated actuator. It was then time for the L/C and A/L setup which was EPIC I loved it and the noise it made..... But I still have not tried either out as Im to much like a girl .He then spent another further 40-45minutes checking / doubkle checking and then getting me to simulate different driving scenarios. We then took a nice drive back to his and it was time for Ben to get the MR2 mapped to around 1.3bar of boost on the Link. Again Ben's experience was much like mine and the car is a different machine. On their return Bob unhooked the equipment we had a 5-10minute chat and then we were off to try and beat the Friday rush. Journey home With huge smiles on our faces we head home and also I could have a proper drive of the car and see how it was..... Well I am over the moon the car drives amazingly she's smooth off boost, it's responsive and pokey in lower gears and on boost, just point and squirt , it's awesome. Completely different to when I first bought her both in terms off drivability and responsiveness and I know it's not forged or running a huge turbo but it feels fookin mental  . .Bens Mr2 again is the same story the 3sgte's are regarded as good engines but with just an Airfilter/ Intercooler/ Link ECU Exhaust system it's quick .... I mean very quick. On the way home we got a little playful as you do and rolling in 3rd 50mph there was a knats **** in it between the P1 and the MR2 literally half to 3/4's of a car length. Just a big thanks to Bob whom has made the last 4 months of my project worth while and to everyone on P1woc who has followed my progress aswell and helped with advice and what not. A few pics Ben took while mapping her   April 22nd 2011: Decided to finally fit my Roger Clarke Oil cooler and next week my RCM catch tank and drain back kit. Here's some piccys      After a clean  Hopefully this will be it now as far as big mods go the underneath is done. All that is left is tidy up the engine bay, which I'll be putting up progress on here in due course.
|
|
#15
07-12-2011, 06:12 PM
|
||||
|
||||
|
UPDATE: MAY 2011.
LYDDENN HILL Went with a local car club up to Lyddenn hill and had a great day some gorgeous cars there and It got me thinking everyone loved the P1 and it got lots of attention but it just had something missing...........The last few powdercoated bits and pieces to finish the engine bay before Japfest. So I decided to get the alternator and Inlet manifold powder coated along with a few little brackets and stuff so here are the before and after pics and some pics of Lyddenn Hill too.    Some Inlet spacers cheers Keith   The powdercoated culprits            After fitting everything back together all seemed well, drove to a friends and no fuel leaks, no funny issues except a slight hunting issue. However I left his around 9PM and the car just died no lights, no nothing the Alternator was fubard I must have ruined it putting it back together.I was broken down around 1/4 mile from Bens house it was dark and I was supposed to be leaving to go Japfest at 4am. To the rescue came Spooky he removed his alternator (lovely polished one with a light weight pulley, gave it to a friend of mine who then delivered it to me. I fitted it , charged to battery and off we go happy days. So my Hero Spooky saved the day  . .Here are some of the pics from JF 2011 that I have stolen from some of the lads. 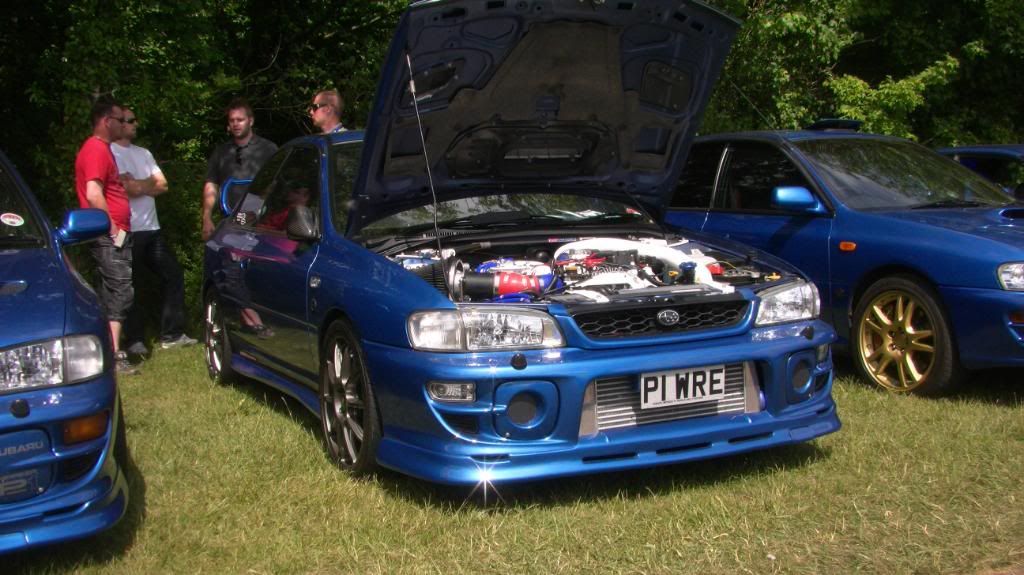 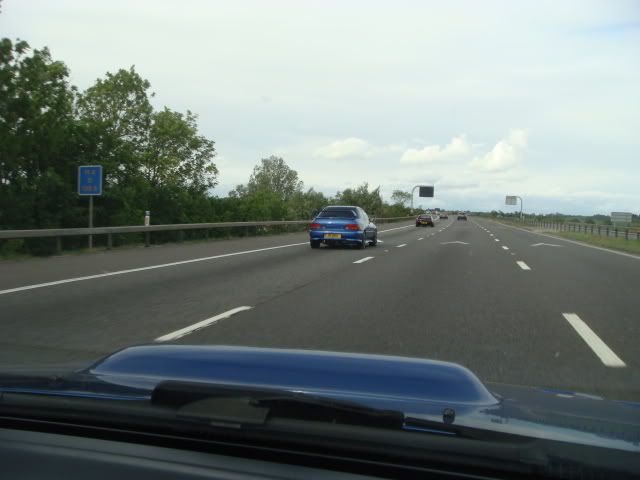  Hope you guys like the pics next update is the Spec R Remote P/S system and braided lines I ordered, and also the better pics of the RCM Catch tank and braided sump return that I have piped in.
|
|
#16
07-12-2011, 06:13 PM
|
||||
|
||||
|
UPDATE JUNE 2011:
 Well I ordered my Spec R remote power steering reservoir and fittings on the 18th of May and after much deliberation, phone calls and chatting....... IT'S STILL NOT HERE AFTER BEING PROMISED MORE THAN 3 TIMES THAT IT WOULD BE>>>>>>>  Anyway to make me feel better and after japfest when I fubard my alternator and Spooks was nice enough to lend me his I bought another one and then hand painted it. I also am starting to get bored of the white engine bay and have decided to tone it down a little so J Steel was a diamond geezer and sent me a lovely non-air con bracket powder coated black for me. To add to this Ren sent out a lovely Forge motorsport header tank, along with the P/S Tank which is also polished it should look awesome. I also had to get my AIT sensor plumbed into my Intercooler pipe which I have done, and also put the Oil cooler lines in the correct location which my Dad kindly done for me aftre having a chat with Skullfudge and him kindly taking some lovely pics of his RCM cooler. Cheers buddy. I also finished plumbing in my RCM catch tank and sump drain back which looks awesome too. So today was a lovely day and after fitting the following bits and bobs I also purchased a smaller import washer bottle and then relocated it to the boot to free up some cluttered engine bay space. It's the battery next but that will be after the ring. Again guys thanks ever so much for following my project :001_tt 1:Thanks KrissyB              
|
|
#17
07-12-2011, 06:15 PM
|
||||
|
||||
      Piccys of my GT35 The First of my new goodies too arrive         it's my new coffee coaster it's my new coffee coasterI'll be picking up my closed deck block tonight with under piston oil squirters, and also some uber trick heads that I was umming and arring about but after much deliberation and about a million PM's to various people.... ( sorry guys) I bit the bullet and bought them. I'll be picking the heads up in around a fortnight after they have been fully inspected, re-lapped , combustion chambers cleaned up and the surfaces re-skimmed. I'll post up the head spec along with piccys when I recieve them guys.
|
|
#18
07-12-2011, 06:16 PM
|
||||
|
||||
|
UPDATE: JULY 2011
Well my Spec R powersteering relocation kit has turned up just before the Nurburgring , well chuffed with it and she fits lovely. Well the ring was fantastic and the car drove superb she didnt miss a beat and kept up with some really high powered cars, piccys below.                 V8 Rx-7    On the way after the Tunnel:         @ Hotel          @ The Ring:                     A few of a friends cam           On my return i realised that the 5 speed box meant the car was sitting quite high in the rev range on cruising and with the Gt35 I have just bought and the CDB I needed a 6 speed so off I went on the hunt. A week later I found the whole conversion kit needed.
|
|
#19
07-12-2011, 06:18 PM
|
||||
|
||||
|
SEPTEMBER 2011:
Well im still waiting on my cylinder heads to be built and again i'll take pics and post up the spec list in due course but in the mean time I went to brands for an evening session.......  BUT I had a small mishap as shown below  YESTERDAY 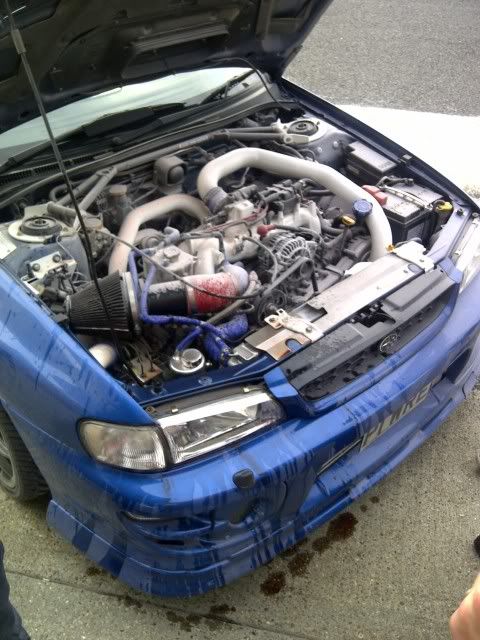 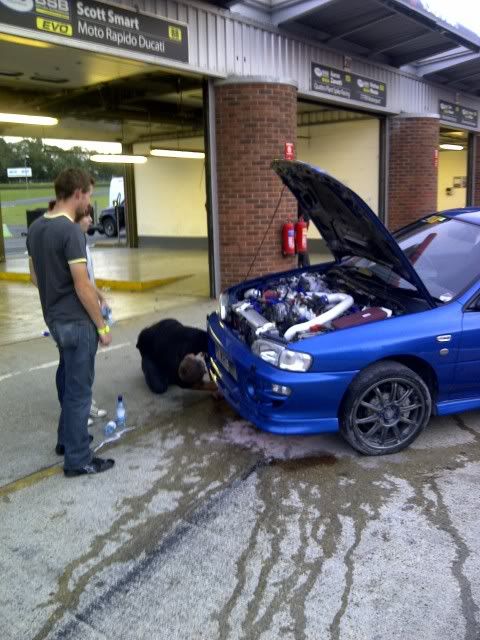  TODAY             ] ]                                          P1 WR.... 0159/1000          KrissyBView Public ProfileSend a private message to KrissyBFind More Posts by KrissyBAdd KrissyB to Your Contacts
|
|
#20
07-12-2011, 06:18 PM
|
||||
|
||||
|
UPADATE TIME:
DEC 2011:  I have taken the P1 off of the road and done this after Japshow Finale and she hasn't moved since. After the fire and now I have a reasonable sized garage to work in the car is coming back to pieces. 1. To clean everything and powder parts that I never got around too back in the spring 2. To remove my 5speed and to fit my 6 speed 3. I'm a complete OCD freak and need mental help. 4. Remove engine and give it a good external clean so it's all shiney. Also now the box and prop are out it means I can finish the undersealing which I cheated and painted around the above items when It was all apart. 5. Fit my own fuel setup I am also going for a more subtle look and alot of the brackets are going back to black for a more OEM look. Of course with my white underneath .I have also purchased the final piece of the puzzle and thats my RCM twisted turbo kit which I'll be fitting in the near future leaving my gt35 off for the time being and maybe going with a GT2871R. Anyways without furthur ado here are some pics of how I am getting along, I am off to the powdercoaters Monday to collect the main bulk of the items and send the rest down. J-steel has also been kind enough to take my Roger Clark exhaust system and give it some much loved TLC so it looks even more amazing than already. I'll keep everyone updated with pics but I am hoping to have the car ready again for March.        
|
|
#21
07-12-2011, 07:39 PM
|
|||
|
|||
|
Stuck it this time mate!
Sorry for the balls up
|
|
#22
07-12-2011, 09:25 PM
|
||||
|
||||
|
Read and looked at this from the top, awesome thread so far!
Clearly alot of love and hard graft has gone into this, hat off to you! Good work!
__________________
If it seems that everything is coming your way.... Your on the wrong side of the road!
|
|
#26
08-12-2011, 10:21 AM
|
||||
|
||||
|
That is some job you are doing and a good thread too.
|
|
#27
08-12-2011, 11:08 AM
|
||||
|
||||
|
Spot on Krissy, love the thread!!!! Keep the posts coming.
__________________
1.6 Terzo........ Non turbo.............http://www.surreyscoobies.co.uk/foru..._vehicle&id=87
|
|
#29
09-12-2011, 04:43 PM
|
|||
|
|||
|
If Carlsberg did Project threads.........
The time and effort that has gone into this car deserves respect and the results show that! Still Gutted I missed that Ring Trip lol Keep it up Kris!! 
|
|
#30
09-12-2011, 04:54 PM
|
||||
|
||||
|
Quote:
|
|
#31
10-12-2011, 02:34 PM
|
||||
|
||||
|
Just read this thread again, fantastic read looking forward to seeing it back on the road, definatly alot of time and effort gone into it and with out a doubt it shows, one of the cleanest scoobies ive seen underneath
__________________
 
|
|
#32
10-12-2011, 09:55 PM
|
||||
|
||||
|
UPDATE DEC 2011:
Just a quick one Neil at Slow boy racing will have my heads finished in the new year all ready to bolt up and I also picked up my Twisted turbo setup from RCM today. Pics to follow: Spec of Heads: Version 5 Heads CNC ported Supertech 1 mm oversize valves. Supertech Dual valve springs Titanium retainers One piece buckets Kelford 190-E cams 274/270 Duration, 10.60mm Lift.
|
|
#34
12-12-2011, 06:16 PM
|
|||
|
|||
|
Top stuff mate
Truly stunning
|
|
#35
12-12-2011, 07:41 PM
|
|||
|
|||
|
Wicked thread and some top viewage
, but please can we get it to go over to page 2 now as it takes 5 mins to load all the pics before i can read the last post. 
__________________
Cooper man!!!!!
|
|
#37
12-12-2011, 10:40 PM
|
||||
|
||||
|
Wow, i never could get along with paddel clutches..
__________________
1.6 Terzo........ Non turbo.............http://www.surreyscoobies.co.uk/foru..._vehicle&id=87
|
|
#38
13-12-2011, 12:36 AM
|
||||
|
||||
|
I've just read this through again from the beginning and have come to the conclusion you cant keep fookin still for 5 minutes !! LOL
Top bloke and developing into a fine example Buddy
|
|
#39
13-12-2011, 07:23 AM
|
||||
|
||||
|
Quote:

|
|
#42
08-01-2012, 07:01 PM
|
||||
|
||||
|
UPDATE JAN 2012
I finally managed to get most of my bits back..... After the xmas and new year break and I am really impressed with the way the Nuts , bolts etc have come out in terms of Zinc plating and also Willows done a great job of powdercoating my bits. I am still waiting on loads of bits to come back including my front sub-frame , front arb, header tank and P/S reservoir, engine bay brackets and lots more and I have decided to move to a more subtle looking engine bay without any polished bits as such, but still retaining the white bits, but having more black in there...... Don't worry the underneath is still staying white .Anyways I wont bore you and I will be sticking this in my project thread aswel, but here are the piccys from today. I have also ordered RCM fuel rails (top feed conversion alond with a host of stuff to run a parallel fuel rail setup, Im just waiting on the rails now to fit and set this up too.                       
|
|
#44
29-01-2012, 11:01 PM
|
||||
|
||||
|
UPDATE JAN 2012:
Today a few mates came over and so we cracked on with fitting my 6speed box and getting everything bolted in ready for the engine in a few weeks. Pictures are not the best but here are some that I have uploaded. Everything has been re-zinc plated and or powdercoated .The subframe has been redone but alot has gone black as it's a more subtle look.           Awaiting my RCM fuel rails now and the turbo will be going back on the engine over the next few days
|
|
#45
30-01-2012, 03:52 PM
|
||||
|
||||
|
Just a few more pictures of the Turbo going back on this morning and of a few brackets and nuts and bolts that were either Powder Coated and or Zinc plated.
Realised that I had also received the wrong release bearing so that should also be taken care of soon enough ..... Hopefully and my Exhaust system has also arrived at J-Steels place for some TLC  Engine mount brackets  Turbo to block support brackets         Clutch kit with the wrong release bearing .....
|
|
#46
30-01-2012, 05:07 PM
|
|||
|
|||
|
Looking very fookin nice fella

|
|
#48
09-02-2012, 07:38 AM
|
||||
|
||||
|
Just thought I'd throw some pics on here, as you all know the underneath of my car is very white, but my lovely RCM system was looking abit tatty and shabby comopared to the rest, which in no way of course detracted from the fact it's beautifully made.
A lad on the P1woc who knows a thing or two about metals ... he is basically a freak in the metal department offered to gove it a spruse up. This consists of shot blast and then acid etch it , which would leave it a nice bright matt silver finish and would stop surface rust and attack from road salt as I would finish it with a coat of phosphoric acid which will leave a passive film of protection on the surface. Before pics:      After pics: These items are not finished yet but you get the idea, James over on the P1woc has worked hard on these and given up his own time aswel. It's a great community spirit within these Subaru forums , something of which I have yet to experience on any other forum.   The way James has treated this means that it will now build up its own passive layer and will not rust, even though it is a stainless system the welding destroys the original passive film layer and then it's a downwards spiral.    The silencers meant he could not immersion dip the sections for fear of damaging the baffle plates. Decided against shot blasting and went with a more aggressive blend of acids. After meticulous prep work (pieces have to be spotlessly clean, no oil or grease allowed) the acid solution is hand painted onto the pipework which etches the damaged surface of the steel away leaving the clean material beneath. This is left to cure, rinsed off, and then bathed in deionised water before being left to dry naturally for 24 hours or so. This allows the material to form a passive (chromium oxide) layer over itself which will act as a very effective barrier against the elements. As I've said to Kris, even RCM systems will rust unless treated properly. The passive layer is damaged by welding, iron particles and other contaminants are then trapped in weld pools which will turn into iron oxide and rust - stainless or not. Given time, this would blow through. This photo shows that quite well:
|
|
#49
09-02-2012, 08:56 AM
|
||||
|
||||
|
WOW!!! Speachless!!
__________________
1.6 Terzo........ Non turbo.............http://www.surreyscoobies.co.uk/foru..._vehicle&id=87
|
|
| Currently Active Users Viewing This Thread: 1 (0 members and 1 guests) | |
|
|


